filmov
tv
PHOTOGRAPHERS! STOPS OF LIGHT AND HOW TO USE THEM

Показать описание
Understanding stops of light is vital for any photographer to know. In this video I teach you how to use them effectively for any situation.
🔥SUBSCRIBE FOR ONLINE WORKSHOP DISCOUNTS HERE:
🔥 My presets and tutorials:
🔥 Your support makes a big difference to me, consider buying me a coffee here:
If you only watch ONE MORE video of mine, make it this one:
=========================
=========================
🔥SUBSCRIBE FOR ONLINE WORKSHOP DISCOUNTS HERE:
🔥 My presets and tutorials:
🔥 Your support makes a big difference to me, consider buying me a coffee here:
If you only watch ONE MORE video of mine, make it this one:
=========================
=========================
 0:12:37
PHOTOGRAPHERS! STOPS OF LIGHT AND HOW TO USE THEM
 0:13:00
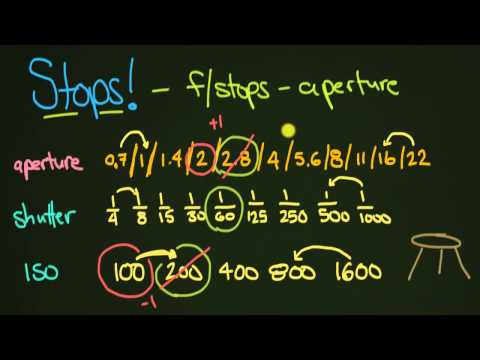
How Stops of Light Work
 0:02:49
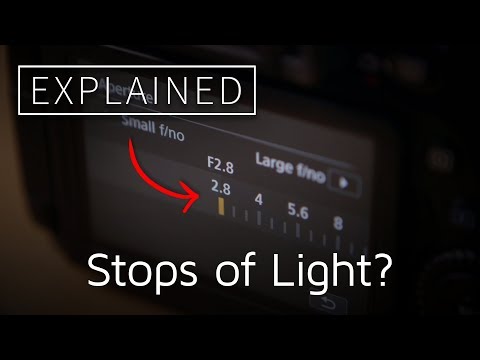
'Stops' of light explained! How much exactly is 'one stop'?
 0:13:00
How Stops of Light Work
 0:02:47
Know What Stops of Light Are | Stops of Light in Photography
 0:03:28
F Stop and Stops of Light: Photography Definition of F Numbers and Fstops
 0:10:37
Understanding Stops of Light in Photography
 0:04:36
Exposure & STOPS of Light explained in Detail | Comprehensive Photography Course
 6:50:43
Beginning Photography Fundamentals: Composition, Lighting & Camera Settings
 0:03:04
Stops of light and flash power (Flash photography Lesson 7)
 0:00:55
Stops Of Light vs Stops Of Power #photography #flashphotography
 0:16:31
Aperture - Introduction to F-Numbers and Stops of Light - Episode 4.0
 0:02:53
Understanding Stops of Light in photography.
 0:03:07
Understanding Stops of Light in Photography
 0:04:18
Understanding Stops in Photography
 0:03:29
From Stops of Light to Modern Settings in Photography
 0:02:49
F-Stops Explained — Camera Lens Tutorial
 0:08:01
Using Stops of Light to Master Manual Mode Photography
 0:00:51
Part 2 stops of light in #photography. Master settings to become a better #photographer #photoshoot
 0:08:43
Why You Should Use True Stops When Shooting Photos
 0:04:01
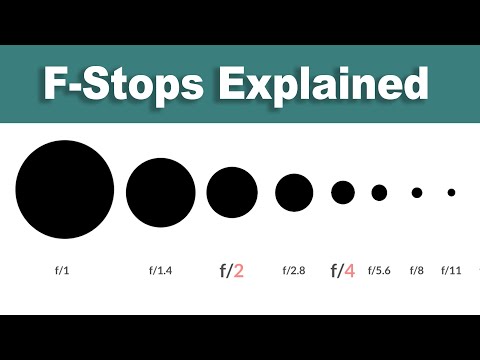
The Secret To Understanding F-Stops For Creative Photography
 0:06:13
Photography Tutorial - Aperture and F Stops Explained
 0:05:19
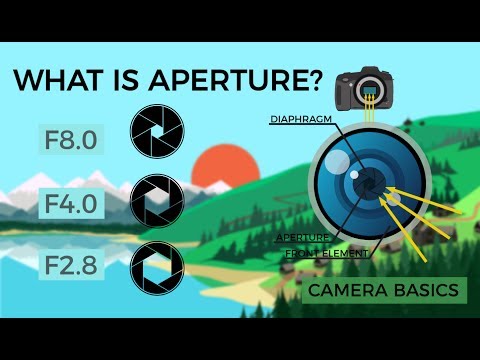
Camera Basics - Aperture
 0:06:27
F Stops vs T Stops - what is the difference?
Комментарии