filmov
tv
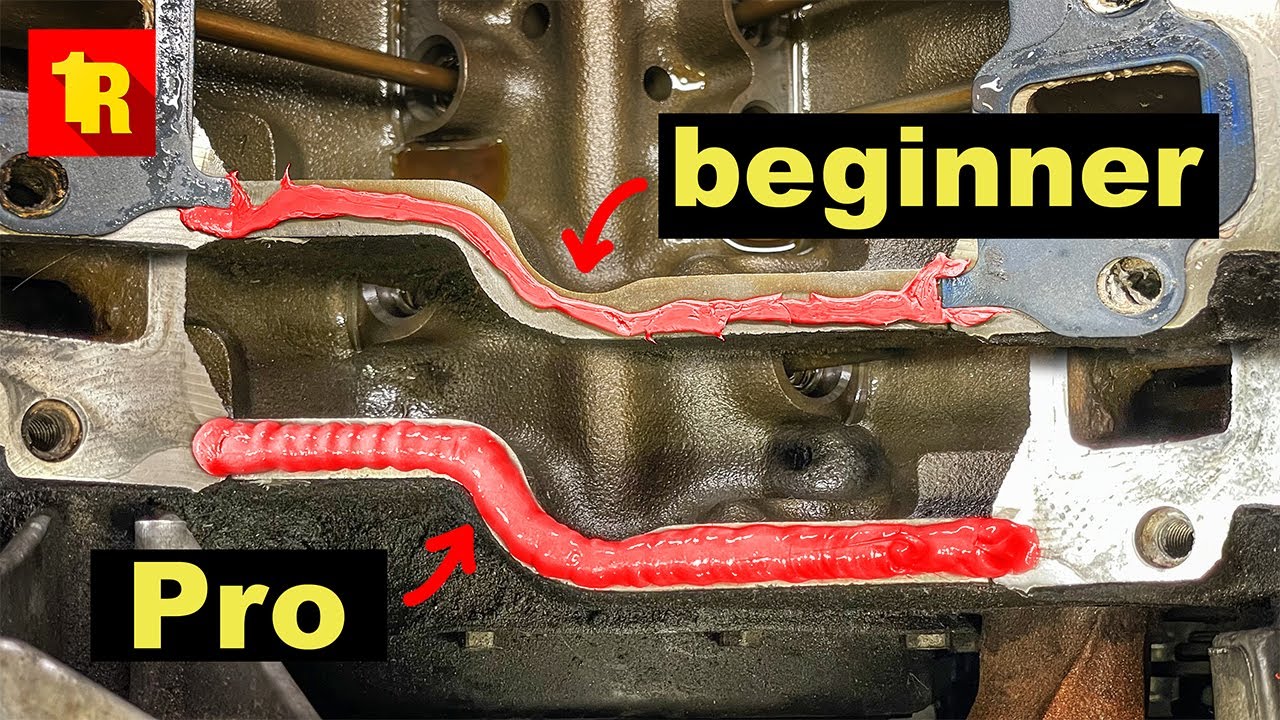
Why You NEVER ATTEMPT To Use RTV Gasket Maker Without Doing This First!!
Показать описание
Why You NEVER ATTEMPT To Use RTV Gasket Maker Without Doing This First!! #rtvGasketMaker #RTV #UltraGrey How To Use Gasket Maker!!
*** I am an Amazon associate. I make a commission based on sales through my Amazon associate links.***
In this video I show how I messed up doing a somewhat simple job all because I didn't do enough research into how exactly to use gasket maker. I thought I had done enough but didn't quite understand the difference between a metal to metal seal and one that also incorporates solid gaskets. Oh well, it's fixed now and I've certainly learned from this experience and hope you enjoy this video!
***This channel is for entertainment purposes only! Do not do what I do. Do not take my advice. I am not a professional. The methods I use may be completely wrong and/or dangerous. Please seek professional help with anything and everything and do your own due diligence (research). Working on cars is extremely dangerous. I am not responsible for any loss of life or limb or property. DO YOUR OWN RESEARCH. THIS CHANNEL IS FOR ENTERTAINMENT PURPOSES ONLY!***
FTC Disclaimer: I am an Amazon associate. As such, I earn a percentage of sales made through Amazon associate links found in the description of my videos and on my website and other places.
00:00 Intro
01:09 What I did wrong
02:42 Fel-Pro gaskets after 2 weeks
03:35 The reason why RTV failed
04:35 Why I made a mistake
05:39 Peeling Fel-Pro gaskets
06:19 Permatex Ultra Grey Application
07:08 New intake gaskets
08:04 Gasket maker squeezing out
08:25 Which directions to follow
09:21 Applying thread sealant
11:21 Before I start the truck
14:44 Starting the truck
15:34 Conclusion
 0:17:29
Why You NEVER ATTEMPT To Use RTV Gasket Maker Without Doing This First!!
 0:03:26
Stacey Ryan - Fall In Love Alone (Lyrics) 'If we never try how will we know'
 0:11:41
Here's Why You NEVER ATTEMPT To Change An Original Fuel Pump!!
 0:03:21
Why didn't Britain ever try to retake the United States? (Short Animated Documentary)
 0:01:12
Never attempt to push Darth Vader off a cliff
 0:02:21
Why You Should Never Attempt To Overtake On A Curve
 0:00:31
You should never try to bury yourself alive😰 #shorts
 0:00:37
Why you should never attempt to fight a fire yourself
 0:02:15
Obese Loser - You Never Tried (Official Music Video)
 0:01:00
NEVER PLAY HIDE AND SEEK
 0:00:30
is not like you ever tried to stay.
 0:00:19
don’t ever try to lowball Michael Scott #TheOffice #MichaelScott #Shorts
 0:00:58
Never Try! Call Out To Candyman 5 Times In The Mirror, He Will Kill You! short3/3
 0:00:19
You never know until you try 🤞🏼
 0:15:01
I tried finding Hidden Gems on AliExpress AGAIN! (Part 11)
 0:00:24
The Deadly Steel Coils You Should Never Try To Stop! #science #sciencefacts
 0:00:51
'I've never wanted to try again'
 0:44:25
The HARDEST Platinum You Should Never Attempt (Jump King)
 0:00:24
have you ever tried steaming your eggs?
 0:00:35
⚠️: if you try this, you’ll never want to eat any other choco lava cake. Make at your own risk☺️...
 0:00:28
The greatest try NEVER SCORED! #allblacks #rugby
 0:00:19
I love ninja warrior!! 🥷have you ever tried it before?! #ninjakidztv #viral #dance #explorepage
 0:00:37
Never tried to sing it in one breath before 🎻
 0:00:13
Admit it! Have you ever tried cat food? #cat #cats
Комментарии