filmov
tv
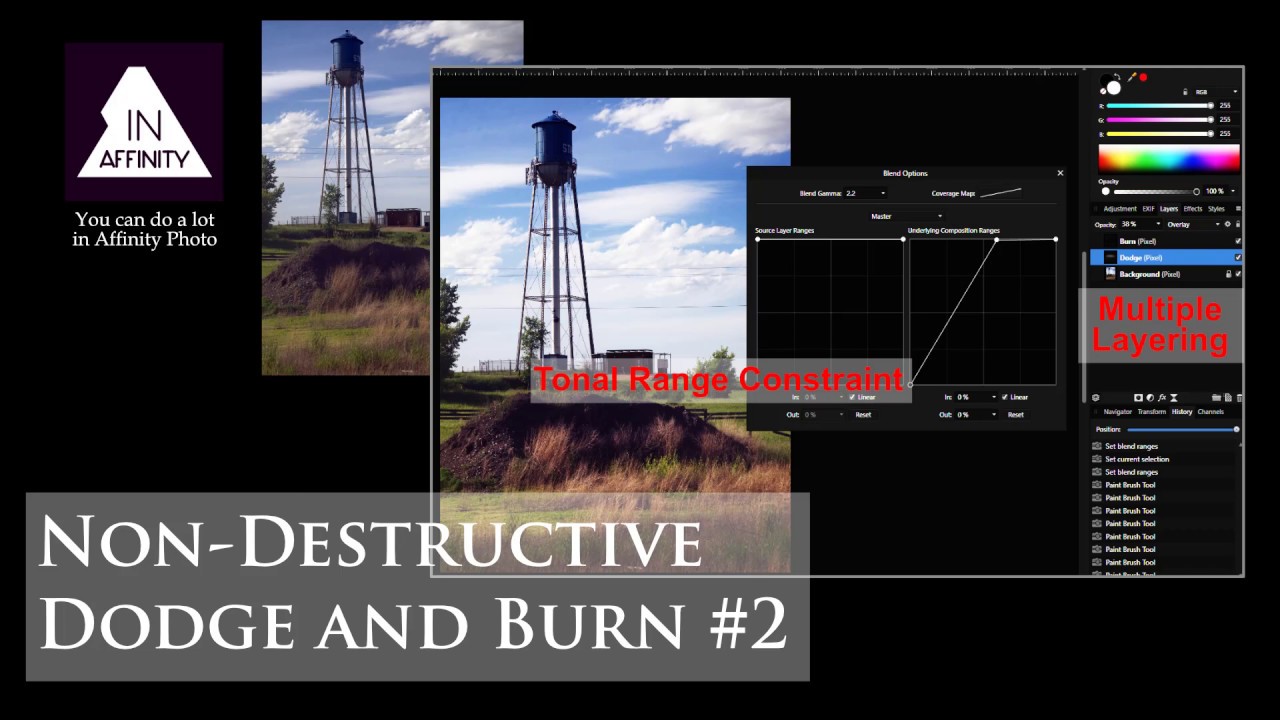
Non-destructive Dodge and Burn #2 (using Affinity Photo)
Показать описание
Here are some more useful tips for using dodge and burn layers in Affinity Photo, including:
-- How to use Blend Ranges to constrain tonal ranges, more flexibly doing what the dodge and burn brushes do when applied to highlights, mid-tones and shadows.
-- Not using grey layer (as is often recommended).
-- Using multiple layers to separate dodge and burn batches.
Free resources, including macros, palettes, etc. are here:
If you are a beginner, start here:
 0:06:32
Non-destructive Dodge and Burn #2 (using Affinity Photo)
 0:05:02
Non Destructive Dodge and Burn Layer in PS
 0:08:14
Non-Destructive Dodging & Burning
 0:07:42
Learn Affinity Photo #8 - Non-destructive Dodge and Burn tools
 0:06:27
Non-Destructive Dodge and Burn in Photoshop
 0:02:40
How To Dodge And Burn Using Curves In Photoshop (2 Min) | Non Destructive Editing
 0:19:27
How to do non-destructive dodge & burn
 0:06:08
Non-destructive Dodge and Burn #1 (using Affinity Photo)
![[Photoshop 023] How](https://i.ytimg.com/vi/-YUbOglyPeU/hqdefault.jpg) 0:04:09
0:04:09
[Photoshop 023] How to Non-Destructively Dodge and Burn
 0:08:12
Create Dodge and Burn Layers in Photoshop for Non-destructive Editing
 0:09:38
Photoshop: Dodge and Burn...Like A Boss!! Part 2
 0:05:56
Non-destructive Dodge and Burn #3 (using Affinity Photo)
 0:30:24
Dodge & Burn in depth in Affintiy Photo
 0:06:39
Non-Destructive Dodge and Burning
 0:14:34
Affinity Photo Dodge and Burn Non-Destructively
 0:05:31
How to Contouring Dodge and Burn in Photoshop - Non-Destructive Retouch Technique
 0:03:22
Non Destructive Dodging and Burning in Photoshop
 0:07:32
Absolute Beginner's Course Series 2: Episode 20: Dodge and Burn Using Layers
 0:11:48
Professional Dodging and Burning in Photoshop-2019-The Non-Destructive Way
 0:07:40
Simple Dodge & Burn Technique in Photoshop - Sculpting the Face by Dodging & Burning [Easy &...
 0:03:18
Photoshop Tutorial Dodge and Burn with Calculations
 0:01:00
How to Dodge and Burn in Photoshop
 0:06:03
How to dodge and burn landscapes to beautiful effect
 0:05:12
DODGE & BURN HACK | How to Easily Dodge and Burn Portraits with Curves in Photoshop
Комментарии