filmov
tv
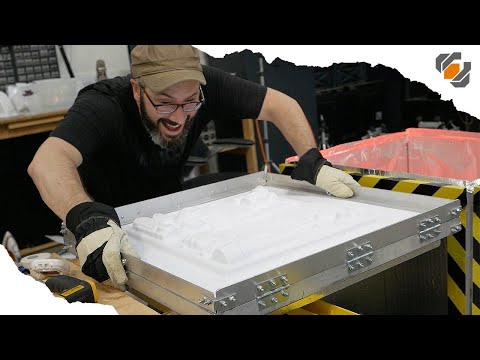
Hardware Store Vacuum Table - HOW TO make your own

Показать описание
Large vacuum formers are super awesome, but can't just be purchased like other equipment. Bill teaches you how to make your very own large vacuum former using materials from the hardware store!
Links:
Materials - Vacuum Former:
Patio Heaters (x2) - $240 - Amazon
Wood Screws - $4 - Amazon
Super 77 - $10 - Amazon
Wood Glue - $8 - Amazon
4 Corner L Brackets (x2) - $5 - Amazon
6’ Long 1/8” Thick x 1-1/4” Aluminum Angle Bar (x3) - $80 - Amazon
I only found 4’ long pieces on Amazon, you will need to buy 4 to get the total length you need. Also I recommend making your frame a little smaller than 24” square to save on aluminum. Cut the raw material into 2’ segments, then cut the miters on the ends. Assemble the frame, then build your platen to fit inside the frame.
8-32 x 1/2” Screws - $8 - Amazon
8-32 Nuts - $8 - Amazon
Sash Locks (x4) - $12 - Amazon
Thin Steel Plate - $10 - Amazon
Shop Vac - $120 - Amazon
Metal Mesh - $10 - Amazon
Striped Duct Tape - $5 - Amazon
30” Continuous Hinge (x4) - $35 - Amazon
Aluminum Tape - $10 - Amazon
Aluminum Foil - $10 - Amazon
Wood - Locally Sourced
1/2” 2’x4’ Plywood (x2) - $40
3/4” 2’x4’ MDF - $15
1/4” 2’ x 4’ MDF (x4) - $30
Total: $660
Tools:
Jig Saw - Amazon
Band Saw - Amazon
Table Saw - Amazon
Belt Sander - Amazon
Power Drill - Amazon
Drill Bits - Amazon
Countersink Bits - Amazon
Extension Cords - Amazon
Thermometer - Amazon
Circular Saw - Amazon
Bear Hand Saw - Amazon
Miter Box - Amazon
Spindle Sander - Amazon
Palm Sander - Amazon
Horizontal Metal Cutting Bandsaw - Amazon
Countersink Bits - Amazon
Metal Hanger Strap - Amazon
We release new videos every month!
Fun ways to help our channel:
Share your projects with us on twitter!
#PunishedProps
 0:41:12
Hardware Store Vacuum Table - HOW TO make your own
 0:08:00
Prop: Shop - How to Make a Vacuum Forming Machine
 0:06:20
Stop what you're doing and build this for your shop
 0:10:58
DUST COLLECTION - Basics and Setup - Woodworking
 0:00:24
Dodgey Vacuum Table for CNC
 0:03:28
Home made membrainless vac press
 0:14:08
My first attempt at a DIY Vacuum Table for my CNC Machine. Don't make this mistake!!!
 0:07:11
Vacuum Table Version 2
 0:01:27
. KYDEX Holster build using Vacuum press
 0:12:09
DIY Vacuum Bed For An Avid CNC
 0:29:39
TFS: Cheap DIY Downdraft Grinding Table
 0:10:31
Vacuum Clamp Pads - Shop Work Game Changer!!!
 0:04:16
Cheap Vac Former V
 0:09:54
Mill SMALL Parts on a GIANT CNC Vacuum Table
 0:10:30
Vacuum Clamping for CNC Woodworking w/ Rockler's Vacuum Pods
 0:16:13
DIY Vacuum Table Part 1- CNCnutz Episode 210
 0:26:39
4x8 Workbench, Tools, Vacuum, Power and Dust Separator
 0:04:17
Simple Vacuum Adapter
 0:03:41
Upgrade a Shop Vac With a Cyclone Separator Cart!
 0:19:53
How to Set up a Custom Vacuum System for your Sanding Shop
 0:17:41
How to Make a Larger Vacuum Former | I Like To Make Stuff
 0:05:52
This Device KEEPS 99% OF DEBRIS Out Of Your Shop Vac!! (Dust Stopper/Dust Deputy/Dust Collector)
 0:19:20
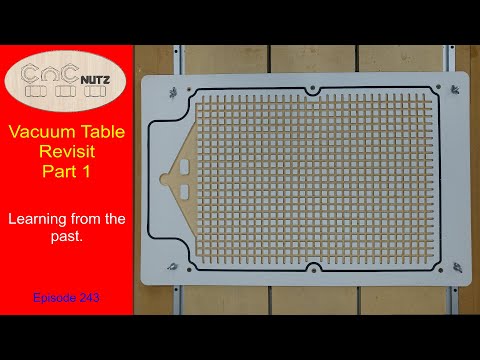
Vacuum Table revisit - CNCnutz Episode 243
 0:00:49
Vacuum forming table for molding Kydex
Комментарии