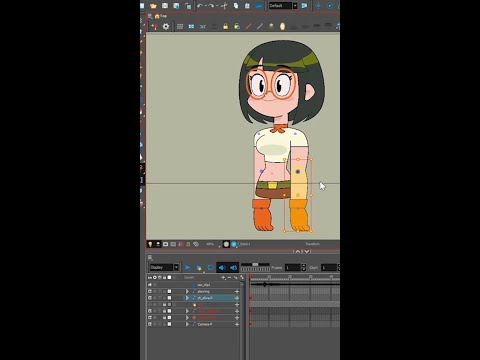
How To Animate Faster - Breaking Down My Animation Workflow

preview_player
Показать описание
Discovering an animation workflow that works for you can be one of the most important factors in your success as an animator. Often times we stick with whatever workflow we were taught in school, but there isn't one method for animating that works for everyone. In this video, I break down my workflow and talk about my thought process when approaching my animations.

Social Media 📰

Chapters 📘
0:00 Intro
2:05 Video Reference
3:32 Cube Pass
5:16 Body Pass
7:31 Leg Pass
12:44 Arms + Chest Pass
13:37 Leg Polish Pass
15:57 Timing Adjustments and Pose Tweaks
17:02 Final Pass
18:16 Outro

Related Videos 🎥
Рекомендации по теме
Комментарии
Автор

In animation school one of my teachers was a veteran Disney animator who taught pose to pose. I remember reading a book by a more obscure Disney animator (can't remember his name) where he explained that he liked to do the whole scene straight ahead to figure out the movement first, then looked for the drawings that could be turned into key poses, perfect them, and drew the inbetweens again with a more controlled timing.
When I talked about it to my teacher he just smiled and say "yeah, you should probably stick to pose to pose". I went on and tried it anyway on my next scene, without telling him. When I showed him the scene he said "this is your best work so far" and that's been my process for traditional animation ever since.
I think pose to pose has become a standard because it is the 9 old men way, but it's nice to see people try other workflows. I also don't used pose to pose in 3D.

katakana-kun
Автор

"The Pose is not important. Animation and the flow is important."

You have a point. That was something eye opening. Thank you..

nimaxo
Автор

It's awesome watching pros work. The "rough pass" is what many would consider really good - all the motion, timing and flow looks super good. And then to refine the details further from here is just *chefs kiss*

michaeljburt
Автор

duuude, idk about anybody else, but this made soo much sense to me, one of my big problems is that
i dont like the whole planning phase, I also have a really hard time thinking of it as a bunch of poses and not motion, so your workflow makes so much sense to me, cause first you get the timing of the motion down then you get the pose down. imma start trying this out!, thanks so much!

Samsstuff
Автор

I personally think animating like this is way better indeed. It is much easier to figure out timing (which is probably the most important thing in animation) with a cube rather than trying to do it with ready to use complex poses. Spending only 6.5 hours for an animation like this just proves the effectiveness of this method. Lastly, Mark your channel is a gold mine with damn precious insights all over the place. It's always a great experience to watch a professional sharing the knowledge, helping others along the way

ArtVandelayInc
Автор

Not only a good technique but also a very well constructed and thought out presentation of how to create and apply the methods.

phlipnolen-author
Автор

Very cool to see, love seeing representation for other "non-standard" workflows!

Zimuus
Автор

Really nice explanation, I'll try this workflow out soon.
Master Tutorials playlist: 4 down, 38 to go.

shoobsinator
Автор

It make sense (principle 4: straight ahead & pose-to-pose), I'd already met similar workflow in Blender tutorials. Additionally, you don't need the cube layer, you can boldly start with torso + motion trail, except the necessity to block 2+ anim objects in scene. (2 day from start Maya self+tutors learning and diving deep in animation...)

DenisTrebushnikov
Автор

Thanks Mark, this is so relatable. I was looking for a workflow that goes straight into motion. When animating I feel like those "main poses" I make are most likely going to change when I work on the motion of the character and so I was asking myself why should I spend so much time on posing other than having a good base when interpolating. But this workflow just sounds so well to my ears and I definitely need to give it a go. I really appreciate you sharing this, thanks again!! :D

titimariangiusca
Автор

whole animation in 3hrs is good, fascinating!

ShubhamGhosalkarBdesID-
Автор

crazy how we all have our own way to do this stuff. very interesting

brendananimation
Автор

You've brought up something important here. A similar layered approach is how most cg animators worked in the earlier days. The stepped pose thing was a workflow developed by and for traditional hand drawn animators who migrated into cg (shared by Keith Lango in his lectures).
What's important is that students should be made aware of different workflows and shouldn't get boxed into working one way.

mak_attakks
Автор

WOW! I've never seen a work flow like this. Genius. Character looks so grounded after simple blocking and a leg pass. Great vid!

rossums_rule
Автор

Not even using Maya nor do I have more than few months with Blender, but this has been beyond helpful. Thank you ~

weebsenpai-
Автор

This seems like a godsend for someone more used to 2D animation, this is wonderful, Ill definitely be trying a similar method

qwargly
Автор

I'm a programmer and working in research, I had to do some animation myself occasionally since we almost never have available animators on staff. Weirdly enough I reached the same workflow conceptually when I was given mocap animations for a craftsman without any animation for the tools he used. I now had to fully animate tools based on video references of each step of the craft process and the tool used and the grips in the animation. This was about preserving the mocap detail in the end result, so we wouldn't do any keyframe reduction on them and also, it was a cinematic, so it made sense to try and replicate the tool animation as if we had mocaped the tools as well.
To do that, in Unity, I did some animation rigging for the tools and aligned the IK targets to sampled hand animation at points in time that I thought were considered a "change" (kinda like local highs and lows in curves) to get a rough baseline of the animation the tool itself would have in this action and then hand animated the details over that baseline, using the IK rig and based on the movement of the hand, the grip etc.
On another note, old tutorials for modelling made you import reference images in Maya/Blender etc in see you can do the same for the video, so you can have a very quick rough baseline, by rotoscoping, instead of doing it yourself completely all the while watching the video on the side. That should be a bit faster, right?

npatch
Автор

Cool use of the animated cube, and explanation.

Pyraus
Автор

This is literally how I eventually began animating with confidence lol love the video

TylerGutierrez
Автор

I'm an animation student, I graduate in 3 months, I'm also experiencing the same issue. Some of my classes conflicted with each other because each professor had their own preferred methods. Some liked working in stepped and others liked spline. This was also happening with character rigs, some would say to focus on the cog and not really touch hip controls and then other professors and lectures would say the opposite. I think I'm slowly starting to figure out my own workflow but I still have a ways to go.

anayajones