filmov
tv
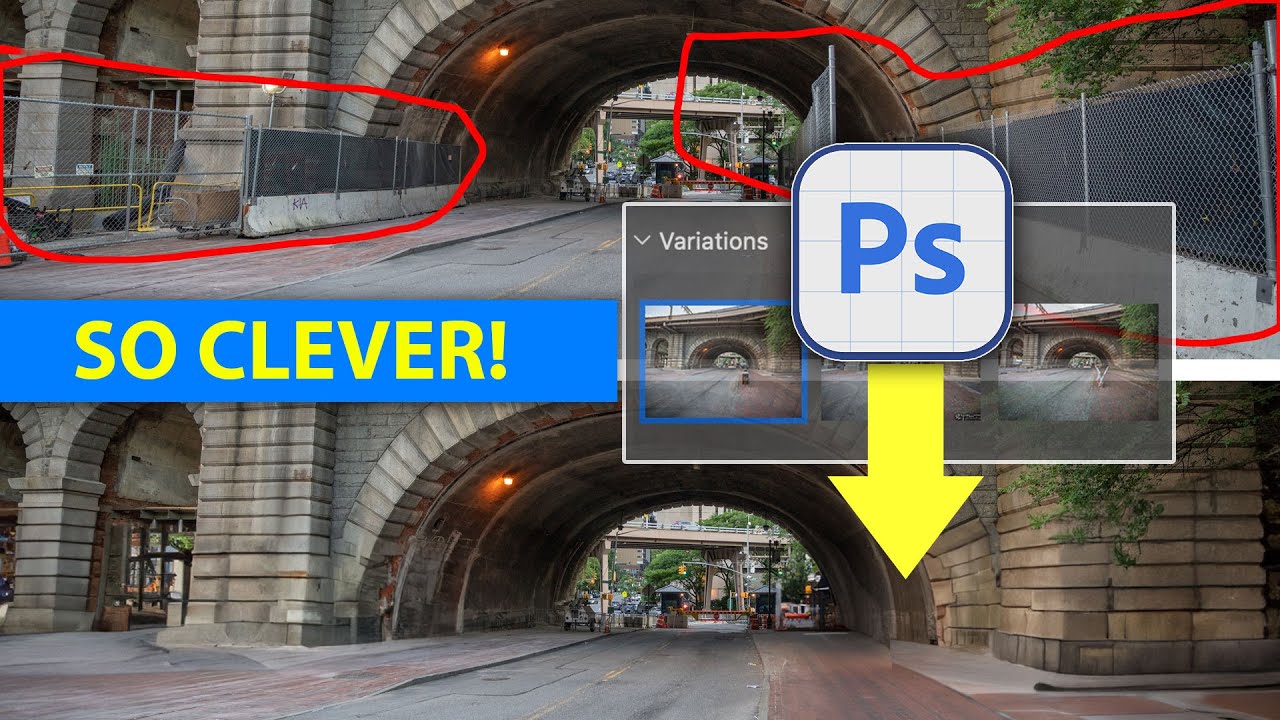
Variation Hack removes ANYTHING with Generative Fill in Photoshop
Показать описание
How to Perfectly remove anything in Photoshop with Generative Fill and this clever hack from Colin Smith. Why didn't anyone think of this before? Choose the parts of each variation you want to use to remove anything from a picture.
Save 20% with code GFYT20
#Photoshop #adobefirefly #generativefill
Save 20% with code GFYT20
#Photoshop #adobefirefly #generativefill
 0:03:20
Variation Hack removes ANYTHING with Generative Fill in Photoshop
 0:05:56
HACKING MIDJOURNEY - How to Change your Prompts for Variations
 0:00:44
This trick makes your arms look 2x bigger (skinny guy hack)
 0:23:32
Secret CFPB Hack That Can DELETE Anything From Your Credit Report
 0:00:39
The infinite clay hack 🤩
 0:00:40
UNEXPLAINED POINTE SHOE HACK (bakers can relate) #ballet #pointeshoe #pointeshoehack
 0:00:15
Mind blowing stain removal hack🤯🤯 #shorts #fyp #diy
 0:08:01
Say Goodbye To 3DS Hack With This How To Guide! - Remove Hack From Nintendo 3DS
 2:17:57
IGCSE ICT (0417/0983) Paper 1 Theory May June 2024 Variant 12
 0:02:23
How to remove a security tag from clothing - Life Hack DIY
 0:00:18
SimCity BuildIt v1.16.94.58291 (Data file Mega Hack [all Variations Recognized] +13)
 0:00:20
Bro’s hacking life 😭🤣
 0:00:16
Free Hacking Classes | Best Hacking Guruji #hacking #cybersecurity #hacker #ethicalhacking
 0:00:16
How to remove backcombing?? BY PYLPTEL #youtubeshorts #videoshortsviral #youtubevideos #hack
 0:00:15
Clean Makeup Mass without Removing whole Makeup#shorts#makeuphacks#viral#trending#hacks#spoolie#123
 0:00:58
🩸 Useful Period Hacks for Girls #Shorts
 0:00:31
😱 How to remove Bricks Hack trick construction tips #trending #shorts
 0:00:40
Big Forehead Hairstyle in just 10 sec! 🙈💕 | #shorts #hairstyle #hack #hairstyling #hairs
 0:00:27
How to Answer Any Question on a Test
 0:53:57
Cementing Your Duct Tape: Turning Hacks into Tools
 0:05:39
Secret Triangle Hack: Don't Get Stacked With This Variation!
 0:10:04
The Derailleur Hack They Don't Want You to See
 0:10:48
NAIL HACKS: sticky items you NEED to try for nail art!
 0:00:52
Life-saving period hacks to make that time of the month easier 😎 #5minutecrafts #hack #periods #girl...
Комментарии