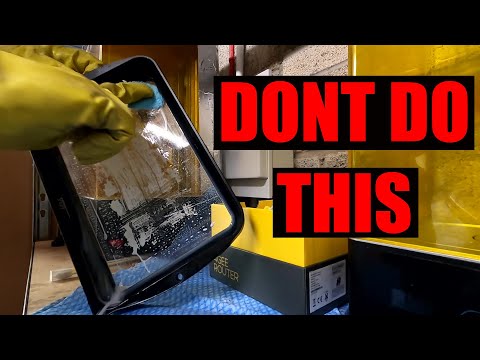
3D printer LEDs - Beginner and advanced versions - Neopixels!

preview_player
Показать описание
As far as simple mods for 3D printers go, this is right up there. Unfortunately, no impact on print quality, but a great alteration to style. LEDs are energy efficient and shaped in a way that makes them easy to install on 3D printers.

Either option gives great results!

Easy install LED kits:

Amazon goodies:

Banggood:

Take a look around and if you like what you see, please subscribe.

#3dprinting #ender3 #led
Рекомендации по теме
Комментарии
Автор

One thing I've done with mine Michael is that I used some UV Lights and when you do prints with glow in the dark filament is is absolutely amazing to see. The UV Lights (as I'm sure you already know) really charge up glow in the dark material faster and with more intensity. It is really cool watching it print that way. If you haven't tried it give it a go you won't regret it.

QuantumRob-yt
Автор

Bought the regular kits for the hot end and rail because lighting is an issue in my room. I can't wait to get this set up and ready.

ParrishT
Автор

I just finished installing the Printermods kit on my Ender 3 and they both went in nicely. The included installation instructions are okay but this video was a very helpful addition. When installing the hot end kit, I found it a little easier to remove the 4 screws holding in the hot end fan and work with the splice outside the shroud. When installing the rail kit, I raised the X gantry all the way to the top before loosening and removing the top rail screws. I don't know if it helped keep my vertical rails parallel but it made me feel like I attempted to keep them straight. The lights look great and the hot end light is especially useful. Thanks for the video.

soggynode
Автор

3:00
Just so newbies know the 2 pins
(marked "N" and "L")
on the RIGHT are HIGH voltage!!!!
Not the left!!

Jimnymudhunter
Автор

This is the better solution I ever clever and effective!
I bought it 👍🇮🇹

altair_
Автор

Good information for my Ender 3. The bed heater mosfet was damaged by ESD. I used pin 29 to control the BED HEATER. #define HEATER_BED_PIN 29 (SANGUINOLOLU_11.h) #define BED_LIMIT_SWITCHING, (Configuration.h) I used a 2N2222 to control a 24Vcoil 10ADC relay. The Marlin default is 2C hysteresis which switches the relay about every 1m15sec.
Thanks for the pin29 information.

stevesmith-sbdf
Автор

Great tutorial Michael. Who doesn't love LEDs.

spikekent
Автор

Absolutely the very best video on this subject

rb-ropo
Автор

Been thinking of a lighting setup so I don't have to rely on a small flashlight, the first kit featured looks like it will fit the bill perfect, stupid easy to install, and priced right. On my shopping list!

nukedogger
Автор

I used rigid led strip in a simple casing and two sided tape but i did add a separate power supply that just about fitted inside the power supply cover. I also added a rocker switch to the power supply cover. It is much better now that i can have lights without having the printer powered on, makes working on it SO much easier. The printer is usually in my bedroom, the led light has been more used than other lights in the room, it isn't too bright, just perfect when you are going to sleep but still bright enough that it provides general lighting for the printer.

I'm going to add 1W led beside the hotend, i need to just think how i want to do it, it will take power from the printer PSU.

As for cabling: buy flat cables.. they are very handy when you use Dupont connectors. You won't have the horrible looking three separate wires but one flat cable. Takes a bit of practice to get it looking nice, you can't fail with any of the the duponts or you have to do that end all over again.

squidcaps
Автор

Time Stamp. 3.03 "wires on the left" should be on the might need to put a balloon up on the screen for this one! 😄

I'm probably not the only one to spot this but only just seen this. Brilliant videos as always, thanks for the hard works that you put in to make these for us, always appreciative of your reviews especially now I hit 60 !!

Regards from Barcelona....

Neil.

spiritburners
Автор

I just purchased the hot end and v slot lights. I am printing in an office with a crappy light and right now using a very hot and bright desk lamp. This will hopefully look a lot better and clean up my area. This is my first printer but I have messed around with one at my tech school. I was using a mojo and a MakerBot replicator printer at school and I have the ender 3.

brysonrodden
Автор

Me, awake at 4:00 AM:
I wonder if there’s any chance that there’s a YouTube tutorial on controlling LEDs with GCode.

Teaching Tech:
I gotchu, fam.

opinion_panda
Автор

Looks doable... ordered my lights today. Thanks!

casual-beast
Автор

Cheers bro, just what ive been looking for, as i am a novice printer

Green.Fingers.
Автор

Strongly advise avoiding that crimp connector he features here on his ender 5 hotend!!!
When you pull the wires from the fan retention clip to have enough room for the crimp connector, it becomes extremely easy to pull the wires off of the fan's circuit board. The wires then cannot be soldered back onto the board, and then the fan must be replaced.
As an alternative, it is much better to cut the wires further back and use a JST crimp set to make and install a JST socket and splitter to support both connections.
Not only does this support the LEDs, but it also gives you a means to easily swap your hotend fan if/when needed.
Understand that many people are turned off by the though of crimping or soldering, but if you rip the wires out of your fan its going to be a bad day if you don't have a spare....

walterbkeen
Автор

Exactly what i was looking for - Thanks!

Kevin-ghcn
Автор

I was just working on adding in LED's to my machine today lol... Looks great man! I bought a couple white LED rings (60mm OD / 45mm ID) a few weeks back so I was making changes to add a round inset channel to the bottom of the Hero Me duct and modified my electronics box to add a switch and potentiometer to the front so I can adjust the brightness quick and easy. I might add the neopixels in the top 2020 extrusion as well, the color change functionality looks awesome!

deceitive
Автор

I have the hotend LED version from PrinterMods and love it! But I think I will wire it to my RAMPS 1.6 board so I can turn it off an on as I please vs with the cooling fan as the voltage varies depending on the speed you want the fan to run so the LED lights vary in brightness. For now it work but it'll be easy enoough to run to the pins on the board so I can trigger it with code in Octoprint or on the mobile version you can setup a button to run the command for on and off. Nice video!

tchninja_official
Автор

I think the splicing connectors are called "Scotch Locks"

MrNlce