filmov
tv
How To Install Intelli J Idea On Windows

Показать описание
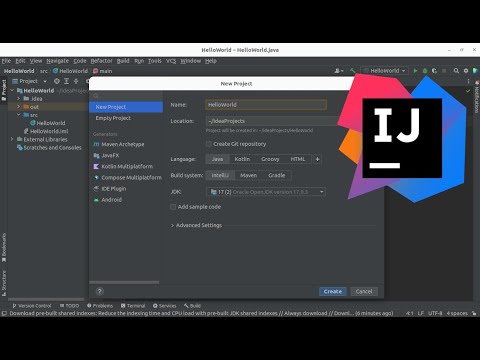
Installing IntelliJ IDEA on Windows
Follow these steps to install IntelliJ IDEA on your Windows machine:
Download IntelliJ IDEA:
Visit the official JetBrains website.
Choose your edition: Ultimate (paid, for full-featured professional development) or Community (free, open-source, suitable for JVM and Android development).
Click on the Download button for Windows.
Run the Installer:
Once the download is complete, locate the installer file (.exe) in your Downloads folder.
Double-click on the installer file to launch the installation wizard.
Start the Installation:
Click Next to begin the installation.
Choose the installation path or leave it as default, then click Next.
Configure Installation Options:
Select the additional installation options:
64-bit launcher: For 64-bit systems, this is recommended.
.java and .kt (Kotlin) file associations: Enable this if you want IntelliJ IDEA to be the default program for opening Java and Kotlin files.
Add launchers dir to the PATH: This will allow you to run IntelliJ from the command line.
After selecting your options, click Next.
Install IntelliJ IDEA:
Click Install to begin copying files and installing IntelliJ IDEA on your system.
Finish Installation:
Once the installation completes, click Finish.
You can choose to reboot your system if necessary, though it's usually not required.
Start IntelliJ IDEA:
After installation, launch IntelliJ IDEA from the Start Menu or desktop shortcut.
On the first launch, you'll be prompted to import settings from a previous installation if applicable.
Configure and Update:
After launching IntelliJ IDEA, you may be asked to customize your IDE appearance, keymap, and plugins.
Ensure you update to the latest version if prompted.
Your IntelliJ IDEA is now installed and ready for use!
 0:08:48
 0:09:13
 0:13:22
 0:08:36
 0:05:04
 0:03:41
 0:07:02
 0:10:48
 0:09:46
 0:04:32
 0:01:43
 0:22:42
 0:16:13
 0:04:28
 0:05:27
 0:03:20
 0:06:23
 0:20:29
 0:02:09
 0:02:50
 0:01:35
 0:08:18
 0:00:17
 0:17:47