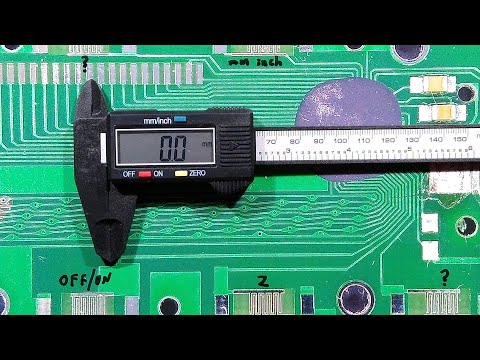
Secret Digital Caliper Functions

preview_player
Показать описание
A quick and math free way to measure hole spacing and bore depths
Рекомендации по теме
Комментарии
Автор

Tip: After measuring the center distance, be sure to re-zero your calipers before using them to layout said holes. Ask me how I know.

RambozoClown
Автор

One of the most useful tips I got from a time-served machinist on the use of calipers was actually to use them instead of tweezers to remove tiny metal splinters, because they're always at hand and their ground jaws are more precise than all but the most expensive of tweezers.

weevilinabox
Автор

It's important to keep in mind that both holes must be the same diameter for trick #1 to work properly.

RubiconJoey
Автор

This is one of the reasons why digital calipers are so much faster in real use than analog ones. Incremental mode has many uses!

shiro-rm
Автор

I'm so glad this is uploaded in video format and not a short. Thanks Adam

EitriBrokkr
Автор

I'd never thought to use calipers the way you did at 2:56 to measure the pin, immediately went to get my pair to try it out 😅 definitely going to remember that, great stuff as always thanks adam

roseroserose
Автор

More! I need more tips and tricks. That was very useful, thank you

gordon
Автор

> using handy tips and tricks to improve accuracy - good
> using a good, proven brand of calipers, to further accuracy - great
> uses inches.... 😦

Really appreciate the vid 😁

truebluekit
Автор

Thank you for this great information. I'm an older retired machinist/toolmaker who was trained on vernier scale calipers. The dial calipers were the "new thing". I own some digital calipers but never thought to use them in this manner.

jcjones
Автор

Damn it. All you car to say was two tricks and I immediately figured them out. But I might never have done so otherwise...
Bravo

Tadesan
Автор

The gauge pin one really hits me hard.. I have inspection department measuring reamed steps as you said, use calipers or depth mic, saying it’s out of tolerance, but using a proper size gauge pin like I used at the machine is by far the true most functionally accurate way to measure that feature.. I haven’t seen anyone else use it until I saw this video. And I love your videos, someone who truly understands what they are doing

adammiller
Автор

Yes! The ability to zero a digital caliper/mic/dial and gauge is super useful and under utilized. If you inspecting a series of parts it much better to zero it at the nominal dimension and then you can just see the plus and minus reading instead of looking at a long string of, in some cases random, numbers and trying to remember the nominal number. When doing a production of parts I'll often grab a couple calipers and zero each one for a specific feature and then I can just grab each one and instantly know if I'm on size or not without any mental math which could (and will at times) fall you.
Also another use is measuring between the head of the caliper and the moving hook. Think if you needed to measure from the mill table to the bottom of a part over hanging in a vise. Not something overly common but its pretty easy to do if you have the right scenario. Getting the zero is a bit of setup as you need to build a reference with something like gauge blocks but it is a quick and easy way to make that sort of a measurement if you have to do it over and over.

TheWidgetWorks
Автор

Automatic thumbs up for not using the work "hack" or "amazing" or "must-know". I'd give an extra thumbs up if I could for providing actual useful information. Thank you!

TheDude
Автор

In general, you can use your calipers to do addition and subtraction. By doing the measure, set zero, and measure something else, you are doing subtraction. If you measure one thing, note the measurement, measure something else, zero out, move by the noted measurement, zero again, and then close the caliper, you will get the sum of the two. (drop the minus sign) I routinely use this when turning things on my lathe. Measure the bore in the part I am trying to match or mate to, zero out, then measure the part that i am machining, and the number on the caliper is the amount I need to take off. Divide by two and that is the amount I need to move the cross feed.

For all hobbyists that use cheap calipers, make sure that the zero is correct for all four measurement points zero at the same time. Clean the inside jaws first. The top of the head should be flush when the outside jaws are clean and closed. Zero the outside jaws and then measure a gauge ring and it should read the right number. If you don't have a gauge ring, you can use the inside of a known good bore, like a good end mill holder. Also, you can zero on the gauge ring and close the outside jaws and you should have the diameter of the bore in gauge ring. Use a gauge block or mic standard and surface plate or other flat surface for the depth. If they are off by a half thou, ignore it. They aren't that accurate anyway. Even high priced calipers have a +- one thou accuracy. If they are off, but close, you might be able to stone them in. If they are way out (I had a harbor freight set that was out by 7 thou for the depth tang) you should probably pitch them, unless you have a surface grinder. You shouldn't even think about trying to mill them to the correct them. They are hardened and ground stainless, and seem to work harden even more. (if that's even possible)

jeremyhicks
Автор

Even if you know these features, it's always a pleasure to watch your videos.

chrisstephens
Автор

Thank you for sharing….please keep mentoring (simple or complex) subjects

outsidescrewball
Автор

Genius! I just hope I can remember it when the need arises.

dmakerzone
Автор

I always wondered how that was done! Thank you! (the first tip)

nthawin
Автор

Jesus tha OD trick is so good and simple that I feel dumb not figuring it out on my own

thisApexD
Автор

While I knew the first trick I never thought of the second trick thanks 👍👍👍

umahunter