filmov
tv
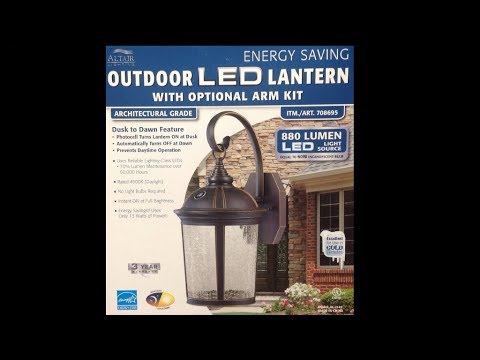
Costco LED Porch Lantern Repair 2

Показать описание
How to fix and repair to Costco or Altair Outdoor LED Lantern that is suffering from the blinking LED of death, strobing, or has failed completely. Second video in this series.
Check out my first video for details about picking a replacement driver.
The outdoor LED Lantern that I fixed had a Espen Technology constant current driver, model number VEL12035120H-3, which was rated for 120V input and 350mA, 18-33V, output. For my previous LED Lantern, I did contact the manufacturer, but I never heard fromthem again. But I also went ahead and purchased a new constant current driver from LED Supply.
My new replacement driver is a Mean Well APC-16-350, which is probably overkill for this purpose but I figured a more robust driver may last longer than one that is an exact replacement (since the OEM unit failed and all). Anyhow, I wired it back together and everything is working great. Please note that during the video I decided to bypass the built-in photo cell because I've switched to a timer that controls all my lights. If you want to keep your photo cell operational, be sure to wire it back as original.
Other parts I had to add:
Two orange wire nuts
One M3x8mm screw
One small washer
One mounting tie zip tie (it has a screw hole built-in)
Links:
(Full Disclosure: Amazon Associates link, I get a little credit/$ if you purchase a linked item.)
Affiliate Links that Help my channel:
♫♪ Credits ♪♫
Thanks for watching.
 0:08:33
Costco LED Porch Lantern Repair 2
 0:07:07
Costco Flashing Light - A Different Fix!
 0:05:56
HOW TO FIX A BLINKING / FLASHING OUTDOOR LED LANTERN FROM COSTCO - REPLACE THE LED DRIVER - EASY DIY
 0:02:54
Fixed Flickering Costco Altair LED Lantern light for $6
 0:09:35
Costco LED Lantern Conversion 'Dusk To Dawn' LED Light Bulb, Cheap.
 0:12:40
Costco LED Lantern Repair
 0:08:57
Costco LED Lantern Conversion to Lightbulb
 0:01:13
Repair of AL-2167 Altair outdoor lantern
 0:04:36
How to Repair Outdoor Wall Light / Costco Outdoor LED Coach Light by Altair Lighting AL2163/AL2163C
 0:07:12
How to install Outdoor Light Fixture - Costco's Outdoor LED porch Lantern Altair 917884
 0:03:38
How To Fix Costco LED Lanterns No Longer Work After 5 Years
 0:00:29
My neighbor laughed at me when I said I could remove the haze in 1 second! #diyhome #diy #diyhacks
 0:07:48
Easy Outdoor Light Fixture Update - 20 Minute DIY Upgrade
 0:01:00
Why New LED Light Fixtures Are A Bad Idea 👎
 0:18:04
Fix the Koda 46' LED Shop Light from Costco so it doesn't interfere with 5GHz WiFi
 0:00:47
how to remove a concealed downlight #light #renovation #howto
 0:01:00
Quick Troubleshooting Lesson - String Lights
 0:07:54
🔥 FIRE-TABLE WON’T LIGHT - FAST EASY FIX 🔥
 0:00:27
These GIANT Lawn Worms will give you nightmares. With @theunblockersaus
 0:00:32
How to Replace Recessed Light
 0:02:02
LED String Lights not working
 0:01:24
How to Fix a blinking outdoor LED light
 0:01:10
Flickering LED lighting? Here's what's really happening
 0:04:42
How to install Porch Light Fixtures dusk to dawn LED from Costco - How to replace porch light
Комментарии