filmov
tv
Creating a Macrame Plant Hanger with Beads: Beginner's Guide

Показать описание
Let's get knotting!~
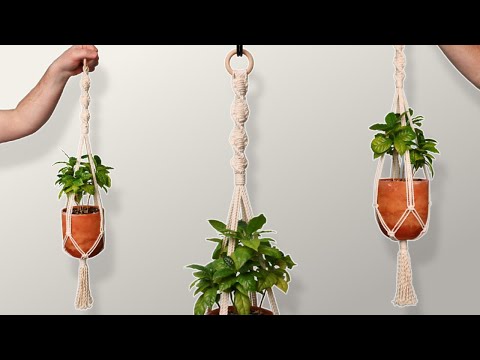
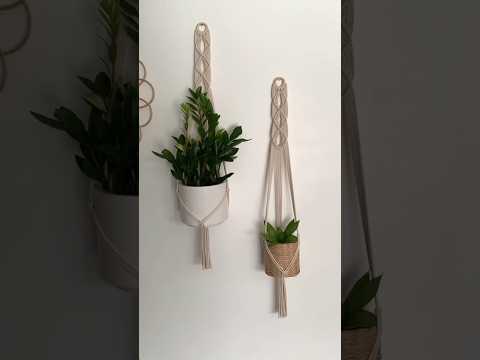
Where we'll be crafting a delightful macrame plant hanger adorned with charming daisy flowers and beads! 🌼✨
Join us in this comprehensive step-by-step video, where we'll walk you through every knot and technique necessary to bring your own stylish plant hanger to life. 🌿💫
Get ready to unleash your creativity and add a touch of whimsical charm to your space with this beautiful DIY project!
Materials used:
Size of completed project: 7" width (with pot) and 37" length
Special tools: N/A
I've tagged the products used in the video, so check them out if you're interested!
***************************************
Welcome to Bochiknot, your go-to destination for Macramé inspiration. Whether you're a skilled enthusiast or just starting, our channel provides a range of tools, tutorials, and a supportive community to guide you on your Macramé adventure.
Discover captivating patterns and detailed guides to enhance your macrame skills.
Join us in the fascinating world of Macramé at Bochiknot, where creativity knows no bounds, and each knot tells a unique story.
#bochiknot #macrame #macrametutorial #macramepatterns #macramewallhanging #macrameplanthanger #macrameforbeginners #macrameknots
***************************************
New to Macramé and eager to get started? Check out these helpful resources.
🧶 Tangled Threads Tribe:
***************************************
★☆★ SHOP ★☆★
***************************************
★☆★ SOCIAL MEDIA ★☆★
***************************************
★☆★ TIMESTAMPS ★☆★
00:00 - Intro
00:23 - Getting Started
01:36 - Cords & Materials
02:33 - Step #1 : Weave 4 x 350 cm cords through the ring.
02:49 - Step #2 : Separate the cords into 2 cord sections and make 24 consecutive Crowns knots.
07:14 - Step #3 : With a 2-cord section, overlap the cords several inches down and then attach 2 x 150 cm cords with Reverse Lark's Head knots.
08:10 - Step #4 : Straighten out the cords and measure the spacing to desired length and adjust the knots. Recommended spacing length is 22 cm (8.5")
08:53 - Step #5 : Make 3 consecutive Vertical Lark's Head knots on the right and left sides.
10:31 - Step #6 : Thread a bead through the middle 2 cords.
10:55 - Step #7 : Overlap the anchor cords and bring the middle 2 cords up and through the top middle hole. Then make a Half Hitch knot with the left and right cords.
11:55 - Step #8 : Use the anchor cords as working cords now for a large Square knot.
12:28 - Step #9 : Repeat the Daisy patterns all around.
13:03 - Step #10 : Skip a few inches down and make a Square knot. Repeat all around.
15:07 - Step #11 : Skip another few inches down and make another row of
Alternating Square knots all around.
15:45 - Step #12 : Use a 60 cm cord as a working cord for a Gathering knot.
16:38 - Step #13 : Trim off excess cords and fringe at the bottom.
17:01 - Outro
--------------------------------------------------------------
Intellectual Property and Copyright Notice
Please be informed that the copyright for this pattern belongs to Bochiknot Inc. All rights and intellectual property are exclusively held by Bochiknot Inc. You are allowed to view and create the finished pattern. However, the pattern may not be sold or redistributed for commercial purposes.
 0:06:39
Macrame Plant Hanger For Beginners (Easy DIY Tutorial!)
 0:06:03
DIY - How to make a macrame plant hanger
 0:00:47
One cord macrame plant hanger. #macrametutorial #diy #planthanger
 0:18:42
Creating a Macrame Plant Hanger with Beads: Beginner's Guide
 0:16:24
How To Make A Simple, Easy Macramé Plant Hanger
 0:03:59
How to make a simple customized macrame plant hanger
 0:00:57
DIY Macrame Plant Hanger EASY Home Decor #macrame
 0:00:16
How to Hang Pots using Rope | DIY Hanging Planter Tips | Jar Sling Idea #shorts #plants #diy
 0:01:00
Macrame Pot Hanger Easy DIY Plant Hanger #macrame #diy
 0:00:16
Macrame Plant Hanger🪢 🪴
 0:00:32
Don’t throw away your ugly plastic plant hanger, do this instead! #diyideas #diyhacks #diydecor
 0:00:07
Stylish Macrame Plant Hangers: Bring Nature's Beauty Indoors
 0:12:34
DIY Mini Macrame Plant Hanger | Hemptique
 0:17:13
Macrame Plant Hanger | Tutorial | Beginner | Square Knot | Twisting Knot
 0:09:14
DIY macrame plant hanger tutorial | make a plant hanger without wooden hoop | boho plant decor
 0:02:51
DIY | 5 Minute Macrame Planters
 0:06:40
DIY Macrame Plant Hanger Easy Beginner Tutorial
 0:00:22
Quick and Easy Macrame Hanging Plant Holder DIY #Shorts
 0:00:12
Macrame plant hanger | Making Plant Hanger | Hanging indoor plants | Plant Hanger Design Ideas
 0:01:00
DIY Hanging Rope Basket EASY #macrame plant hanger
 0:04:23
DIY Plant Hanger - natural and simple
 0:13:51
2 EASY MACRAME PLANT HANGERS TUTORIAL | Step-by-step! (Video #1)
 0:04:44
Macrame Plant Hanger Without Ring (4 Easy Ways to Start!)
 0:00:30
Macrame wall plant hanger tutorial. Slow one available on my YouTube macrametutorial #planthanger
Комментарии