filmov
tv
How to make CSV for Xero from a PDF statement

Показать описание
Convert PDF files from bank or credit card statement to Xero compatible CSV file. Use the converter app that converts from more formats and converts to more formats.
00:00 - Download the converter and select a file with transactions
04:00 - Set the CSV Xero Target and the Date Format
05:49 - Convert to CSV file
07:24 - Switch to Xero Online and go to 'Bank Accounts'
07:36 - Import a Statement
07:44 - Upload the CSV file
01:45 - Select the account to import data into
01:47 - Upload the CSV file
08:45 - Map the Check Number, Reference columns
09:51 - Review imported transactions and add them to register
PDF2CSV converter shows Date, Amount, Withdrawal, Deposit. The Date is specifically shown as a month, as a name in this video. There are three different formats: how dates are on PDF file, how dates inside the software, how dates outside. So the converter always shows inside, always shows dates as a year/month (as name)/date. So dates are properly parsed from the PDF file.
There are different CSV layouts, CSV generic formats. The Regular CSV layout, that will just save all the columns you see inside the application. Also, there are Excel file - the same, XLSX Excel layout - recent XLSX format, XLS Excel - old XLS format, CSV layout for Quickbooks Online, CSV layout for Xero, Quicken for Mac (CSV Mint layout), POSH layout, Clipboard layout - the same as CSV layout, you can copy it without saving the file, copy to Clipboard and then you start Excel and just paste it.
We will use the CSV Xero. The Date Format for CSV Xero could be month/day/year or day/month/year, as day suggests on the help page, depending on your country settings. The Converter looks at your country setting and uses as month/day or day/month suggesting the format, but you can set it the way you like. We will use month/day/year for Xero.
The checkbox 'Open after conversion' will make the converter open the CSV file after a conversion, so you can review it before importing into your accounting system.
You can check the Payee and the Description.
To create a CSV file, first, select a Target, confirm Date format and then click the 'Convert' button.
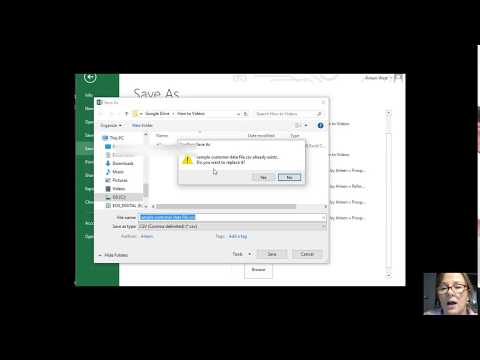
Then create a CSV file, offered with the same name, as a PDF file, you can change it to what you like. And then in the related form click 'Ok', open Xero, and import the CSV file.
We can use Notepad to look at the CSV file. The converter tries to call the system and open the CSV file with whatever App you have installed. As you see, the date format, as specified in this example is month/day/year (07/02/2016). It's not a month name, it's not year/month/day, it is a format, you specified.
The file is saved and the last thing is to import into Xero. We have a test account in Xero. Click 'Accounts' - 'Bank Accounts'.
Let's say we have a Checking account. Click 'Manage Account' - 'Import a Statement'.
The right column is the names from the CSV file and the left column is the names inside Xero. Select Check Number is 'Check No.' and Reference is 'Reference' if you have it. When you have CSV or Excel with additional information, in another product, like CSV2CSV and you want to create a CSV layout compatible with Xero, then you would Map the 'Reference' column and use it here. Check 'Don't import the first line because they are column headings' and click 'Save'.
Before you click 'Save', 'Convert', 'Import' pay attention, that 14 statement lines were imported, 0 were duplicates, and click 'Ok'.
Now it shows that it is Jul 2, 2016, the Amount, the Deposit. Now we have to process it inside the application, like Map it to Proper Account, select Proper Vendor Name. It is a usual process in the accounting system after you import any file with transactions. Quickbooks called it 'Mapping', Xero called it 'Review'. Before you just have done those transactions into your system, it usually goes to some intermediate place, when you review imported transactions and add them to register.
 0:03:02
 0:03:19
 0:00:22
 0:09:46
 0:00:51
 0:00:29
 0:00:59
 0:01:39
 0:05:28
 0:07:46
 0:03:23
 0:03:06
 0:00:19
 0:04:54
 0:02:10
 0:04:14
 0:00:18
 0:16:12
 0:00:40
 0:02:38
 0:01:19
 0:00:34
 0:00:29
 0:00:13