filmov
tv
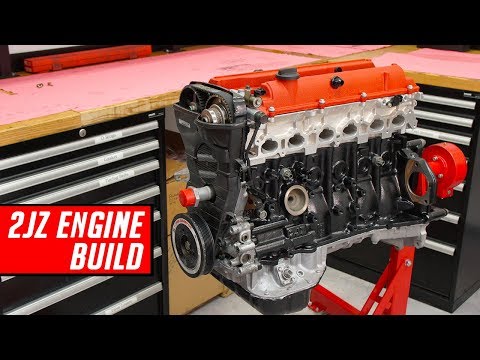
How to remove 2JZ-GE cylinder head | Lexus GS 300, IS 300, SC 300 | 2JZ-GE Rebuild Part 1

Показать описание
‣ You can help support this channel by buying me a coffee!
Part 1 of a new series: COMPLETE engine & transmission rebuild/refresh on the 2JZ-GE engine and A650E transmission! We’ll be replacing the head gasket, ALL timing belt components, oil pump, ALL seals like the rear main, front crank - basically refreshing the engine to give it a second breath of life.
Also great for those of you who are going NA-T/ supercharged and building your motor internals/transmission as I will be completely disassembling the drivetrain!
In today's video I will be showing you step by step how to remove the cylinder head on the inline-6 2JZ-GE engine. Every bolt, every nut, how to set the timing - I’ll cover every step of the way.
If you're new to the channel - welcome and do consider hitting the like and subscribe button! If you're already a subscriber, I really appreciate the support - it means the world to me!
In this video I'll be working on a 2004 Lexus GS 300, but it should work for most Toyota/Lexus models with the 2JZ-GE engine, with of course a few changes depending on the chassis.
2nd gen. Lexus GS 300 (1998-2005)
1st gen. Lexus IS 300 (2001-2005)
1st gen. Lexus SC 300 (1992-2000)
Naturally Aspirated (NA) Toyota Supra (1993-1998)
If you like the video and would like to see more of my content, don’t forget to hit the like and subscribe button!
Support the channel on Patreon:
Make a one time donation to the channel:
For business inquiries, please contact:
---------
Contents:
00:00 Intro
00:39 Leaks everywhere after 221k miles!
01:41 Draining and removing radiator
03:44 Removing exhaust manifold
04:33 Disconnecting throttle body, removing serpentine belt
06:53 Timing the engine
09:08 Disconnecting timing belt from camshaft pulleys
10:10 Removing drive belt tensioner, misc. hoses
10:41 Removing coil packs/boots
11:23 Removing noise filter, injector connectors and throttle body from engine bay
12:29 Removing oil dipstick guide, wiring harness nuts, noise filter bracket and VVT-i solenoid
13:23 Removing Air intake chamber
14:55 Removing fuel rail
15:55 Removing vacuum valve set for ACIS
17:02 Removing many connectors!
19:24 Removing valve covers
19:55 Removing camshaft pulleys, no. 4 timing cover
21:54 Removing no.1 oil pipe union bolt, no. 3 camshaft bearing caps
23:18 Removing camshafts
25:37 Removing water bypass pipe, no. 1 oil pipe bolt
26:05 Removing intake manifold
29:00 Removing ground cable, heater hose
29:17 Removing head bolts
30:58 Pulling head off the block
31:30 Removing old head gasket and inspecting block
31:57 Importance of setting engine at 60° BTDC instead of TDC
32:30 Conclusion and what's next in the series!
---------
Tools required:
Safety gloves
Jack
Jack stands
Ratchet
Breaker bar
Cheater bar for extra torque eg: your jack handle
Long extensions
Socket set - regular + deep - 10, 12, 14, 17, 22 mm
Hex socket set - 5, 10, 14 mm
Plier set - Needlenose, 90 degree, channel locks, sharp cutters
Screwdriver with Philips, flat-head bits
Wrench set - 10, 12, 14 mm
Allen key set - 5 mm
Adjustable wrench
Rubber mallet
Pry bar
Magnetic pick-up tool
---------
Parts Required:
None - we're only disassembling today.
_____
Disclaimer:
Due to factors which are beyond my control, I i.e. the creator of this channel, ‘The Auto Chap’, cannot guarantee against misuse of the information I supply in this video or anywhere on my channel. No information in this video or anywhere on my channel shall imply any warranty or guarantee a result. Any loss, including but not limited to property or injury are the sole responsibility of the user and not me.
I assume NO liability for any kind of injury, including but not limited to, property damage or injury suffered due to information in this video or anywhere on my channel.
I recommend you follow all necessary and proper safety practices while working on any project. Use the information supplied this video or anywhere on my channel AT YOUR OWN RISK.
I am NOT a professional mechanic and the information in this video is NOT a substitute for information from a qualified professional automotive repairer. The information in this video or anywhere on my channel is NOT advice. If I supply any wrong information and something breaks/malfunctions, I will NOT reimburse or pay in any way for the costs associated.
Please do not work on your car if you are not comfortable doing so.
 0:32:54
How to remove 2JZ-GE cylinder head | Lexus GS 300, IS 300, SC 300 | 2JZ-GE Rebuild Part 1
 0:07:08
2JZGE - Head & Accessory removal
 0:06:25
Removing 2JZ-GE From MK4 Supra!
 0:12:59
2JZ CYLINDER HEAD REMOVAL : 2003 LEXUS IS300 2JZ-GE
 0:06:21
2JZ-GE Head Removal Tips
 0:07:07
2JZGE NA-T Part 4 Cylinder head work and Install
 0:00:10
2jzge 2zjgte cylinder head removal diagram
 0:03:29
2JZ-GTE cylinder head removal!
 0:05:32
QDIY HOW TO REMOVE 2JZ EXHAUST MANIFOLD STUDS
 0:27:15
Removing the 2JZ valves
 0:03:26
Time lapse, removing 2jz ge head.
 0:03:28
2JZGE NA-T - Head Gasket & ARP Head Stud Install
 0:12:46
Detailed 2JZ Engine Teardown - See Why This Engine is So Loved
 0:07:09
2JZ GE vs GTE head swap, is it worth it?!
 0:08:05
2JZGE VVTI Build Part 2: Removing the Head!
 0:07:49
2JZ-GE TEARDOWN | What Tools To Use | JZX100 NA+T Build
 1:58:56
2JZ Head Gasket, Timing Belt, Full Re-Seal // DETAILED TEARDOWN & REASSEMBLY
 0:07:32
2JZGE NA-T Turbo Build - Assembling the Head
 0:01:34
2jz-ge valve stem seal removal
 0:09:28
The SAFEST way to remove Camshafts [2JZ FRS ep 15 ]
 0:00:29
2JZ Engine Build! (1,000 horsepower assembly)
 0:14:25
Toyota 2JZ Engine Build - Full Start to Finish
 0:02:12
2JZ / 1JZ Timing Belt Install
 0:44:40
The ULTIMATE IS300 2JZ maintenance guide - PART 1
Комментарии