filmov
tv
ORGANIZING MY WORKSHOP: Sanding Storage

Показать описание
Firstly, I love you all. Thank you so much for all the support, kind words, feedback and advice from the last video. What an amazing community we're building on this channel.
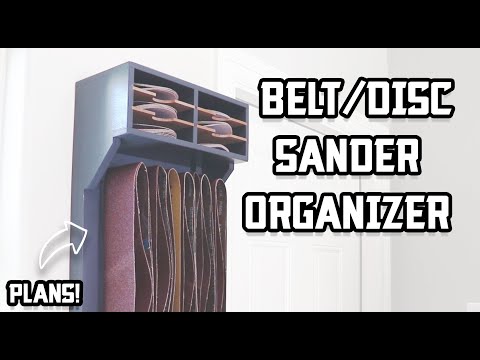
In this video, I take a step closer towards organization. I create a place to store my orbital sander and sanding discs. I make a simple cabinet from pallet wood and add it to my French cleat wall.
The internal dimensions are 330x330mm which is ample room to fit 4 discs. The plywood was cut to 340mm square to fit into the 5mm groove that I routed out. If you need any more measurements or information, just leave a comment.
This was all designed to store my orbital sander and new sanding discs:
Dewalt Orbital Sander
3M Cubitronll Sanding Discs
Music Credits: YouTube Music and Incomptech
 0:12:11
ORGANIZING MY WORKSHOP: Sanding Storage
 0:00:28
Perfect Sandpaper Storage Solution #woodworkingtips
 0:09:41
Build a Sanding Disc Storage Rack | Workshop Organization Project
 0:05:32
Sander Storage
 0:07:51
Drill Charging And Sanding Station Build
 0:11:40
The Shop Sanding Cabinet // Shop Organization
 0:08:51
Shop Sanding Cabinet // Shop Organization
 0:10:01
How to organize your shop | Building a shelf for my sander and sandpaper
 0:00:25
The easiest way to keep your sandpaper organized and stored #woodworking #storage #organization
 0:01:00
WORKSHOP ORGANIZING: Sanding Storage #shorts
 0:03:52
How to make a Sander and Disc Storage: shop organization
 0:17:09
My Ultimate Wood Sanding Storage // Shop Organization
 0:11:19
Shop Organization - Part 5: Sandpaper Storage
 0:00:14
Sandpaper Storage made easy — Woodworking Tutorials
 0:05:11
Workshop Build #1 - Tape and Sanding Disk Storage
 0:00:26
Sandpaper Organization Idea
 0:11:20
20+ Simple French Cleat Ideas for Your Tool Storage
 0:00:23
Using 3D printing to help organize my garage/workshop
 0:00:30
BEST way to organize your sandpaper discs! #woodworking #sandpaper #frenchcleats
 0:07:15
Easy DIY Sanding Organizer! // Shop Organization
 0:08:31
Random Orbit Sandpaper Organizer & Storage
 0:00:14
My French Cleat Tool Wall #woodworking #workshop #wood #tools #frenchcleat #makita #bosch #dewalt
 0:00:16
Sandpaper Storage - Shelves for my French Cleat Wall carved on my Avid CNC
 0:15:44
a better way to layout your workshop
Комментарии