Engine Misfire Diagnosis & Fuel Injector Replacement

preview_player
Показать описание

**PLEASE READ THIS AND THE COMMENT WE PINNED FOR HELPFUL INFORMATION**
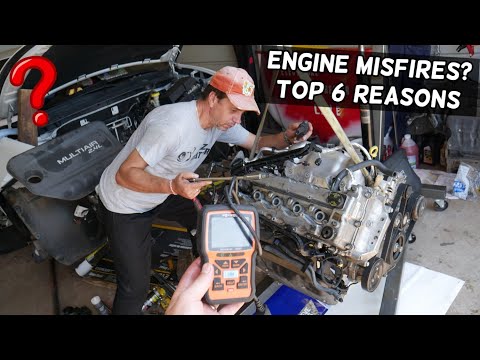
In this video, we discuss some logical steps you would go through diagnosing a misfire on your engine and then we show you how to replace all 6 fuel injectors on your Toyota 3.4 L V6 5VZ-FE engine.

On the positive side, Greg reported that he had better throttle response and his engine had more power after the fuel injector replacement. On the negative side, Greg's P0301 misfire code popped up again after 20 miles of driving. So, we're going to try to get Greg back over to do some more diagnosing to try to figure out why he's getting the misfire code. What we do know is his engine runs fine. It idles smooth and he has good power so there's no way he's running on only 5 cylinders.

MotorWest Performance
9741 Lurline Ave
Chatsworth, CA 91311
Owner: Martin Diaz
(747) 888-9768

**PARTS**
*Set of 6 Fuel Injectors from MotorWest Performance - #23250-62040

*Single Fuel Injector from Toyota - #23209-62040

*Injector O-Rings - #90301-07001

*Fuel Pressure Regulator O-Ring - #90301-07024

*Fuel Pipe Gaskets (Aluminum Washers) - #90430-12026 (Need 6)

*Upper and Lower Plenum Gaskets - #17176-62040 (Need 2)

*Throttle Body Gasket - #22271-62040

**HELPFUL TOOLS**
*If you're looking for other tools not used in this video, check out Timmy's Master Tool List.*

*1/4” Drive Regular Extension Set

*3/8” Drive Regular Extension Set


*1/4” Drive 6 Point Standard Metric Socket Set

*3/8" Drive 6 Point Metric Standard Socket Set


*3/8" Drive 6 Point Metric Deep Socket Set

*Milwaukee M12 Battery

*Milwaukee M12 High Capacity Battery


*Milwaukee M12 Battery Charger

*Right Angle Needle Nose Pliers - (used to remove hose clamps)

*Small Pick Tool Set - (used to break free hose connections off fittings)


*Painter’s Tape - (used to cover intake manifold ports)

*20 Piece Screwdriver Set - (nice complete set if you're in the market for a screwdriver set)

*CDI 3/8" Drive 30-250 Inch Pound Torque Wrench - (used to torque all the fasteners for this job)


*Brake Cleaner (More affordable option to Clean Streak)


*Crowfoot Wrench Set - (used in combination with the torque wrench to torque fuel rail banjo bolts)

*Battery Terminal Cleaner - (nice tool to clean the battery posts and the inside of the battery clamps)

**As Ebay Partner Network members, we earn commissions from qualifying purchases.
**As Amazon Associates we earn from qualifying purchases.

**Torque Values**
Fuel Pressure Regulator Bolts - 71 in-lbf
12mm Fuel Rail Bolts - 10 ft-lbf or 120 in-lbf
17mm Fuel Rail Bolts - 25 ft-lbf
Timing Cover Bolts - 80 in-lbf
Upper and Lower Plenum Bolts & Nuts - 13 ft-lbf or 156 in-lbf
Throttle Body Bolts and Nuts - 13 ft-lbf or 156 in-lbf
Рекомендации по теме
Комментарии
Автор

*PLEASE READ THIS COMMENT AND THE VIDEO DESCRIPTION FOR HELPFUL INFORMATION*
When using the crows foot wrench to tighten the banjo bolts on the fuel rails, to get an accurate torque value, I should have had the crows foot at a 90 degree angle with the torque wrench instead of how I had it inline with the torque wrench. By doing it the way I did, I increased the leverage of the torque wrench and thus tightened the bolt more than the torque value set on the wrench. So, if you want an accurate torque value when using a crows foot wrench attached to your torque wrench, have the crows foot at a 90 degree angle and you'll be good to go.

TimmyTheToolman
Автор

I just completed replacing all six fuel injectors, valve cover gaskets (including both rear cam plugs and all four half-moons and PCV valve) and plugs and wires in my 2000 4Runner 3.4 (199, 000 miles). First, a huge thank you to Timmy The Toolman! I would have never attempted this work without your videos. I did it over two days and it was a lot of work. I have so much respect for all the mechanics out there who keep the world running everyday.

So for anyone wondering these were my truck's symptoms:

When starting cold it would start and run fine and I could drive it for hours without any issues. However, if I did a warm start maybe 30 minutes after turning it off, cylinder 4 would misfire badly making the truck barely drivable. At first, the misfire would go away after driving for a few minutes but as the issue progressed it began lasting longer and longer and finally would not go away. I invested in a Bluetooth ODB2 scanner and the ODB Fusion app and was able to monitor and log tons of data and then graph it all in excel. Everything looked normal with the exception of the cylinder 4 misfire. So after cleaning the MAF sensor and confirming all other sensors seemed to be working normally I finally decided to it must be the cylinder 4 injector. The injectors were likely original so I knew they would all need replacing anyway and I figured while I was in there I would do the valve cover gaskets as well which were leaking oil badly.

It's running great now! Feels smoother and peppier for sure. So after many test drives today the issue is gone! I'm very relieved. I ordered my replacement injectors (Denso refurbished) from Motorwest Performance. The only thing I can think of is that maybe the injector was sticking but only in the scenario described above. I will say that all of the old injectors looked a little rough.

Some issues I ran into:

This may be obvious to some but not to all including me...torque wrenches may or may not work in reverse. I assumed it would and while torqueing the 17mm fuel rails I wondered why it was not clicking. I was using an extension in a strange orientation which reversed the direction. Anyway, I figured it out but just beware of this as I could have easily broken or stripped the fuel rail. Also, listen to your intuition. I know what 25 ft. lbs. feels like so alarms should have gone off in my head immediately...but they didn't.

The PCV was so old and hardened that it broke and fell inside the valve cover when I was trying to remove it. I had to carefully break it up with a hammer and screwdriver and then I was able to get the broken pieces out.

I used those small silicone stoppers to plug the fuel pressure regulator as well as the throttle body coolant lines. As I removed the driver's side fuel rail (with fuel pressure regulator attached with plugged up hose) fuel started spilling out a bit and then I noticed that the yellow stopper that I used to plug the hose was gone and I had 3 open fuel injector ports! Arghh! I figured the stopper just dropped and landed somewhere in the engine compartment but I wasn't sure until I finally found it in the grass! Phew. The moral here is be careful if using them to make sure they are in tight so that there is no chance of them falling out and into an open engine orifice.

sidneykantor
Автор

I wrote you a while back, yammering about to much talking. I now want to say - well shut my mouth.
I have since reviewed more of you videos, and now think your channel is the only "comprehensive", complete auto repair channel on the web. I wish the repair was on a 2.4, but what the hell.
Now I see you as a true gentleman, articulate, knowledgeable and a total pro at filming and editing.
Quite an accomplishment, beyond being the first one to receive an apology from me, since the nixon administraton.

thouartit
Автор

This is a HIGH VALUE video resource right here. Thank you! I ordered refurbished injectors from Motorwest Performance and told them you recommended their products. What a world we live in today when we shade tree guys can get instruction like this out here for free AND get connected to the best suppliers too.

johntyburski
Автор

#3 Misfire when Warm finally fixed! After changing plugs, wires, coil pack I decided to replace fuel injectors with reconditioned ones from Motorwest. I was reluctant to do a compression and leak down test because this was an intermittent issue. This video was awesome and was vital to my confidence and success. I would also highly recommend Motorwest for OEM Fuel injectors. I’m glad I had new plenum a and TB gaskets.
I no longer have the #3 misfire and CEL.
My 4Runner that has 251k, starts way better, the throttle response has increased and the engine seems to run quieter for some reason.
Notes/Tips - be careful to not over-tighten the intake plenum because the aluminum can strip out. Use a torque wrench and the fuel rails and intake, especially if you are not confident with your tightening abilities.
Replace your gaskets, it’s a better feeling having them when removing parts. OEM Fuel injectors only, Motorwest is the way to go and a pleasure to work with. I cleaned my intake plenum with degreaser. It looks way nicer. Vacuum out dirt/debris/broken plastic inside side of valve covers and fuel injector ports. Replace your fuel rail gasket/washers. 6 are needed.
The job took about 3 hours and I took my time.
Thanks Timmy for your fast response and Motorwest for the fuel injectors.

juliusgallares
Автор

Can not thank you enough for this video. Been chasing down a really bad misfire in my 98. Only got one code in the beginning for #5 cylinder. Tried swapping parts to see if it follows but the code never came back. Starting replacing plugs, wires, coils, and found this video. Got the fuel injectors from motorwest performance it absolutely solved it. Would not of been able to complete this or even know about these injectors other than very expensive oem ones. Most definitely owe you guys a beer next BBQ event! SicMods!!

conor
Автор

Thanks Timmy for another great video!


I installed the updated / recommended by Motorwest Performance injectors (blue Denso ones) on my 2001 4x4 SR5 this weekend.
Not that it needed it, but I was replacing the valve cover gaskets... so while I'm in there I just went for it.
(also it made it pretty easy to remove valve covers without the fuel rails in the way) (plugged all holes etc..)


I think I'm OCD I broke out my old engineering calculator from back in the day & did the math for anyone who cares.


If you use the 17mm crows foot piece on the torque wrench in the straight configuration, set it to 22 ft-lbs (21.67) .. to actually get the 25 ft-lbs at the fuel rail bolts.


(probably doesn't matter much but that's what I did)


Anyway in the end, no more oil leaking through my valve gasket onto the exhaust manifold (and no more oil burn smell) And new injectors. Nothing is too good for my rig.


I think the joy and satisfaction I get doing the work is sometimes more than the end result when it's all done. Onto the next project.


Thanks again Tim. & Sean for all the work man NICE. Social distance? OK twist my arm... 9, 000 FT here I come :-)

jleebuongiorno
Автор

Love your videos Timmy! I have a 2003 Tundra with this same engine at 230k miles. I get stoked watching you do all these repairs and I want to go fix mine every time I watch one. There’s just one problem. The darn thing won’t break!

crystalthurmond
Автор

Use Timmy's videos all the time to work on my 1999 3.4...Had an issue with the injectors (cold start fine, terrible idle, codes P300/P0303 when warm and during warm restart). Contacted Martin at MotorWestPerformance, pleasure to speak with and after purchasing the upgraded Denso injectors this 3rd gen runs lke new (just hit 205k). Thank you Timmy, Martin and everyone else involved in these videos!

JnIII
Автор

Safety Tip: When installing the fuel injectors into the fuel rail, I highly, STRONGLY recommend a very, very light coat of SILICONE grease (use a cue-tip) on the small, upper 0-ring and halfway into the fuel rail opening. (Do not use petroleum-based oil or grease that may eat the 0-rings.) FYI: my official Toyota repair manual says you can lube the 0-rings with gasoline. In my experience, gasoline is way too THIN to lube correctly -- you'll likely deform or damage the 0-ring and have a dangerous fuel leak! That injector needs to slide into the fuel rail nice and easy, and (gently) spin freely without binding.

---> Use a very, very light coat silicone grease. You'll be happy you did.

nicholasbeck
Автор

Tim, when they build my burial pyramid you will be one of the "gods" depicted on the walls!!!! I have a 2000 4Runner 2WD and a 97 4X4. The 97 belonged to a good friend but it has nearly 300K and is all original. I basically memorized some of your awesome videos and filled the rear cargo area with new parts and tools. Like a kid at Christmas, I played with my toys. The 97 had a bad misfire and the muffler was rotten. my friend was told the engine was blown but I ran a compression check and a leak down check. I gambled with new injectors, plugs, wires and coils. I installed a complete timing belt kit and new valve cover gaskets. I put a new muffler and tail pipe. The brake lines are rotten so that will be next. Thank you for turning my $500.00 purchase into something worth driving another 20 years. Tim, thank you for being my HERO. You are a ROCKSTAR!!!! Robert, Loganville, GA

robertclark
Автор

I recently did a Valve gasket replacement and thanks to your other video it was a smooth job. I wish I had seen this video before I did the job because I would have checked the resistance and replaced the o-rings since I had it apart. I have been dealing with a small hesitation when slowly accelerating since I hit 300.000 miles and now at 350, 000 miles. I have gone from 18 MPG to 15.6 MPG as well. I have replaced my coils with new Denzos, new spark plugs, new NKG spark plug wires, I have new O2 bank 1 and Bank 2 denzo sensors. I have de-carbonized the throttle while I did the valve cover job. This hesitation does not cause a code either. If I accelerate quickly it is not an issue. I had the injectors professionally cleaned recently also. I used a stethoscope to listen to the injectors today and they all sound similar and with a steady tone. This hesitation is driving me nuts. So I am going to do what you suggest in this video however 1 question. Since I barely put any miles since the valve cover job (maybe under a 1000 miles) do you think that I would need to get a new plenum set of gaskets or can I re-use the same ones? Thanks for you invaluable advice. Happy New year Timmy, keep the videos coming.

philipperichen
Автор

This is a fantastic resource for this type of job. I have a 99 4Runner and I recently had a #4 misfire (flashing CEL) and at the time, did not know (or have the ability) to diagnose it, so I had it towed to my local dealer. Ugg... we all know what happens next... They "diagnosed" it as a bad injector, and replaced it (says NAPA on the invoice) for somewhere north of $600 all in. After watching this video probably 10 times, I felt like I could do this myself, and ordered a set of reman injectors from Motorwest as well. Talk about a great company. Fast and extra o-rings just in case!

Anyway, I ended up digging in there yesterday and got them all swapped. No issues. Thanks for all the detail you guys put into this video. It gave me the confidence to tackle this job myself, not to mention the excuse to buy more tools! (the 17mm crows foot especially), so it was win-win for me as well.

I also decided to get all the gaskets for the valve cover job and do that at the same time, since upon further inspection (and a little sniff test), I got some oil leaks that burn on the exhaust. Also using your video for that.

And if it couldn't get any better, I used your other video on valve lash to check the clearances, since I was going that far into it already...

Once again, fantastic job guys. I can't even think of how much I saved.. and knowing it was done correctly. On a side note, I could tell where the dealer guy had been, since I found 2 bolts lodged behind some fuel lines, and that plastic cover over the harness (the ones that are really brittle) was completely non-existent on the drivers side and pretty much destroyed on the passengers side...

nurmworks-
Автор

You make the absolute BEST videos for these Toyota jobs. I am a mechanic and a Toyota specialty one. You are extremely thorough. Some jobs you do could be shortcut and done faster. But you do things the right way and I LOVE IT.

superdave
Автор

Great video! I just had this happen to me earlier this year. P0303 and P0306. I also replaced all of the spark plugs, new wires, replaced air filter, cleaned all of the injectors, pressure tested the fuel system and compression tested the cylinders. Everything came out great but the engine would stutter slightly at idle and would lose power at highway speeds. I finally replaced the fuel filter under the truck and that fixed everything! Might want to give that a shot.

jaetheo
Автор

Great vid as usual. I’m a former Toyota tech… I don’t know any tech that torques any of those fuel line bolts. Good on you!

MotoDUDEabides
Автор

When my dad and I did this to his 98, we pulled the EFI fuse and then ran the engine until it lost fuel pressure. That let the fuel pressure be gone and not let out as much fuel.

GXKid
Автор

I just bought a 2000 4runner about 8 weeks ago with a bad engine. Watched a lots of your videos on the 4runner. They are all really good. I just replaced the bad engine with a used one took me 7 weeks to do the job. I am getting old and my memory is not as good as it use to be so I have mark and film everything and rewatch it to see how to put it back together. When I started it up and ran it for about 5 minutes I got code p304 and p306 misfire. I have ordered 6 rebuilt injectors for it. Toyota uses 3 coils to fire the 6 cylinders, each coil fires 2 cylinders, one on bank 1 and one on bank 2 at the same time. On 2 cylinder lawn mowers its called wast fire spark. A good way to tell if it is the coil pack you will get a misfire on bank 1 cylinder and bank 2 cylinder that is fired by the same coil. Swapping the coils around will also do the same job. Sure you could be unlucky enought to have 2 bad injectors on the 2 cylinders that the one coil fires.

tcwaterdrill
Автор

I love seeing a mechanic follow the service manual. Your double click on the torque wrench is a sign that you really care about doing things to the best of your ability. Good work! I've got a Launch CNC605A on order (it's hard to justify the cost...but it sure will be nice). Considering how much work is involved in fuel injector changes it's going to be nice to be able to clean and verify proper operation before buttoning everything back up.

kellyanderson
Автор

i don't have a lot of experience working with car engines, but I followed this video and was able to clean and replace all the O rings on my fuel injectors as well as replacing one. I also replaced my spark plugs and wires and tightened my belts which fixed my cylinder 1 and 4 misfire. Thanks Timmy the Toolman!

meganbrate