filmov
tv
A Simple and Minimal Laptop-Focused Desk Setup Tour

Показать описание
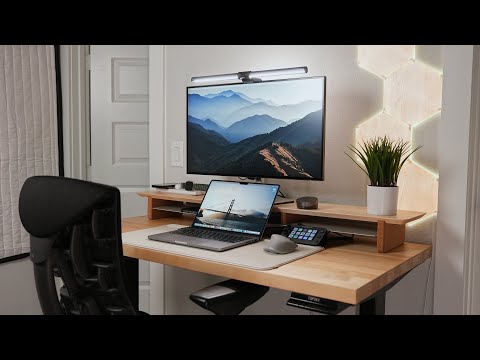
It’d be pretty nice if I had a workspace without the frills. You know a setup that was back to the basics, minimal and focused on productivity. And here’s what I came up with. This is the minimal productivity focused macbook setup. Let’s get started with a little desk tour.
Sponsor: BenQ Screenbar Halo - Check this monitor light bar down in the links below!
Timestamps:
0:00 Introduction
0:31 What I’m trying to accomplish
1:46 Desktop
2:51 Standing Desk Legs
3:23 Casters to mobilize the desk
4:06 Difficulties with Lighting
5:11 Sponsor: BenQ Screenbar Halo
6:27 Other Lighting: Nanoleaf Elements
7:22 Adding a Grovemade Monitor Stand for Storage
8:03 Orbitkey Deskmat
8:33 Macro-pad for Hotkeys: Loupedeck Live S
9:01 Monitor: Dell U2723QE
10:29 Desk Accessories for Visual Interest
11:41 What I think of the completed setup
12:44 Minor Issues
13:32 Conclusion
Affiliate links and standard links to product discussed:
So let’s start with the desktop, this is their Karlby countertop I got cut down to 50inches to better fit my space. From there, I bought this budget standing desk frame from Amazon. It’s not the nicest standing desk around, but this thing works so what more could you ask for in a standing desk. it has height adjustment buttons and memory buttons to save the height, so it more than enough serves its purpose. Standing desks are great because they provide height adjustment but they can get pretty heavy, since they have metal legs and motors built into them. And because of that, they can be pretty difficult to move if you want to adjust the desk or manage the cables in the back. That’s why I got these casters off Amazon and swapped out the desk’s leg pads and now the desk is mobile and I can sit anywhere in the room that I like.
I’ve always struggled with is lighting. And I don’t mean rainbow lights all over the room. That’s a cool aesthetic, but not what I’m going for. What I’ve noticed is If you use overhead lights, the usual lights you have mounted to the ceilings in rooms, at night they could look really harsh, you can fix this by adding light at different heights and different parts of the room to diversify the light sources and to make a more moody and a much more interestingly lit space. So I used 2 different items to add different types of lighting to this room. The first is an item the sponsor of this video BenQ sent. This is the Screenbar Halo, an LED light bar that sits on top of your monitor and is powered by USB. It has both an LED light in the adjustable bar up front and in the housing in the back. And to add in additional lighting, I’m using these Nanoleaf Elements wood hexagon panels. These panels mimic the look and feel of natural wood, they don’t get super bright, but during the daytime the wood look and texture fits in with the rest of the natural wood decor of the desk.
By default a plain standing desk does not have any way to organize your stuff. That’s where this grovemade monitor stand comes into play. It’s this monitor stand made of maple, and comes in various sizes and colors to best fit your desk environment. Now, I have a nice area to keep notebooks, pens, pencils, and whatever tangled mess of cables I want to make sure no one ever finds out about. Then on top of the surface of the desk, I’m using a water resistant orbitkey desk mat. I think looks really cool with this desk. I tend to drink coffee at my desk, and on this type of surface, accidental spills are easier to clean. Then I added a Loupedeck Live S. Each knob and button can be set to do different functions. Very similar to a stream deck. Except with knobs and a touch screen. Both the Loupedeck and ScreenBar Halo are connected to the Dell monitor's built-in usb hub in the back. I also like how color accurate, and bright this monitor gets, while also providing a very minimalistic appearance, with even borders on all 4 sides, and no logos, except this small dell one barely visible on the stand. The stand lets you swivel, rotate, adjust the height and also has a nice hole in the stand so you can guide all of your cables through the back of the monitor and keep it from uglifying the front. Okay, now that we have a complete desk setup, we have to add some interest. This is a fake plant that doesn’t require me to water.
 0:14:25
A Simple and Minimal Laptop-Focused Desk Setup Tour
 0:15:55
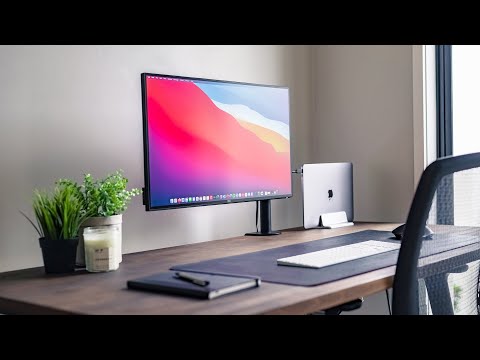
Everything I learned Trying to Make a Clean Laptop Desk Setup
 0:09:15
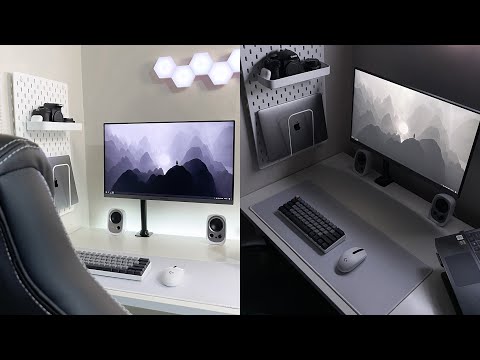
laptop desk setup makeover + tour | minimal & aesthetic (but on a budget)
 0:10:15
Best Laptop Setups - 34 // Minimal & Clean Desk Setups!
 0:08:37
My Minimal Productivity Mac Desk Setup (for students, office work, developers, and more!)
 0:10:00
Best Laptop Setups - 30 // Clean & Minimal Desk Setups!
 0:09:07
Building A Minimal Desk Setup For A Gaming Laptop!
 0:03:40
Analog: The Simplest Productivity System
 0:14:20
Student + Gaming Desk Setup 2020 // Minimal Dual Laptop Workflow!
 0:05:22
The Ultimate Minimal Laptop Desk Setup - 2023
 0:06:57
Best Laptop Setups Ep. 7 // Minimal & Clean Desk Setups!
 0:08:39
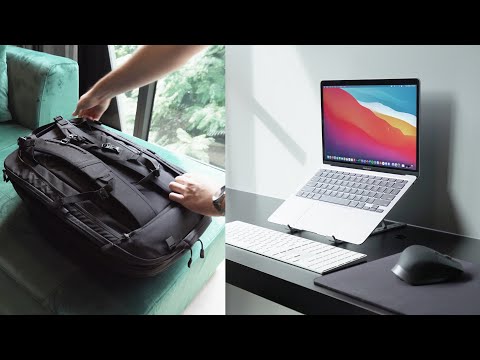
The ULTIMATE Laptop Travel Setup! (for students, remote workers, developers)
 0:08:23
2023 Simple and Effective Laptop Desk Setup | College Student
 0:19:58
Watch BEFORE Buying a Video Editing Laptop | 2024 Buyers Guide
 0:08:44
Minimal and Simple Work From Home Setup with Dual Laptop Monitor Mount/Bracket | How to Assemble it
 0:03:23
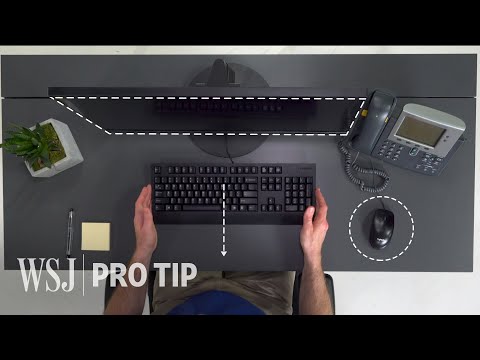
Ergonomics Expert Explains How to Set Up Your Desk | WSJ Pro Tip
 0:05:51
How I Set Up a Clean Laptop
 0:02:27
Budget Laptop Desk Setup 2022 - Editing/Filming Workspace
 0:13:15
FIRST 14 THINGS TO DO ON NEW M2 MACBOOK AIR | MacBook Setup & Customization
 0:13:36
The Best Laptop Buying Guide (2022 Guide) | Watch This BEFORE Buying A New Laptop!
 0:09:14
Best Laptop Setups Ep. 26 // These Desk Setups are too Good!
 0:07:07
Perfect Productive Workspace – Minimal Office + Desk Tour
 0:15:45
What to Look for in an AFFORDABLE Laptop for Programming
 0:03:04
Minimal Laptop Setup Tour | Macbook Student Setup 2020
Комментарии