filmov
tv
How to Effectively Use Multiprocessing in Python with Kivy

Показать описание
Discover how to use `multiprocessing` with Kivy in Python, addressing common errors and best practices for better performance in your GUI applications.
---
Visit these links for original content and any more details, such as alternate solutions, comments, revision history etc. For example, the original title of the Question was: How to get multiprocessing working in Python with Kivy
If anything seems off to you, please feel free to write me at vlogize [AT] gmail [DOT] com.
---
How to Effectively Use Multiprocessing in Python with Kivy
Working with Kivy, a popular library for building graphical user interfaces in Python, can sometimes be challenging, especially when it comes to handling heavier processing tasks alongside the user interface. The common solution when facing performance issues is to use multiprocessing, which allows you to run separate processes to handle CPU-bound tasks. This post will guide you through understanding how to integrate multiprocessing effectively into your Kivy application, along with examples.
The Problem: Slow Performance in Kivy Applications
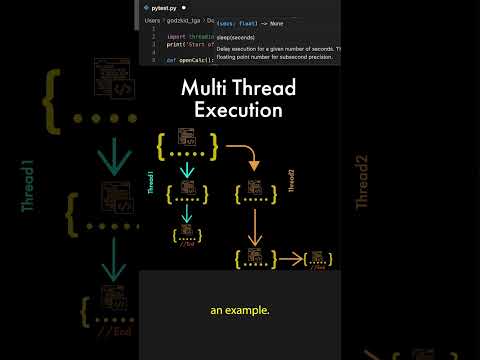
When developing Kivy applications, you may notice performance issues as the complexity of your application increases. In simple applications, using threads may work, but as you add more functionality or processing power is needed, your Kivy app might become sluggish.
The typical scenario involves:
Choppy GUI: As the processing load increases, keeping everything in one thread can cause the GUI to freeze.
Limited CPU Utilization: Task managers show plenty of available CPU resources, but running everything in a single thread limits performance.
The Solution: Integrating Multiprocessing
To overcome these limitations, multiprocessing can be introduced. It allows you to run different processes separately, leveraging multi-core CPUs effectively. Here’s how you can do it step-by-step:
Step 1: Replace Threads with Processes
Start by replacing the threading.Thread you used in your initial Kivy code with multiprocessing.Process. Here’s a simplified version of the changes:
[[See Video to Reveal this Text or Code Snippet]]
Step 2: Define Shared Memory
Since multiprocessing runs separate processes, passing data between them requires shared memory. This is where Value comes into play:
[[See Video to Reveal this Text or Code Snippet]]
Step 3: Start the Process and Handle Button Clicks
You need to modify the button-click method to start and manage the multiprocessing process:
[[See Video to Reveal this Text or Code Snippet]]
Step 4: Main Processing Function
Define the main function that will run in a separate process. This function is where the heavy lifting occurs:
[[See Video to Reveal this Text or Code Snippet]]
Complete Example Code
Here’s your complete Kivy application integrating multiprocessing:
[[See Video to Reveal this Text or Code Snippet]]
Conclusion
By using multiprocessing, you can drastically improve the performance of your Kivy applications, allowing for smooth UI interactions even during heavy processing tasks. Remember, always ensure to manage your processes correctly to prevent any memory leaks or leftover processes.
Integrating multiprocessing into your Kivy applications can seem daunting at first, but with the right approach and understanding, it becomes manageable and greatly enhances your app's performance.
---
Visit these links for original content and any more details, such as alternate solutions, comments, revision history etc. For example, the original title of the Question was: How to get multiprocessing working in Python with Kivy
If anything seems off to you, please feel free to write me at vlogize [AT] gmail [DOT] com.
---
How to Effectively Use Multiprocessing in Python with Kivy
Working with Kivy, a popular library for building graphical user interfaces in Python, can sometimes be challenging, especially when it comes to handling heavier processing tasks alongside the user interface. The common solution when facing performance issues is to use multiprocessing, which allows you to run separate processes to handle CPU-bound tasks. This post will guide you through understanding how to integrate multiprocessing effectively into your Kivy application, along with examples.
The Problem: Slow Performance in Kivy Applications
When developing Kivy applications, you may notice performance issues as the complexity of your application increases. In simple applications, using threads may work, but as you add more functionality or processing power is needed, your Kivy app might become sluggish.
The typical scenario involves:
Choppy GUI: As the processing load increases, keeping everything in one thread can cause the GUI to freeze.
Limited CPU Utilization: Task managers show plenty of available CPU resources, but running everything in a single thread limits performance.
The Solution: Integrating Multiprocessing
To overcome these limitations, multiprocessing can be introduced. It allows you to run different processes separately, leveraging multi-core CPUs effectively. Here’s how you can do it step-by-step:
Step 1: Replace Threads with Processes
Start by replacing the threading.Thread you used in your initial Kivy code with multiprocessing.Process. Here’s a simplified version of the changes:
[[See Video to Reveal this Text or Code Snippet]]
Step 2: Define Shared Memory
Since multiprocessing runs separate processes, passing data between them requires shared memory. This is where Value comes into play:
[[See Video to Reveal this Text or Code Snippet]]
Step 3: Start the Process and Handle Button Clicks
You need to modify the button-click method to start and manage the multiprocessing process:
[[See Video to Reveal this Text or Code Snippet]]
Step 4: Main Processing Function
Define the main function that will run in a separate process. This function is where the heavy lifting occurs:
[[See Video to Reveal this Text or Code Snippet]]
Complete Example Code
Here’s your complete Kivy application integrating multiprocessing:
[[See Video to Reveal this Text or Code Snippet]]
Conclusion
By using multiprocessing, you can drastically improve the performance of your Kivy applications, allowing for smooth UI interactions even during heavy processing tasks. Remember, always ensure to manage your processes correctly to prevent any memory leaks or leftover processes.
Integrating multiprocessing into your Kivy applications can seem daunting at first, but with the right approach and understanding, it becomes manageable and greatly enhances your app's performance.
 0:12:16
 0:22:31
 0:02:16
 0:02:42
 0:10:58
 0:13:51
 0:00:11
 0:06:13
 0:07:05
 0:01:50
 0:15:33
 0:00:14
 0:00:41
 0:00:17
 0:01:54
 0:07:09
 0:01:27
 0:00:11
 0:02:29
 0:00:52
 0:02:21
 0:02:11
 0:01:43
 0:01:48