filmov
tv
My Sea Container Garage

Показать описание
My sea container garage/work shop project - Summer 2019. Painting and trim will be finished next summer.
I would like to thank all my friends who helped me with this project over the summer.
How I built my Shipping Container Garage
Background
I purchased two shipping containers for storage, but this was not necessarily practical. I needed a space to work….I wanted a workshop. So following many internet searches, Youtube videos and with my AutoCad skills, I designed my garage.
Here are some of the many tasks and jobs that were done to bring my sea container garage to fruition.
1. The first step was to design my garage. There were many concepts done, but I finally decided to have a 14’ space in between the 2 cans that would house my shop area. The outside dimensions are roughly 20’ long X 30’ wide.
2. Now I was able to put my sea cans in place. I laid out the location of my screw piles and drove them into the ground. There are 4 screw piles per container and the 2 piles at the front are held together with a 6 x 6 PT lumber beam bolted into the saddles of the piles. This is typical for the front and back.
3. Now the fun began; it was time to move the containers. With jacks, pipes, old railway ties, and the help of a few friends with quads with winches, we jacked, tugged and pushed the sea cans into place. Actually, this went relatively well with the great help from my friends and neighbors which in turn, made this task much easier.
4. During the Winter months, I made my material list, ordered my engineered trusses and did all the necessary preparation that would allow me to start construction in the Spring of 2019.
5. Spring 2019 finally arrived and I began the first task of bolting down my top plates on the outer edges of each container. The top plates consist of two 2x6 boards nailed together sitting on wooden shims placed between the container ribs and bolted through the container’s metal roof with carriage bolts. After the top plates were in place, I installed the hurricane clips.
6. With the help of two of my cottage friends, we used elbow grease to lift the 11 trusses into place. This took a little over an hour and the trusses were all sitting in the hurricane clips. Next, we had to level, brace and fasten all the trusses. Since I decided to install a metal roof, strapping was required, so 2x4’s were nailed into the top of the trusses at every 16”.
7. It’s roofing time. I ordered my metal roof panels in continuous lengths, roughly 18.5’ long which allowed for somewhat of a quicker installation. Of course, we had to do the roofing during some of the hottest days of the summer.
8. With the roof mostly done, I was able to start working on the garage floor area in between the containers. The nice part of this job, I was able to work in the shade during the warm sunny days and I was also able to work when it rained because I was now covered. The pressure treated wooden floor frame is supported with 12x adjustable screw piles and covered with 3/4” marine grade pressure treated plywood.
9. With the floor levelled, it was time to build the outer walls which were framed with 2 x 6 lumber. The rear wall is a full 8’-3” high x 14’ wide wall with no openings. The front wall, also framed with 2 x 6, has a 36” wide mandoor and an 8’ wide x 7’ high overhead door. 2 x 4 interior walls were also installed to allow for wiring, pink insulation and a vapour barrier to be installed. Norbord’s 7/16” OSB was then used to finish the walls and ceiling. Also, above the ceiling I installed a lifting beam wich consists of five 2x6 x 16’ long boards nailed together spanning 14’ and sitting on both containers. From the interior picture on the video, you can see 4 lifting eyes at the ceiling which are fastened to the hidden lifting beam.
10. The siding used for this project was LP’s OSB SmartSide. Very simple and quick to install. Following the siding installation, it was time to paint which I did with the help of a paint spray gun. The painting was quick, however, it was prepping the containers that took the longest.
11. Then came the soffit and fascia. This job really changes the appearance and gives you a bit of hope that the project is nearing completion.
12. The electrical portion was not complicated and consisted of installing a few plugs and LED lighting. I also installed a propane heater. You kind of need that in Northern Ontario if you want to be comfortable during our many cold months.
I still have a bit of painting to do on the mandoor, vents and I also need to install some outdoor trims.
I hope this is helpful and I hope that if you decide to move forward with a similar type project, that you will have as much fun as I did.
 0:02:25
My Sea Container Garage
 0:04:15
My Sea Container Garage Update 2020
 0:00:17
DIY Container Shop cost breakdown ⬇️
 0:00:17
Garage Transformation
 0:05:05
5 Epic Shipping Container Garage and Carport Ideas
 0:01:00
Shipping container Micro shop build!
 0:01:46
Standard shipping container with a roof and garage added - My sea container garage
 0:17:07
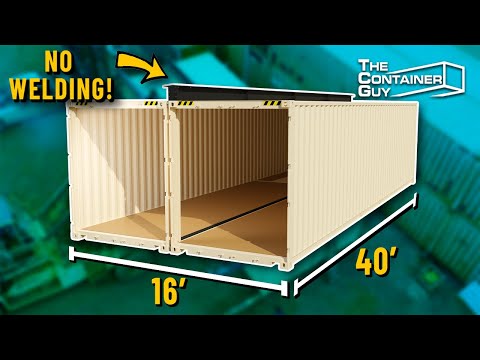
Connecting Two Shipping Containers Together! Double Wide Home, Garage, Warehouse - DIY - NO WELDING!
 0:07:09
Incredibly Stunning Birch Tiny Home in The Heart of WA
 0:00:11
A container home conversion 🏠 #tinyhouse #containerhome
 0:03:06
Shipping Container Garages: The Good, Bad, and Ugly
 0:00:16
☝️Watch slow motion video☝️ #containerhomes #shippingcontainerhomes #smallcontainerhouse
 0:00:41
Shipping Container Home Build - Cutting Window In Container! #containerhomebuild
 0:00:09
Curious how we do framing? 🧱🌲 #containerhome #tinyhouse #containerconversion
 0:00:59
Let’s Check Out This Assembled Black Garage Container! #shippingcontainer #storage #tinyhome
 0:05:30
5 Ways To Insulate Your Shipping Container: Which Is The Best?
 0:00:31
Delivery day my shipping container workshop
 0:01:00
The Real Cost of a Luxury Container Home 😅 #airbnb #design #seattle #containerhomes #airbnbdesign
 0:15:56
Box Barn FULL BUILD from Start to Finish
 0:00:29
Cutting apart a Shipping Container to make a Garage
 0:09:56
What I Wish I Knew Before Building My Shipping Container Shop
 0:07:25
Container Garage my ideas and plans Part 1
 0:00:13
Witness a Container Converting into a Masterpiece!
 0:00:11
Folding Container House of Garage
Комментарии