filmov
tv
bmw 335i n55 valve cover gasket replacement full detail

Показать описание
thank you for watching!!!!!
If this video was helpful to you and if you would like to place a donation, here is my Venmo and PayPal information. Or I would really appreciate it if you could share my YouTube channel on your social media. Links will be on the bottom.
#bmw335i #valvecover #gaskets #jabothemechanic
If this video was helpful to you and if you would like to place a donation, here is my Venmo and PayPal information. Or I would really appreciate it if you could share my YouTube channel on your social media. Links will be on the bottom.
#bmw335i #valvecover #gaskets #jabothemechanic
 0:23:59
How to Replace the Valve Cover on a 2013-2015 BMW 335i N55 (F30) – Step-by-Step DIY Guide
 0:18:44
N55 Valve Cover Replacement - DIY at Home!
 1:01:16
bmw 335i n55 valve cover gasket replacement full detail
 0:16:46
2015 BMW 335i F30 N55 VALVE COVER GASKET REPLACEMENT
 0:44:39
BMW N55 Valve Cover Replacement - X6/X5/X3/535i/435i/335i
 0:03:24
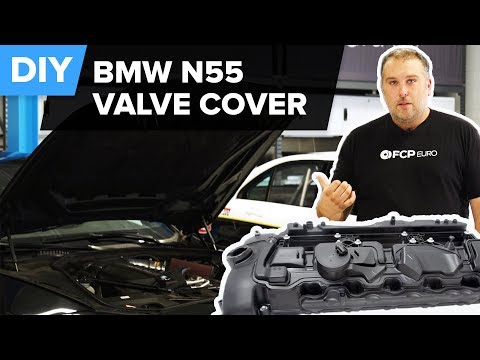
BMW N55 Valve Cover (X5, X3, 335i, & More) - Replacement Interval, Features and Product Review
 0:29:29
Valve Cover Gasket Replacement On BMW X5 335 With N55 Engine
 0:01:01
N55 Valve cover gasket, Do it yourself for $25 #bmw #335i #n55
 0:12:35
BMW N55 Valve Cover Gasket Replacement, (EASY)
 0:00:18
BMW 2011 335i N55 valve cover whine :/
 0:31:26
N55 Valve Cover Gasket DIY- BMW xDrive 35i F15
 0:01:19
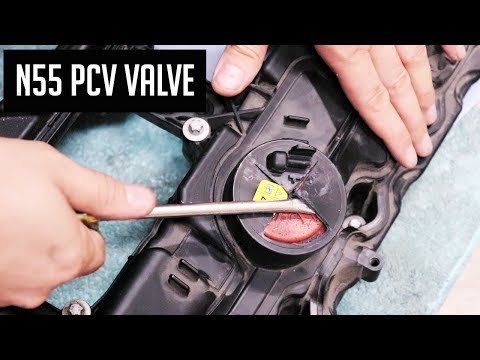
BMW N55 valve cover inspection and testing. Replace don’t reseal
 0:17:55
JDMSPEED N55 ALUMINUM VALVE COVER UPGRADE- WATCH FOR TIPS AND REVIEW
 0:00:09
F30 335i N55 First start after replacing valve cover gasket
 0:01:00
Valve Cover Replacement BMW X5 N55 F15
 0:11:34
BMW N55 Squealing Noise Fix DIY
 0:08:25
BMW N55 Amazon Aluminum Valve Cover Install & Review | Budget Upgrade Worth It?
 0:22:50
Valve Cover Replacement (N55 Engine) | BMW X5 F15
 0:20:54
BMW M235i/335i/435i/535i N55 Valve Cover/VCG Replacement!
 0:38:17
BMW 335i N54 Valve Cover Gasket POV DIY!!
 0:29:03
How To Replace The Valve Cover On A BMW N55 Engine (X5, 335i, & More) - DIY, Diagnosis, and Repa...
 0:24:35
How to Replace the BMW 3 N54 N55 Valve Cover Gusket DIY 2007-2010
 0:53:57
HOW TO BMW N55 Valve Cover , Oil Filter Housing, Transmission Service 2013 F25 X3
 0:00:53
2015 Bmw 335i N55 Valve Cover and Turbo Inlet Install #bmw #car #mobilemechanic #335i #n55
Комментарии