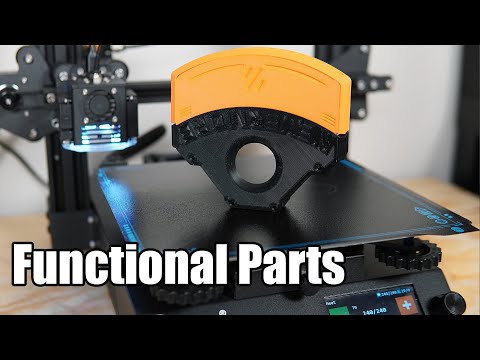
Printing ABS with an open frame 3D printer?

preview_player
Показать описание
People are often asking in comments how I print ABS on open frame 3D printers. For many prints, producing them in ABS is just a matter of upping the bed and nozzle temps and turning off the cooling fan. Other models, however, are destined to failure.

In this guide, I explore ABS printing successes and failures, and explain why ABS can be so difficult to print using some custom animations.

Summary:
-ABS needs 240+ for nozzle and 100 for bed.
-Fan to be turned off except for bridging, etc.
-Shrinkage occurs on thick/solid objects due to the uneven cooling causing the cooler areas to contract.
-This results in a lifted base and/or splitting between layers.
-The best way to overcome this is to raise ambient temps with an enclosure.
-Otherwise you are limited to printing models with thin or narrow sections.
-ABS is mainly useful for prints that need to withstand higher temperatures.
-ABS can be acetone smoothed!
-ABS releases potentially harmful particles into the air where PLA does not.
-PETG is a good substitute for ABS.

Take a look around and if you like what you see, please subscribe.

#3dprinting #abs #explained
Рекомендации по теме
Комментарии
Автор

I used ABS for a long time on an open frame printer with a lot of success. I always tried to use no more than two perimeter walls, no more than 3 top and bottom layers, and 15% or less on the infill. People always make the mistake of making their print more solid thinking that it will help reduce warping, but as you pointed out, the center retains warmth while the outside cools and contracts.

tysonl
Автор

Why nobody could explain better than this guy!!! Men I been battling with abs until I saw this video thanks 😊

williammolina
Автор

The main reasons to print in ABS are the mechanical properties - it's machinable, flexible, creeps not too much, and can be welded with acetone. I believe the flexibility is actually the reason why the vase mode worked out - when the walls are so thin, they can slightly flex without ripping the part off the bed or cracking. There is a good trick to keep ABS stuck to the bed - dissolve some of the material in acetone and cover the print bed with the slurry.

apprentice
Автор

I print ABS every so often on my ender 2 because of the beds capability to heat to a higher temp than my cr-10 and also the heat of that bed is more even. Other setting tips for cura users are to use lower infill temperatures than the set print temperature( i.e. i use 250 for my set temp but drop infill temp to 240), I've found that the draft shield is also worth the wasted filament for better odds of success, and cubic infill usually disperses the internal stress more uniformly so that there aren't areas of elevated stress, especially at sharp corners.

XenonLining
Автор

I have always had a completely different explanation than outer wall contraction: I completely enclosed my Solidoodle 3 and every time I would go to rpint I would preheat the bed for 10 minutes before printing. 8 years and this is rock solid always print with ABS. I hate how brittle PLA is. Now for my theory on lifting/curling. The outer walls do not cool faster than the infill. The outer walls have more density and retain the heat especially if you have more shells. But the infill is basically a lattice where even the smallest of air currents (even walking by your printer) will draft cool air inside the print and the infill contracts while the outer shell is still warm (and still flexible). The infill acts as a internal bungie cord, pulling the outside shell inward, lifting corners and overhangs. This is why round base objects suffer much less. Enclosing a non-moving-platform printer like the SD3 stops all air movement. An interesting test to prove me wrong would be to print a cube with no infill and see if the corners lift. If they do lift under the same conditions without any infill, then outer wall contraction would be the only reason.

robhayes
Автор

Print with a skirt all the way up. The skirt may crack and split but holds the heat in the print better.

So the print comes out much better. Had a lot of success with this method.

Madkite
Автор

I ONLY print in ABS !
Why? because it's temp resistant, tough and you can weld parts together using acetone.
It also does not degrade as much, old ABS prints just as good as new ABS.
Furthermore, clogged nozzles is something i don't have (maybe three times the last 4 years) . ABS can stay as long as you want in a hot or cold nozzle, when you heat up the nozzle again, it flows out nicely leaving no residue in the nozzle.
Print quality is as good as with PLA, except with overhangs and bridges, but you can work around that.
Having said that, I only make functional parts, i don't do Marvel figures and other ^#@# :-)

winandd
Автор

Another great video Mike.
I've dedicated my Anycubic i3 to ABS. I've got it inside a simple thick clear plastic green house enclosure placed into the corner of the room, to keep the breezes away from it. I also always close the nearby window. The enclosure helps keep the smell in, which is a major bonus. My settings are 85 for the bed, 240 for the hot end and fan speed at 50% after the the 5th layer (I'd have to double check on this). I'm a real believer in if it works leave it alone and those setting seem to work well for me. Since I've been using them I've not had any lifting, cracking or warping nor have I had any Steppers over heating and causing layer shifts.

pete
Автор

You can minimize internal stresses of a printed part by using less infill. This will result in your part cooling faster from the air surrounding it but at the same time, there will be less (hopefully, far less)material trying to rip the layers apart and your part off the print bed. Another way to help reduce internal stresses is to print slower, especially if you're printing at the lower end of the heat spectrum for the plastic. Stretching of the molten plastic as it gets laid down will leave internal stresses in your part and this is the other cause of warping. All those stresses relax, any stretched material will contract, any material that got pushed together(this often happens when you use ironing in your slicer with extra extrusion during the ironing) will bulge outwards destroying any and all dimensional accuracy in the part.

kefler
Автор

I always appreciate your methodical and organized approach to conveying your information. Well done.

JasonZnack
Автор

Reduce density as much as possible. I also use a .2 nozzle. I love abs for printing figures. Supports seem to detach cleaner, and when you sand and cut on it, it doesn't get fuzzy like PLA. Its the best if you ask me.

daHLOo
Автор

One of the advantages of ABS that you did not mention is that it can be polished easily with acetone. This is the only reason, apart from the higher temperature tolerance, that is relevant, and why abs is still popular in 3D printing world

BoardisasouL
Автор

This video actually explains things. Nice work!

pashenka
Автор

Great info as always Michael. I used ABS when I first started 3D Printing (DaVinci printer) but quickly moved to PLA. These days PLA is my go to material unless I need something specific, then I too generally use PETG or TPU. I haven't printed with ABS for a very long time.

spikekent
Автор

Thank you so much! This was the answer to all my ABS questions and probably the fastest I've ever obtain answers from yt

MRebReanu
Автор

Having all kinds of trouble with ABS, which I need because of the outdoor temperature on a motorcycle (camholder), I learned from your vid that my assumptions about cooling in the middle were right. So instead of prinring my design upright (9cm) I will try it printing horizontally (only 2cm up, 9 wide) and see it that will prevent the splitting which you so nicely demonstrated. Thx for the intel!

MichaelSchulzeVWJWB
Автор

Ambient temperature in your print room is a big factor. Great video, thank you

putrid.p
Автор

I like abs because it has very little stringing and slightly weaker layer adhesion. The weaker layer adhesion means you can make very good supports that come off easily while still being pretty close to the model. I use it to print very complex protein models that wouldn't be possible with pla where the support often turns into razor sharp spikes

destroyer
Автор

I only print ABS on my Wanhao Duplicator i3 after I first got it, and had a lot of trouble with the bigger more solid prints at start. To solve all my issues I build a cheap case and only used 2 cheap Ikea lac tables and bought 4 polyester sheets cut to size to fit between the legs and 3D printed some parts I designed and used some screws to connect it all. The front polyester sheet is only hold by magnets and can be removed by a set of handles, because a hinged door would always be in the way. It was a fun project and it really works.
I wanted to start with ABS to challenge myself and to give myself the idea that if I could master ABS I could print with any material.
I print directly on a piece of glass that is on the heated bed and spray some 3D Lac on it (Bit like hairspray but made for 3D printing) to make the print stick good when the bed is heated to 100 degrees. The ABS I work with works best for me at 250 degrees. When the print is done I teached myself not to open the door directly but just let the print cool slowly and most of the time it will just snap loose from the glass plate.
But personally I would advise most people to stick with PLA because you can get better results without all the trouble and even things like overhang will be handles a lot better when using PLA and lower temperatures will also be a lot better for your 3D printer. But if you want to make something that you might want to leave in your car like a holder for your phone or cupholder then you might want to consider ABS so your print won't deform when it gets hot.

HitBit_Gaming
Автор

Just a few things that were game changers for me as far as 3D printing with ABS is concerned: 1. ABS "juice". This really helps a great deal. I print directly on glass (CR-10S) and so far I have not had any chipping of the glass when I remove objects. 2. Mouse ears/pads for sharp corners. Size about 20 mm in diameter, 2 or 3 layers high. 3. Now that I had the bed adhesion sorted out, I still had layer separation to deal with. In my case I found the feed rate to be the culprit. On my machine I had to chase it up to 120% and, at long last, I could print a perfect print in ABS. 4. Also experiment with smaller layer heights etc. What really made sense to me is to set the print acceleration to a very small value, say, 10-20 mm/s/s. This ensures more heat around the corners, making for better bonding between the layers. I am quite able to print very well with my bed temperature around 85 degrees. And lastly, a cover for the printer can't hurt. At least it will keep out all those nasty fumes. :)

Spacekriek
join shbcf.ru