filmov
tv
Mastering Virtualization: Creating a Virtual Machine in Hyper-V and Installing Windows Server 2019

Показать описание
"Join us in this comprehensive tutorial where we delve into the world of virtualization and guide you through the process of creating a virtual machine in Hyper-V and installing Windows Server 2019. Whether you're a beginner or an experienced IT professional, this video will equip you with the knowledge to harness the power of virtualization. Get ready to unlock new possibilities and optimize your server infrastructure!"
In this video, we cover the following steps:
Enabling Hyper-V: Discover how to enable the Hyper-V feature on your #windows machine, granting you access to a powerful virtualization platform.
Creating a New Virtual Machine: Learn the ins and outs of setting up a virtual machine in Hyper-V, ensuring optimal hardware allocation and network configurations.
Mounting the Windows Server 2019 ISO: Walk through the process of mounting the Windows Server 2019 ISO file, enabling you to initiate the installation process within the virtual machine.
Installing Windows Server 2019: Follow along as we navigate through the Windows Server 2019 installation process within the virtual machine, customizing settings and optimizing the server environment.
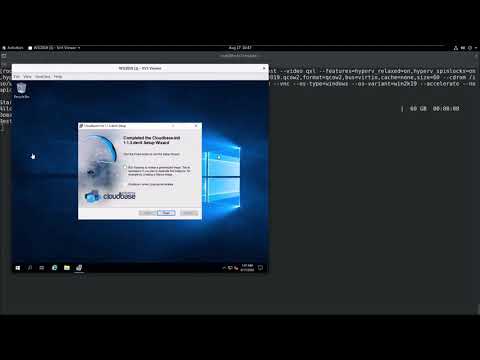
Post-Installation Setup: Discover the essential configurations and optimizations to ensure the smooth and efficient operation of your Windows Server 2019 virtual machine.
Conclusion and Next Steps: Recap the key steps covered in the tutorial and provide recommendations for further exploration and utilization of virtual machines in Hyper-V.
Now, follow these steps
To create a virtual machine (VM) in Hyper-V and install
Windows Server 2019:
1. Set up Hyper-V: Ensure that your computer meets the
system requirements for Hyper-V and that it's enabled on
your Windows operating system. You can enable Hyper-V by
going to "Control Panel" -- "Programs" -- "Turn Windows features on or off" --
Check the box for "Hyper-V" -- Click "OK" and restart your computer if prompted.
2. Open Hyper-V Manager: Once your computer restarts, open
the Hyper-V Manager. You can do this by searching for
"Hyper-V Manager" in the Start menu.
3. Create a new virtual machine: In the Hyper-V Manager,
click on "New" -- "Virtual Machine" in the right-hand pane.
4. Specify the virtual machine name and location: Provide a
name for your virtual machine and choose a location to store
the virtual machine files. Click "Next" to proceed.
5. Specify the generation: Choose the generation for your
virtual machine. For Windows Server 2019, either Generation 1
or Generation 2 can be selected. Generation 2 is recommended
for newer operating systems.
6. Assign memory: Set the amount of memory (RAM) you want to
allocate to the virtual machine. For Windows Server 2019,
a minimum of 4 GB is recommended, but you can allocate more
if your host system has sufficient resources. Click "Next"
to continue.
7. Configure networking: Choose the virtual switch or network
connection for your virtual machine to access the network.
Select the appropriate option and click "Next".
8. Create a virtual hard disk: Select "Create a virtual hard
disk" and click "Next".
9. Specify the disk size: Set the size of the virtual hard disk.
The recommended minimum size for Windows Server 2019 is 40 GB,
but you can allocate more if needed. Choose a location to store
the virtual hard disk and click "Next".
10. Install an operating system: Select "Install an operating system
from a bootable image file" and click "Browse" to locate the Windows
Server 2019 ISO file you have. Choose the ISO file and click "Next".
11. Complete the wizard: Review the summary of your virtual machine
settings and click "Finish" to create the virtual machine.
12. Install Windows Server 2019: In the Hyper-V Manager, right-click
on the newly created virtual machine and click "Connect" to launch
the VM's console.
13. Start the virtual machine: In the VM's console, click "Start"
to power on the virtual machine.
14. Follow the Windows Server 2019 installation process: The virtual
machine will boot from the Windows Server 2019 ISO file. Follow the
on-screen instructions to install Windows Server 2019 within the
virtual machine.
15. Complete the installation: Once the installation is complete,
Windows Server 2019 will be running inside the virtual machine.
Remember to ensure that your computer meets the system requirements
for both Hyper-V and Windows Server 2019 to ensure optimal performance.
Join us on this virtualization journey and empower yourself with the skills to create and deploy virtual machines running Windows Server 2019. Don't forget to subscribe to our channel for more insightful tutorials and updates on the latest technologies. Get ready to revolutionize your server infrastructure with virtualization mastery!
In this video, we cover the following steps:
Enabling Hyper-V: Discover how to enable the Hyper-V feature on your #windows machine, granting you access to a powerful virtualization platform.
Creating a New Virtual Machine: Learn the ins and outs of setting up a virtual machine in Hyper-V, ensuring optimal hardware allocation and network configurations.
Mounting the Windows Server 2019 ISO: Walk through the process of mounting the Windows Server 2019 ISO file, enabling you to initiate the installation process within the virtual machine.
Installing Windows Server 2019: Follow along as we navigate through the Windows Server 2019 installation process within the virtual machine, customizing settings and optimizing the server environment.
Post-Installation Setup: Discover the essential configurations and optimizations to ensure the smooth and efficient operation of your Windows Server 2019 virtual machine.
Conclusion and Next Steps: Recap the key steps covered in the tutorial and provide recommendations for further exploration and utilization of virtual machines in Hyper-V.
Now, follow these steps
To create a virtual machine (VM) in Hyper-V and install
Windows Server 2019:
1. Set up Hyper-V: Ensure that your computer meets the
system requirements for Hyper-V and that it's enabled on
your Windows operating system. You can enable Hyper-V by
going to "Control Panel" -- "Programs" -- "Turn Windows features on or off" --
Check the box for "Hyper-V" -- Click "OK" and restart your computer if prompted.
2. Open Hyper-V Manager: Once your computer restarts, open
the Hyper-V Manager. You can do this by searching for
"Hyper-V Manager" in the Start menu.
3. Create a new virtual machine: In the Hyper-V Manager,
click on "New" -- "Virtual Machine" in the right-hand pane.
4. Specify the virtual machine name and location: Provide a
name for your virtual machine and choose a location to store
the virtual machine files. Click "Next" to proceed.
5. Specify the generation: Choose the generation for your
virtual machine. For Windows Server 2019, either Generation 1
or Generation 2 can be selected. Generation 2 is recommended
for newer operating systems.
6. Assign memory: Set the amount of memory (RAM) you want to
allocate to the virtual machine. For Windows Server 2019,
a minimum of 4 GB is recommended, but you can allocate more
if your host system has sufficient resources. Click "Next"
to continue.
7. Configure networking: Choose the virtual switch or network
connection for your virtual machine to access the network.
Select the appropriate option and click "Next".
8. Create a virtual hard disk: Select "Create a virtual hard
disk" and click "Next".
9. Specify the disk size: Set the size of the virtual hard disk.
The recommended minimum size for Windows Server 2019 is 40 GB,
but you can allocate more if needed. Choose a location to store
the virtual hard disk and click "Next".
10. Install an operating system: Select "Install an operating system
from a bootable image file" and click "Browse" to locate the Windows
Server 2019 ISO file you have. Choose the ISO file and click "Next".
11. Complete the wizard: Review the summary of your virtual machine
settings and click "Finish" to create the virtual machine.
12. Install Windows Server 2019: In the Hyper-V Manager, right-click
on the newly created virtual machine and click "Connect" to launch
the VM's console.
13. Start the virtual machine: In the VM's console, click "Start"
to power on the virtual machine.
14. Follow the Windows Server 2019 installation process: The virtual
machine will boot from the Windows Server 2019 ISO file. Follow the
on-screen instructions to install Windows Server 2019 within the
virtual machine.
15. Complete the installation: Once the installation is complete,
Windows Server 2019 will be running inside the virtual machine.
Remember to ensure that your computer meets the system requirements
for both Hyper-V and Windows Server 2019 to ensure optimal performance.
Join us on this virtualization journey and empower yourself with the skills to create and deploy virtual machines running Windows Server 2019. Don't forget to subscribe to our channel for more insightful tutorials and updates on the latest technologies. Get ready to revolutionize your server infrastructure with virtualization mastery!
 0:05:56
 0:05:27
 0:11:50
 0:07:06
 0:20:48
 0:17:50
 0:03:08
 0:36:23
 0:08:33
 0:29:31
 0:11:11
 0:43:27
 0:53:30
 0:01:03
 0:23:22
 0:03:50
 0:23:42
 0:10:53
 0:49:10
 0:23:25
 1:18:39
 0:37:31
 0:17:21
 0:24:27