filmov
tv
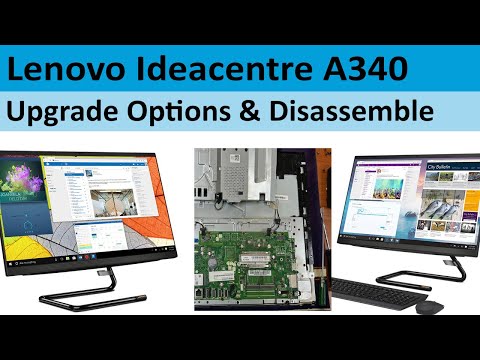
How To Disassemble Lenovo Ideacentre A340-24IWL AIO Computer And Upgrade NV1 SSD?

Показать описание
In this video, we're going to show you how to disassemble and upgrade the NV1 SSD on the Lenovo Ideacentre A340-24IWL AIO computer.
This computer is a great option for students and small business owners who need a powerful computer that's easy to keep in perfect condition. We'll show you how to disassemble the computer and upgrade the NV1 SSD, so you can keep your computer running at its best!
In case you have another question regard Lenovo AIO computer, feel free to ask in the comments.
#lenovo #ideacenter .
====================================================================
#bilalkhalid #hp #canon #epson
Continue the Conversation:
About Bilal:
I am an IT professional who graduated with a Bachelor of Science in Information Technology. I am keenly interested in helping people troubleshoot and fix common issues with their printers and computers.
But that's not all - I am also a solo traveler and love exploring new destinations, cultures, and experiences. Through my Travel Vlogs, I take my viewers along on my adventures, sharing tips and insights into some of the most beautiful and unique destinations worldwide.
My channel has something for everyone. I hope my content inspires and educates you, and I look forward to sharing my knowledge and experiences with you.
For Business Enquires:
Disclaimer:
All content in this video is the original work of the creator and is protected by copyright. Unauthorized reproduction, copying, or distribution of this material on any platform is strictly prohibited.
The techniques demonstrated are based on my personal experience with printer repairs. While I strive to provide accurate and helpful guidance, I am not responsible for any damage or loss that may occur to your device as a result of following these methods. Viewer discretion is advised, and professional consultation is recommended for any equipment issues. Thank you for your understanding and support.
© Bilal's Workshop - Technologist and Vlogger, 2025. All rights reserved.
 0:06:31
How To Disassemble Lenovo Ideacentre A340-24IWL AIO Computer And Upgrade NV1 SSD?
 0:12:07
Lenovo IdeaCentre AIO 3 24ADA6 Teardown and NVMe Install
 0:13:38
Lenovo All In One Ideacentre 300-23ISU Disassembly & How To Clean Heatsink and Thermal Paste
 0:09:02
Disassembly Lenovo AIO 330-20IGM IdeaCentre
 0:01:52
Upgrade HDD SSD 480GB KINGSTON Lenovo AIO 520 22IKU Ideacentre
 0:07:39
How to Open Lenovo IdeaCentre All In One F0D
 0:14:58
Lenovo IdeaCentre AIO 3 24 Break Down Disassemble
 0:02:20
Lenovo 10110 C540 all in one cover removal and upgrade
![[4K] A look](https://i.ytimg.com/vi/Zm0jgtlGqEM/hqdefault.jpg) 0:04:45
0:04:45
[4K] A look inside the Lenovo Q190 PC (incl. HDD and RAM upgrade)
 0:01:01
How to open Lenovo IdeaCentre AIO 310
 0:04:28
✔️ Cómo desmontar Lenovo All In One 520-22IKU paso a paso
 0:00:16
Upgrade SSD 1TB Lenovo IdeaCEntre AIO 3 24IRH9
 0:05:18
Lenovo IdeaCentre 510A-15ICB Disassembly Quick Look Inside
 1:12:06
Lenovo IdeaCentre AIO 510-23ISH Disassembly RAM SSD Hard Drive Upgrade Repair LCD Screen Replacement
 0:07:21
Lenovo ideacentre AIO 510S-23ISU Disassembly RAM SSD Upgrade Repair
 0:19:21
Lenovo IdeaCentre Gaming 5: Ryzen 5 5600G+Nvidia GTX 1660S. Inside look, Build Quality, Disassembly.
 0:02:22
All In One Lenovo IdeaCentre B300 | lenovo ideacentre b300 disassembly
 0:09:14
Lenovo Ideacentre All-in-One Disassembly - Jody Bruchon
 0:04:56
Lenovo AIO (All In One) V50a - Disassembly and Upgrade Option
 0:05:38
Disassembly Lenovo AIO 520
 0:00:17
Lenovo Legion Fan Clean
 0:04:30
How to disassemble Lenovo ideacentre AIO 300 F0BX00J4JP
 0:10:47
Lenovo IdeaCentre 5 14IMB05 Disassembly RAM SSD Hard Drive Upgrade Replacement Repair Quick Look
 0:04:08
Lenovo Idea center B320 All in One System Dis Assembly
Комментарии