filmov
tv
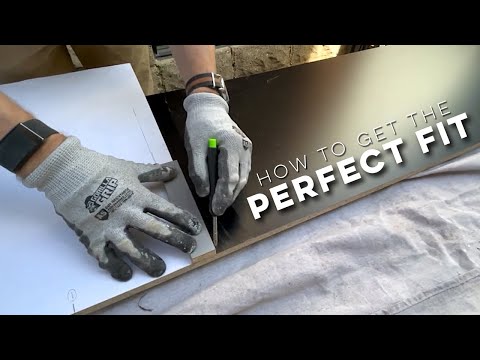
How to Make Pieces Fit Perfectly! (Measure and Scribe at the Same Time)

Показать описание
How to Make Pieces Fit Perfectly! (Measure and Scribe at the Same Time) We'll show you a cool trick to help make all your cuts fit tighter and look more professional!
Anyone who works (or lives) in old homes knows how frustrating it can be to try and fit a perfectly square piece into a corner that is anything but- and adjusting your piece to fit the space can be equally infuriating. After all, how do you mark and measure a piece that doesn't have any right angles?
Luckily, if you've got a few basic tools hanging around you can both measure AND scribe your piece to fit perfectly AT THE SAME TIME. Oh, and the best part? Its so easy that you'll be able to do it yourself in no time.
From floating shelves to countertops, even stair treads and risers- this technique can be used to help you make virtually anything fit better. Give it a try, and be sure to let us know how it goes!
Looking for more 'infotainment' from the Refresh guys? Follow the links below for more DIY-friendly home renovation tips, as well as tons of satisfying, easy to watch videos on our other social media pages!
 0:04:49
How to Make Pieces Fit Perfectly! (Measure and Scribe at the Same Time)
 0:17:18
3D Print Parts that Fit with FREE Conversion Calculator
 0:05:54
Plastic Parts Design: What Is Snap Fit?
 0:04:38
Fast Fusion 360 - Snap Fit Parts for 3D Printing
 0:08:58
Metal Magic: Making Parts Fit
 0:00:57
Even if a pieces looks like it will fit don’t NOT mean it will. #puzzles
 0:07:09
Combine 3D Printed Parts With Snap Fit Design
 0:00:39
Making pieces fit DIY
 0:00:15
Puzzle Clothing: Where Style and Versatility Fit Together. @Quizify_RiddleRush #brainteaser
 0:02:38
Kaylin Marcotte '12: Making the Pieces Fit
 0:03:43
How to shrink fit two pieces of steel
 0:00:42
How make pieces fit perfectly ? Cool trick For Aligning boards and Marbel in corner #shorts
 0:15:40
Parts that fit odd shaped objects - 3D design for 3D printing pt4
 0:09:29
Make PVC Parts FIT
 0:02:37
Soma Pipedream Too - How many non-cubic ways do these pieces fit together?
 0:06:47
What Happens to Perfectly Fit Pieces of Steel In a Vacuum?
 0:00:16
How do we make the pieces fit? #shorts
 0:21:49
Making the controls fit the old truck - 1954 Ford F600 Car Hauler Build part 19
 0:00:58
Schism but the pieces fit
 0:03:19
tinkercad beginner guide : make your parts fit when PLA shrinks
 0:05:05
The Only Way to Make Life's Puzzle Pieces Fit Together
 0:06:44
How do all your pieces fit together?
 0:12:06
Creating sloppy parts to ensure perfect fit - 3D design for 3D printing
 0:11:16
What parts fit your mountain bike? (I won't tell you to just Google it)
Комментарии