filmov
tv
How to Convert Arduino C+ + Ultrasonic Sensor Code to Python for Raspberry Pi

Показать описание
A detailed guide on translating Arduino C+ + code for an ultrasonic sensor to Python for use with a Raspberry Pi, with practical examples and explanations.
---
Visit these links for original content and any more details, such as alternate solutions, latest updates/developments on topic, comments, revision history etc. For example, the original title of the Question was: C+ + to Python Code (Arduino to Raspberry Pi) - Using Ultrasonic
If anything seems off to you, please feel free to write me at vlogize [AT] gmail [DOT] com.
---
Converting Arduino C+ + Ultrasonic Sensor Code to Python for Raspberry Pi
When transitioning from working with Arduino to Raspberry Pi, especially in projects involving sensors like the ultrasonic HC-SR04, you might find yourself needing to convert your existing C+ + code into Python. This can be particularly challenging if you're unfamiliar with Python syntax or the specifics of how the Raspberry Pi interacts with hardware. In this guide, we will break down the problem of translating Arduino C+ + code for an ultrasonic sensor into clear and understandable Python code suitable for Raspberry Pi.
The Challenge: Understanding the Original C+ + Code
Before we delve into the Python code, let's take a closer look at the original Arduino code. This code is designed to measure distance using an HC-SR04 ultrasonic sensor and control two LEDs based on the distance calculated.
Here’s a summary of the key sections of the original C+ + code:
Setup Phase:
Initializes the trigger and echo pins.
Sets LED pins for output.
Begins serial communication for monitoring distance.
Main Loop:
Sends a pulse to the ultrasonic sensor.
Measures the time taken for the pulse to return.
Calculates distance based on elapsed time.
Controls LEDs based on whether the measured distance is greater or less than 10 cm.
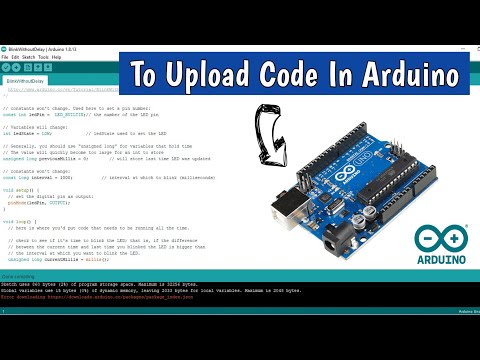
Original C+ + Code Example
[[See Video to Reveal this Text or Code Snippet]]
The Solution: Python Code for Raspberry Pi
Now, let’s transform the Arduino C+ + code into Python suitable for Raspberry Pi using the RPi.GPIO library, which provides GPIO controls similar to what was done in Arduino.
Overview of the Python Code
The Python version achieves the same functionality but with different syntax and methods specific to Python. Here’s how the components break down:
Import Libraries:
Import the RPi.GPIO library for GPIO pin control and the time module for handling timings.
Set Up GPIO Pins:
Set the GPIO mode and define the trigger and echo pins used for the ultrasonic sensor.
Definition of the Distance Function:
Captures trigger pulses and calculates the distance based on the time for the pulse to return.
Main Loop:
Continuously Measure the distance and print the result while monitoring for an interrupt to stop the measurement.
Python Code Example
[[See Video to Reveal this Text or Code Snippet]]
Conclusion
Transitioning from Arduino to Raspberry Pi can seem daunting, especially when it comes to converting code from C+ + to Python. However, by breaking down the problem into clear steps and understanding the functionality behind each line of code, it becomes manageable. The provided Python code replicates the functionality of the original C+ + code and takes advantage of the capabilities of the Raspberry Pi.
Whether you're a beginner or an experienced developer, understanding these conversions can significantly enhance your projects using different microcontrollers. Happy coding!
---
Visit these links for original content and any more details, such as alternate solutions, latest updates/developments on topic, comments, revision history etc. For example, the original title of the Question was: C+ + to Python Code (Arduino to Raspberry Pi) - Using Ultrasonic
If anything seems off to you, please feel free to write me at vlogize [AT] gmail [DOT] com.
---
Converting Arduino C+ + Ultrasonic Sensor Code to Python for Raspberry Pi
When transitioning from working with Arduino to Raspberry Pi, especially in projects involving sensors like the ultrasonic HC-SR04, you might find yourself needing to convert your existing C+ + code into Python. This can be particularly challenging if you're unfamiliar with Python syntax or the specifics of how the Raspberry Pi interacts with hardware. In this guide, we will break down the problem of translating Arduino C+ + code for an ultrasonic sensor into clear and understandable Python code suitable for Raspberry Pi.
The Challenge: Understanding the Original C+ + Code
Before we delve into the Python code, let's take a closer look at the original Arduino code. This code is designed to measure distance using an HC-SR04 ultrasonic sensor and control two LEDs based on the distance calculated.
Here’s a summary of the key sections of the original C+ + code:
Setup Phase:
Initializes the trigger and echo pins.
Sets LED pins for output.
Begins serial communication for monitoring distance.
Main Loop:
Sends a pulse to the ultrasonic sensor.
Measures the time taken for the pulse to return.
Calculates distance based on elapsed time.
Controls LEDs based on whether the measured distance is greater or less than 10 cm.
Original C+ + Code Example
[[See Video to Reveal this Text or Code Snippet]]
The Solution: Python Code for Raspberry Pi
Now, let’s transform the Arduino C+ + code into Python suitable for Raspberry Pi using the RPi.GPIO library, which provides GPIO controls similar to what was done in Arduino.
Overview of the Python Code
The Python version achieves the same functionality but with different syntax and methods specific to Python. Here’s how the components break down:
Import Libraries:
Import the RPi.GPIO library for GPIO pin control and the time module for handling timings.
Set Up GPIO Pins:
Set the GPIO mode and define the trigger and echo pins used for the ultrasonic sensor.
Definition of the Distance Function:
Captures trigger pulses and calculates the distance based on the time for the pulse to return.
Main Loop:
Continuously Measure the distance and print the result while monitoring for an interrupt to stop the measurement.
Python Code Example
[[See Video to Reveal this Text or Code Snippet]]
Conclusion
Transitioning from Arduino to Raspberry Pi can seem daunting, especially when it comes to converting code from C+ + to Python. However, by breaking down the problem into clear steps and understanding the functionality behind each line of code, it becomes manageable. The provided Python code replicates the functionality of the original C+ + code and takes advantage of the capabilities of the Raspberry Pi.
Whether you're a beginner or an experienced developer, understanding these conversions can significantly enhance your projects using different microcontrollers. Happy coding!
 0:00:21
 0:00:47
 0:01:48
 0:02:22
 0:02:15
 0:00:14
 0:01:01
 0:01:33
 0:37:13
 0:00:17
 0:00:19
 0:09:26
 0:11:03
 0:00:59
 0:00:45
 0:00:19
 0:00:20
 0:02:33
 0:01:01
 0:00:20
 0:00:18
 0:00:21
 0:00:17
 0:00:39