filmov
tv
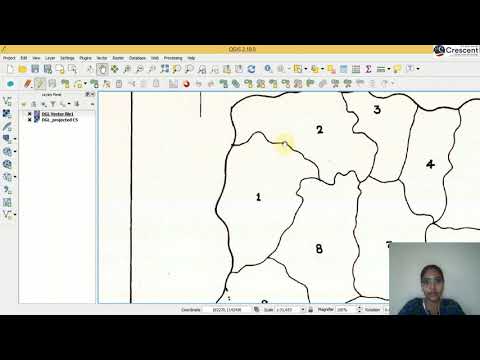
GIS Tutorial 3 : DIGITISATION OF SCANNED MAP OR IMAGE
Показать описание
Task: Digitization of Scanned Map or Raster Imageries
Steps:
1. Open ArcMap
2. Open Your Raster Imageries.
3. Click on Catalog from Toolbar menu.
4. Go to the file destination & create folder where you want to save your data.
5. Right click on this folder, go to new and create the Personal Geodatabase, give the file Name as per the requirement.
6. Then, Right Click on Personal Geodatabase which you created and go to new and click on Feature dataset and give the name.
7. Then, Right Click on Feature dataset which you created and go to new and click on Feature Class.
After click on Feature Class a new dialogue box open:
a). Name: as you Require
b).Alias: Full Name(Description Type)
c).Type of Features Stored in this Class: As per your Requirement (like Point, Line, and Polygon)
Click next button, another Dialogue Box you can see:
a). Add Field name like Name, Area, Registration number etc. as per your Data which will you digitise.
b).Click on Data Type, then Choose a data type from drag & drop button.
c). Adjust Field Properties as per the data type you select.
Click on finish button.
8. Click on Editor from menu bar and click on start Editing.
9. Create the features in the form of Point, Line and Polygon.
10. After extracting the features go to editor and click on save edits.
11. Save your file .MXD for next Task.
 0:13:06
GIS Tutorial 3 : DIGITISATION OF SCANNED MAP OR IMAGE
 0:07:50
GIS 3.6.3 Digitize Boundary
 0:36:45
GIS EXERCISE 3| CREATION OF SHAPEFILE AND ONSCREEN DIGITISATION
 0:17:24
GIS(QGIS) Georeferencing and Digitizing (Part-1: Georeferencing)
 0:09:55
GIS Tutorial 13- Map Digitizing using ArcMap
 0:10:38
Digitization in QGIS || Digitization in point, line and Polygon in QGIS || IT GIS || QGIS
 0:07:21
How to digitize a map in QGIS Software
 0:16:23
Master the Digitizing in 15 Minutes | ArcGIS In-Depth Tutorial
 0:00:55
How to open Environment settings in ArcGIS 10.8 #qgis3 #gis #map #arcmap #googleearth #create
 0:10:00
Lecture 3 - DIGITIZATION IN ARC GIS Part -2 | ARC GIS TUTORIAL | #ARCGIS #DIGITIZATION
 0:18:02
GIS MANUAL DIGITIZING
 0:04:18
How To Create Point, Line, and Polygon Feature in Arc GIS? | Creating Shapefile | Digitization |
 0:10:00
How to digitize an image with the help of Open Source GIS Software Part 3
 0:00:56
How to Add Field in ArcGIS 10 8 #qgis3 #gis #map #arcmap #googleearth #arcgispro
 0:15:20
Digitizing and Creating a Thematic Map - SuperMap GIS
 0:10:01
How to digitize an image with the help of Open Source GIS Software Part 4
 0:00:24
Line Shapes - important GIS features! #gis #geography #mapping #qgis #arcgis #cartography
 0:20:49
Creating Features by Digitizing in ArcGIS Pro
 0:00:49
How to Convert Features To Point in ArcGIS 10.8 #qgis3 #gis #map #arcmap #googleearth #arcgispro
 0:10:41
ARC-GIS Tutorial#Auto Digitization/Auto Conversion of raster to vector#Ashwani Sharma#Geology
 0:02:22
SEC paper GIS Unit 3 Digitization of Physical Feature using Line Symbol
 0:02:11
GIS tutorial 3 : How to plot a contour using GIS.
 0:03:05
GIS For Beginners: Digitizing using Quantum QGIS
 0:21:35
GIS Full Package Tutorials For Beginners | 14.Digitizing
Комментарии