filmov
tv
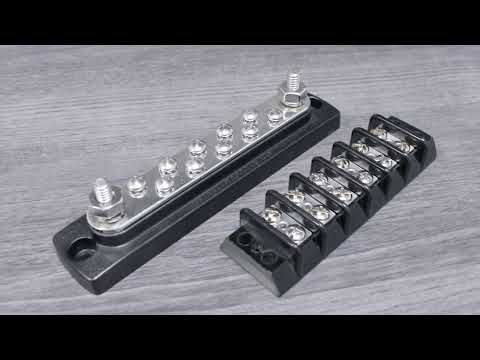
DIY 24 Way Bus Bar installation. Battery 2.0

Показать описание
From the off-cuts of the original copper busbar, I'm building two heavy duty 12 way busbars with M8 studs. It takes a loooong time to prepare, drill and tap all holes into this 10mm copper. The result looks great though and we're making good progress...
Please subscribe and join me on my journey of the Off-Grid Garage!
The 'buy me a beer 🍻' link is here (on the website, scroll all the way down):
You can also click on the Thanks button under the video to support the channel. Thank you, if you have already!
T-Shirts, caps, mugs and more in our merch-shop:
***** These are the batteries you are looking for *****
Get 5% off when buying Bluetti all-in-one Power Storage Products!
Take a live sneak peak at the Off-Grid-Garage in the Victron VRM World:
My other YouTube channels:
 0:12:39
DIY 24 Way Bus Bar installation. Battery 2.0
 0:06:14
Busbar Comparison Guide
 0:28:12
All these different busbars... and why they don't matter!
 0:12:05
Make the best busbars yourself! DIY custom copper busbars easy way.
 0:00:53
The Difference Between Bus Bars and Terminal Blocks
 0:01:26
12-48VDC 4 × M10 Studs Heavy Duty Bus Bar Box - How to Wire a Busbar
 0:13:21
Easiest 24v DIY LiFePO4 Battery build - LEV60 busbars - PCBway
 0:00:44
Maximize Your Power Distribution with the 250A Busbar - Streamline Your Electrical System
 0:29:26
More Flexible Bus Bars! - How to build a 48v Lifepo4 battery (Ep. 24)
 0:03:20
How To Make A Bus Bar For A DIY Lithium Battery
 0:12:45
SUPER EASY Boat Wiring Electrical Diagrams, Fuse blocks, busbars, marine grade
 0:03:08
DIY Copper LiFePO4 Busbars
 0:19:33
Beginners Guide Boat Wiring From Scratch | Blue Sea Systems Dual Battery ACR Install
 0:03:11
Can Am Defender Light Bar Wiring. The Easiest Way Using Factory Wires!
 0:06:21
DIY Busbars 💡⚡
 0:05:26
How to Use Polaris Pulse Bar Quick Connectors
 0:13:55
10 Common Mistakes DIYers Make In Circuit Breaker Boxes
 0:17:11
DIY Bus Bar with Distribution Box for off Grid Solar, RV , Bus Conversion, Skoolie or Van
 0:00:15
What Happens When You Connect Positive And Negative On A Battery With A Wire
 0:11:54
Amazon Switch Panel - HOW TO WIRE INTO YOUR BOAT
 0:24:14
Using solid busbars instead of cables to connect battery modules. I should have gone with 16mm bars!
 0:01:02
How to Wire a Fuse Block - WUPP Upgraded Marine Boat 6-Way Fuse Block is Perfect, Make Wiring Clean
 0:02:26
What is the Best and Safest Way to Connect Lithium Batteries in Parallel for RVs and Boats or Homes?
 0:06:58
DIY Headway aluminum bus bar plates v2
Комментарии