filmov
tv
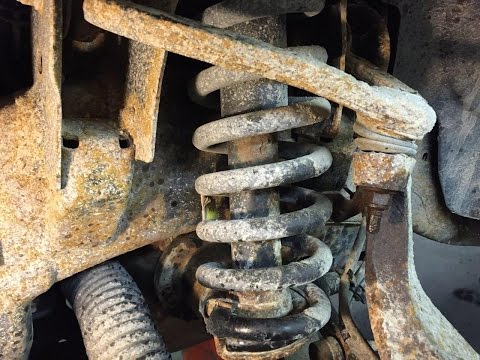
2004-2014 F-150 Front Strut Replacement

Показать описание
In this video I show you how to replace broken front springs and struts on your 2004 to 2014 F-150. Broken springs are a common problem with these trucks. I used a set of strut/spring assemblies by Monroe because the truck that I was working on still had the originals on it and it had over 120,000 miles on them. If the mileage on your truck is lower you can replace just the springs but the strut must be disassembled, the new springs installed, then reassembled. Replacing the broken springs with a new strut assembly is much quicker. Here are some links to the parts and the tools that I used:
Monroe Quick Struts:
2014's are left and right side specific and 2WD/4WD specific.
Help support the channel by using my Amazon links.
As an Amazon Associate I earn from qualifying purchases and your cost is exactly the same.
Disclaimer:
The information, demonstration and any content contained in this video is for informational purposes only. The user Repair Geek makes no warranty, express or implied, regarding the effectiveness or safety of the contents of this video. In no way should the contents of the video, including the tools used, be repeated or tried by anyone. Viewers should only seek the help of a trained professional located at a licensed auto repair shop for any fix, modification, alteration, or any change to their vehicle. Repair Geek shall not be liable for any injury, damage, or loss to any person or property that may result from use of the tools, equipment, or any content contained in this video. In addition, there is no way to guarantee that the video is not altered or modified or is not in the final form submitted by Repair Geek and therefore, Repair Geek does not warrant that the video is unaltered or not modified. The links on this video to products are for informational purposes only and in no way are an endorsement of the safety or effectiveness of the particular product. Viewers understand that anything contained in this video or linked to or from this video is the sole responsibility of the viewer and in no way provides an express or implied warranty as to the safety or effectiveness of any linked tool, product, or video. Therefore, viewer agrees to release, waive, and discharge Repair Geek or anyone affiliated with Repair Geek, from any and all liability, claims, demands, actions, and causes of action whatsoever arising out of or related to any loss, damage, or injury, including death, that may be sustained by the viewer, or to any property belonging to viewer, regardless of whether the loss is linked to the use of the contents of this video, or otherwise and regardless of whether such liability arises in tort, contract, strict liability, or otherwise, to the fullest extent allowed by law.
 0:11:40
2004-2014 F-150 Front Strut Replacement
 0:13:35
2004-2014 Ford F-150 Front Strut Replacement Procedure
 0:11:02
How To Replace Front Strut and Spring 04-08 Ford F150
 0:23:35
How to Replace Front Strut Assembly 09-14 Ford F-150
 0:16:24
How to Replace Front Strut Assembly 2009-2014 Ford F-150
 0:06:55
How To: Replace Front Strut Assemblies on a 2004-2013 Ford F-150
 0:25:03
09-13 F150 Front Suspension Replacement
 0:05:39
How to Replace Front Struts 2004-08 Ford F150
 0:09:14
How to Replace Front Struts 2009-13 Ford F150
 0:03:13
How To Remove F150 Front Strut 2004 - 2010
 0:04:58
Ford 150 Strut Replacement 2004-2008
 0:38:39
2014 2020 Ford f150 Front Strut:Shock Absorber replacement
 0:02:56
2014 F150 Front Shock Replacement DIY
 0:12:33
F150 STRUT REPLACEMENT
 0:11:22
04-08 F150 - Change Front Shocks/Struts Quick Edition
 0:07:24
How to replace the Struts 2009-2014 Ford F150 🚗
 0:34:19
Ford F150 Front Strut and Rear Shock Replacement Falcon Shocks Leveling Kit Install
 0:04:24
05 Ford F150 Front strut replacement
 0:24:47
2004-2014 F150 MotoFab 3' Front/2' Rear Leveling Kit 2WD/4WD Review & Install
 0:07:49
How to Replace Front Struts on a 2006 Ford F-150
 0:08:27
2009-2020 F150 4WD Bilstein 5100 Adjustable Leveling Shock Kit Install
 0:12:37
Ford F150 Front Shock Replacement
 0:19:32
How to Replace Front Shock Absorbers 2009-2014 Ford F-150
 0:10:32
07 Harley Davidson F150 front Strut shock assembly replacement...
Комментарии