filmov
tv
How To Install a DVD Player In Your Vehicle -EricTheCarGuy
Показать описание
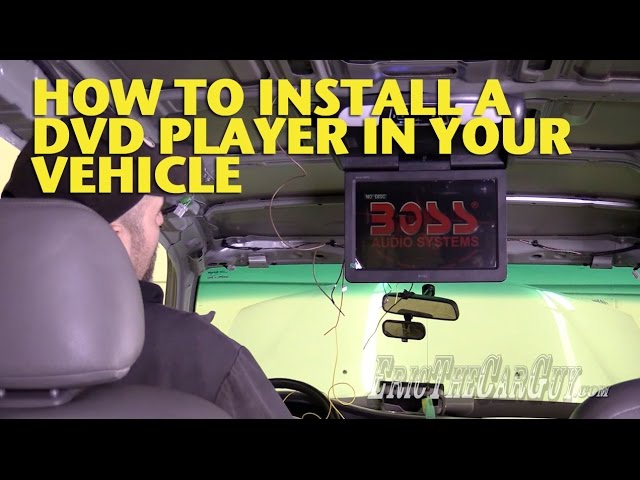
CarID was kind enough to send me a DVD player from Boss to install into my 2001 Honda Odyssey. Originally, I had thought it would be a pretty straightforward installation. It turned out to be a bit more than that. The headliner had to come out several times to make sure that the right measurements were made for the mounting bracket. The mounting bracket also needed a custom installation in order to make it work. Not to mention getting 'creative' with the electrical hook ups. Truth is, this is typical with installing aftermarket accessories like this. You need to be prepared for anything.
In this video I walk you though the steps I took to overcome these challenges. Hopefully it will help you if you are also wanting to install a DVD player of this type.
Camera Brian Kast
Thanks for watching.
Tools
Related Videos
Useful articles.
Engine overheat
No start problems
Idle issues
Performance issues
Diagnosing Noises
Diagnosing Vibrations
Electrical Problems
Brake Issues
Transmission issues
HVAC problems
Leaks
MPG
Social Network Links
Stay Dirty
ETCG
Due to factors beyond the control of EricTheCarGuy, it cannot guarantee against unauthorized modifications of this information, or improper use of this information. EricTheCarGuy assumes no liability for property damage or injury incurred as a result of any of the information contained in this video. EricTheCarGuy recommends safe practices when working with power tools, automotive lifts, lifting tools, jack stands, electrical equipment, blunt instruments, chemicals, lubricants, or any other tools or equipment seen or implied in this video. Due to factors beyond the control of EricTheCarGuy, no information contained in this video shall create any express or implied warranty or guarantee of any particular result. Any injury, damage or loss that may result from improper use of these tools, equipment, or the information contained in this video is the sole responsibility of the user and not EricTheCarGuy.
 0:05:06
How to Install a program from CD or DVD in Windows 10
 0:41:50
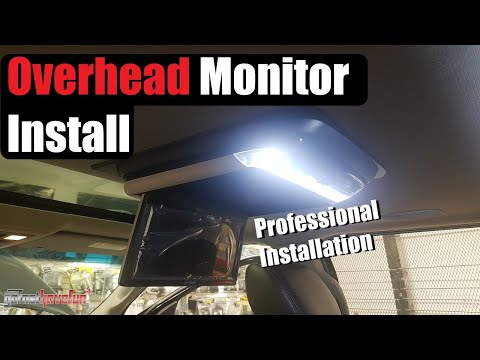
How To Install a DVD Player In Your Vehicle -EricTheCarGuy
 0:13:42
How To Install Windows 10 With DVD
 0:04:28
📀 How to Install A Program From A CD or DVD in Windows 📀
 0:05:03
How to Install or Uninstall your CD/DVD drive on your PC | Farhan Mandal | Puppeteer
 0:01:55
How To Connect Your DVD Player To a TV - Fast and Easy Setup in Under 2 Minutes
 0:05:59
How to Install Your DVD Drive (Part 4)
 0:04:23
HDD + SSD: Replacing Your DVD/Optical Drive With an SSD or HDD
 0:07:40
Free Windows 10 ⚡Download - Install Windows 10 For Free 🔥 2024 [ OFFICIAL ] Stop Using FAKE Version...
 0:00:36
CD/DVD Drive Is Not Detected in Windows 10
 0:01:36
Install DVD Drive On PC To Get More Out Of It! Here's Proof.
 0:06:22
Windows 10 Format And Clean Install From CD/DVD [Tutorial]
 0:04:51
How to install Ms office 2010 from dvd
 0:04:59
How to install part part dvd disc game for pc | (2020)
 0:08:06
How To Replace A DVD Drive : step by step guide
 0:14:53
How to install window 10 full setup activated through usb/CD/DVD || by Nomi RajpuT in Urdu/Hindi
 0:07:56
How To Install Windows 10 Using DVD | Windows 10 Installation In PC | Step By Step
 0:01:09
How to Install a CD ROM or DVD Drive | Sata dvd writer | Install a CD/DVD Drive
 0:02:18
Windows 10 Bootable DVD installer How to Guide 2022
 0:05:34
How to Install LG Slim Portable DVD Writer
 0:00:31
DVD CD-ROM drives not showing in device manager fix | DVD drive not listed in device manager
 0:05:27
How to Set BIOS to Boot from DVD on hp laptop to install Windows 10 , 11 / UEFI BIOS
 0:08:46
Overhead Screen / Monitor DVD player Installation (Alpine PKGRSE2) | AnthonyJ350
 0:02:22
How to install a DVD Drive on Dell Optiplex 7010 PC in 2022
Комментарии