filmov
tv
Ceramic tile hollow drum repair process

Показать описание
Tile hollow repair process:
1. Detect hollow area
Percussion test: Use a small hammer or hard object to tap the surface of the tile and listen to the sound to identify the hollow area. The sound of the hollow area is relatively hollow and dull.
Mark the hollow: Use chalk or a marker to mark the hollow position for subsequent repair operations.
Determine the scope of repair: Determine the number of tiles that need to be repaired based on the area and location of the hollow. If the hollow area exceeds 30% of the tile area, it is recommended to replace the entire tile.
2. Prepare repair tools and materials
Tools: small hammer, electric drill (with special drill bit for tiles), vacuum cleaner, spatula, grouting device, rubber hammer, etc.
Materials:
Tile repair glue (or epoxy glue)
Tile grout
Waterproof coating (optional)
Clean water or alcohol (for cleaning)
3. Repair method
Grouting repair method (for slight hollowing)
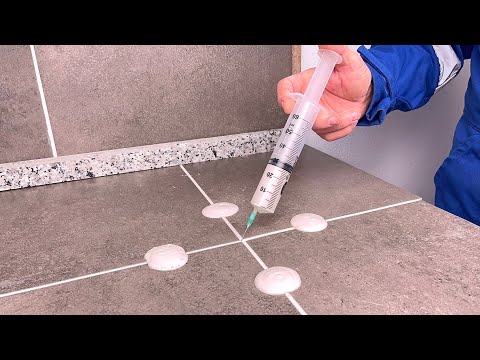
Drilling grouting:
Drilling: Drill 2-3 small holes (6-8 mm in diameter) at the corners or center of the hollow tile with an electric drill. Be careful not to damage the tile surface when drilling.
Cleaning the holes: Use a vacuum cleaner to clean the dust and debris in the holes.
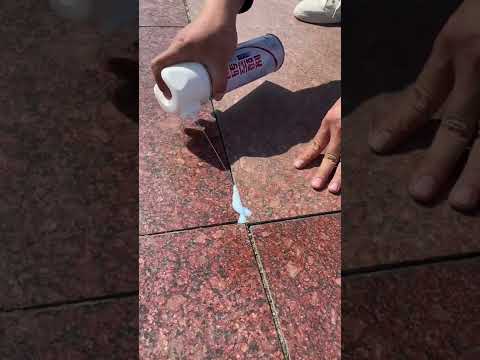
Injecting repair glue: Use a grouting device to evenly inject the repair glue into the hole until the repair glue fills the hollow area.
Tap for even distribution: Use a rubber hammer to tap the tile surface to help the repair glue be evenly distributed.
Sealing treatment:
Wait for the repair glue to dry completely (usually takes 24 hours), and seal the drilled hole with tile grout.
1. Detect hollow area
Percussion test: Use a small hammer or hard object to tap the surface of the tile and listen to the sound to identify the hollow area. The sound of the hollow area is relatively hollow and dull.
Mark the hollow: Use chalk or a marker to mark the hollow position for subsequent repair operations.
Determine the scope of repair: Determine the number of tiles that need to be repaired based on the area and location of the hollow. If the hollow area exceeds 30% of the tile area, it is recommended to replace the entire tile.
2. Prepare repair tools and materials
Tools: small hammer, electric drill (with special drill bit for tiles), vacuum cleaner, spatula, grouting device, rubber hammer, etc.
Materials:
Tile repair glue (or epoxy glue)
Tile grout
Waterproof coating (optional)
Clean water or alcohol (for cleaning)
3. Repair method
Grouting repair method (for slight hollowing)
Drilling grouting:
Drilling: Drill 2-3 small holes (6-8 mm in diameter) at the corners or center of the hollow tile with an electric drill. Be careful not to damage the tile surface when drilling.
Cleaning the holes: Use a vacuum cleaner to clean the dust and debris in the holes.
Injecting repair glue: Use a grouting device to evenly inject the repair glue into the hole until the repair glue fills the hollow area.
Tap for even distribution: Use a rubber hammer to tap the tile surface to help the repair glue be evenly distributed.
Sealing treatment:
Wait for the repair glue to dry completely (usually takes 24 hours), and seal the drilled hole with tile grout.
 0:00:12
Tile hollow drum special glue strong adhesive loose injection
 0:01:21
How to use Fix-A-Floor to Repair Loose Tiles
 0:00:12
Ceramic tile hollow drum repair process
 0:00:14
【Recommended by old customers】Strongly bonded ceramic tile empty drum glue
 0:03:11
Method Surprised 50 Year Old Tiler! Fix Tiles Without Removing
 0:00:08
Ceramic tile internal repair process
 0:00:13
Tile hollowing repair#shorts
 0:00:09
Hollow drum repair of ceramic tile#shorts
 0:00:10
Hollow drum repair of ceramic tile#shorts
 0:00:11
Tile hollow repair technology#shorts
 0:00:12
Repairing a Hollow Tile with Adhesive Injection#tileRepair #flooring #DIY
 0:00:07
Hollow drum repair of ceramic tile#shorts
 0:00:08
Hollow drum repair of ceramic tile#shorts
 0:00:31
Barefoot Floors- Tile Injection to fix drummy & tented tiles
 0:00:08
Hollow drum repair of ceramic tile#shorts
 0:00:16
Easy way to stop hollow sounds in tile fiitings
 0:00:12
Ceramic tile hollow drum repair process
 0:00:06
🚧 Ceramic Tile Drum Repair 🛠️ #shorts
 0:06:15
Method Surprised 50 Year Old Tiler! Fix Loose Tiles Without Removing
 0:00:08
Hollow drum repair of ceramic tile#shorts
 0:00:08
Hollow drum repair of ceramic tile#shorts
 0:00:20
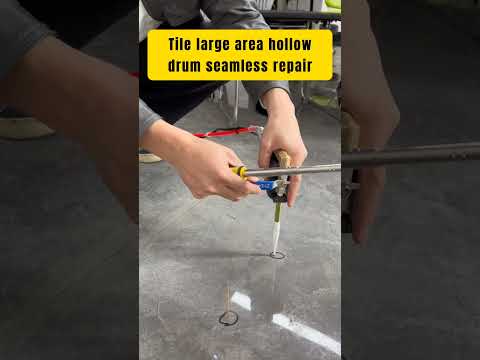
Tile large area hollow drum seamless repair #homeimprovement #construction #tiling #renovation
 0:00:09
Hollow drum repair of ceramic tile#shorts
 0:00:29
Ceramic tile hollow drum repair check #shortvideo #construction #floortiles
Комментарии