filmov
tv
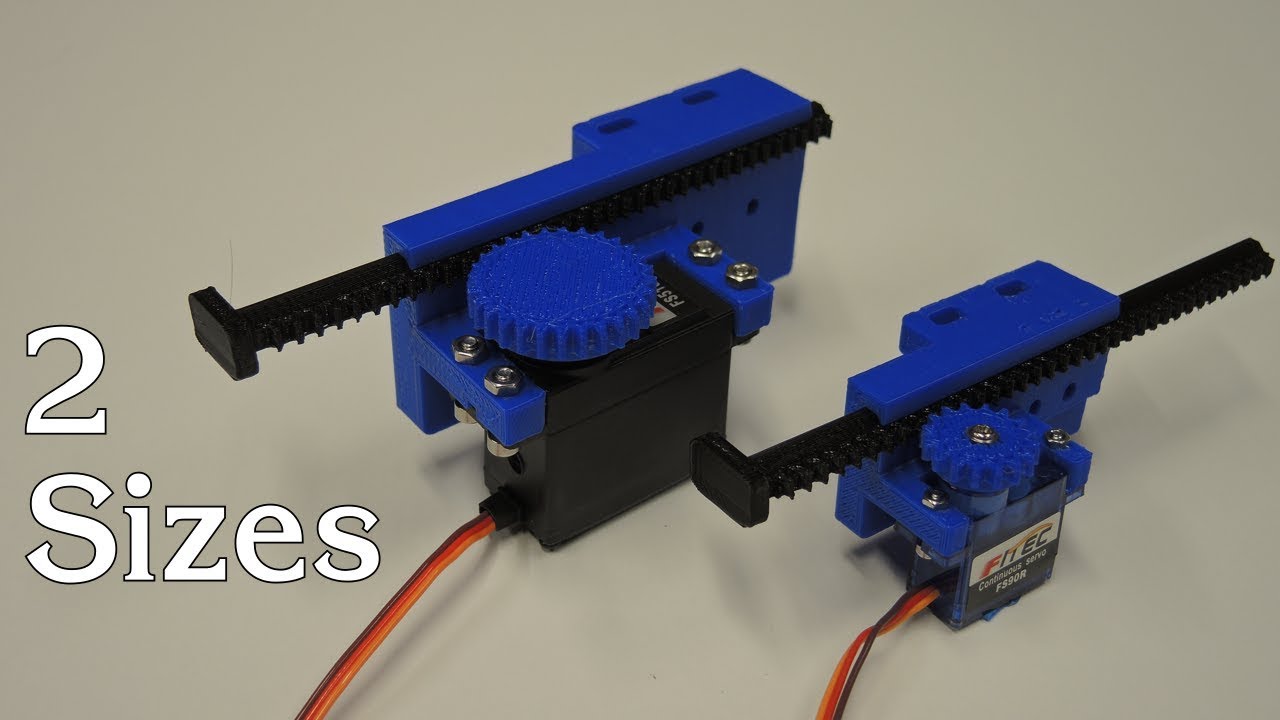
DIY Linear Servo Actuator, 3D Printed
Показать описание
This video shows how to assemble and then run these DIY linear servo actuators (pusher style). Two sizes have been designed and made available for any project you have that needs a pusher style linear actuator.
An off the shelf version can cost around $70, while these 3D printed versions are much lower cost. Links to the STL files, part lists and affiliate links can be found below.
++++++++++++++++++++++++++++++++++++++++++++++++++++
If you like what you see, please support the channel!
++++++++++++++++++++++++++++++++++++++++++++++++++++
Follow me on social media for special updates and behind the scenes info:
Part lists and affiliate links
_______________________________________________________________
Mini version:
Non 3D Printed parts needed:
Continuous Rotation Micro Servo - FS90R
JB Kwik 2-part epoxy
Arduino Uno
Adafruit Motor Shield V2
2x M2 x 10mm screws
2x M2 nuts
_______________________________________________________________
Large version:
Non 3D Printed parts needed:
Continuous Rotation Servo - FeeTech FS5106R
JB Kwik 2-part epoxy
Arduino Uno
Adafruit Motor Shield V2
4x M3 x 12mm screws
4x M3 nuts
As an Amazon Associate I earn from qualifying purchases.
Some inspiration for this design came from:
WARNING: Please be careful when following any of the instructions from this video. Put your personal safety first and wear the appropriate safety equipment.
#3dprinting #diy #arduino #3dprinted #design
 0:06:06
DIY Linear Servo Actuator, 3D Printed
 0:00:33
Linear Actuator With Servo From Kitronik
 0:00:11
DIY Crank Slider 2 - Linear Actuator - Reciprocating Motor - Servo / Arduino
 0:09:36
3D Printed Linear Actuator??? Surprisingly Strong!
 0:00:21
Servo Linear Actuator
 0:13:46
DIY Linear Servo Actuator 3D Printed with full Positional Control and long travel
 0:23:59
3D Printed Linear Servo Actuator with Position Feedback
 0:00:27
Sliding Mechanism Rack and Pinion (3D printed)
 0:10:47
3d printed linear servo actuator
 0:00:17
Linear motion animation with MG90s servo.
 0:21:03
My New Linear Actuators are SO MUCH BETTER! | PDJ #21
 0:02:07
How to Make Linear Servo Actuator |3d printed Linear gear Mechanism
 0:00:21
DIY IRONLESS LINEAR SERVO-MOTOR ; Fixed position
 0:10:08
How to make a powerful 3D printed electric linear actuator
 0:00:21
3D printed micro linear actuator
 0:07:38
Ep 1: Tutorial - How to Make a 3d Printed Linear Actuator from a Servo
 0:01:24
DIY Linear Slide Servo | 3D Printed
 0:00:26
3D Printed Linear Actuator Mechanism #Shorts
 0:06:12
servo actuator build (for motion simulator)
 0:00:23
DIY Linear Servo 3D-Printed parts
 0:00:37
Electric PushRod Built-in Motor. Linear Actuator #diy #3d #rccar
 0:00:15
3D Printed Linear Servo Actuator
 0:04:45
How to make a 3D Printed Servo Linear Actuator, Rack Gear Slider, RC SG90 9g servo motor
 0:02:14
D.I.Y. 3D-printed linear servo tutorial
Комментарии