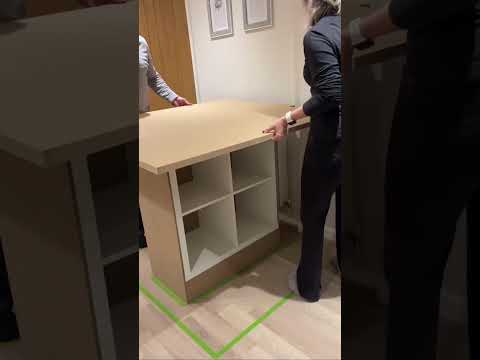
Ikea Basics - Tornviken Kitchen Island

preview_player
Показать описание
Ikea Tornviken Kitchen Island assembly with easy step by step instruction.
Tools required: Screwdriver and a small hammer.

Pro Tip: Use a ratcheting screw driver (Shown in video) for fast assembly

Advise: Do not use power tools. They may damage the wood or strip the screws.

Рекомендации по теме
Комментарии
Автор

Thank you so much for this detailed, easy to follow video! You helped this 69 year old, female DIYer to follow along step by step. Videos like yours help to keep me independent and productive. I wouldn't have attempted this assembly on my own. This also helped me to assemble other shelving (of all configurations!) because process and hardware are commonly used throughout Ikea products and some other brands too. Thanks again!

lyndaroberts
Автор

Thank you for such an easy-to-follow video! No chit-chat, calm voice, great explanations… thank you!

debbicrist
Автор

You did great job! No long winded intros about you, what you ate for breakfast and your cashapp. This looks perfect for my new house and I love putting IKEA furniture together! Cheers 💕

holleelifestyles
Автор

Thank you for such a great and easy to understand video that didn’t take a year to get to the point.

jessicar
Автор

Thanks so much for doing this vid! I am considering this unit for a special use and needed to know exactly how it was constructed so that I could figure out of a single supporting strut could safely be left out. You vid has answered my question - very grateful!

jasoncartwright
Автор

oh boy! You made it look sooo very simple. It was a piece of cake after watching you put it together. Thank you

azimmerali
Автор

Thanks a lot, perfectly explained. I bought 2hand without manual and would not have managed assembly without this vid.

adriellycamposano
Автор

Great instructions and assembly! Thank you for being so straight to the point but also thorough. We just saw the island at IKEA today and loved it. Will be buying it for our new townhome.

candicejackson
Автор

Thank you thank you thank you! I just installed mine and had it not been for your tutorial, I would have given up!

maddylopez
Автор

A little late to the show but just wanted to thank you for putting this video together. I have this in my cart right now but was a little concerned about assembling it alone but it sounds like you were able to do so when you made it. Very helpful!

stukesowle
Автор

I just purchased it and it is making my life so much easier by watching your video as I go along, great instructions and very easy to follow, thank you for a great job

LallyCo
Автор

I think I'll be getting this soon it's always good to see it in real life and not a staged photo with an all white background.

snowman
Автор

Gonna buy one of these next week, always nice time have more instructions for these larger pieces. Also realized how much easier it will he with a ratcheting screwdriver, I'll pick one up. Thanks for the demo and tips!

merediththompson
Автор

It looks so good! This is on my list to get this week to use as a cutting and craft table. I've been putting together Alex drawers and Kallax this week so warming up for this piece.

PattymacMakes
Автор

I followed the instruction booklet along with your video. There is nothing like a step by step video and I am so grateful to you for interpreting the instructions and filling in the gaps. However, new buyers of the Tornviken beware, it is not a task for one person. I prided myself on being able to follow instructions and thought I could complete it alone. Someone needs to stop the first end piece (the one with legs) from moving at all, while putting on the other end piece. The only other issue I had was that there were two occasions where the cam locks did not fit. It was due to the hole for the cam lock being drilled slightly too close to the screw. Despite that, the island is very solid.

kakou
Автор

Excellent! I need a functional kitchen island. Thanks.

davidogan
Автор

Thank you for the video I liked the screw driver that you used for the screw number 118331.

aysegulkucuk
Автор

You did a very clear and precise instructions of how to put it together. Someone else had referred your video because they said for them it was the worst thing they've ever put together meaning difficult. I would have to do it by myself but I don't see that as a problem. And I think I would put casters on the bottom. Great work.

Peachcobler
Автор

Great video, very helpful! I like to get a big picture before I start!

stephaniemorken
Автор

Thanks so much, I loved this. Exactly what I needed.

alanamacallister
visit shbcf.ru