filmov
tv
How To Build An Elevated Raised Garden Bed - DIY Planter Box With Free Plans

Показать описание
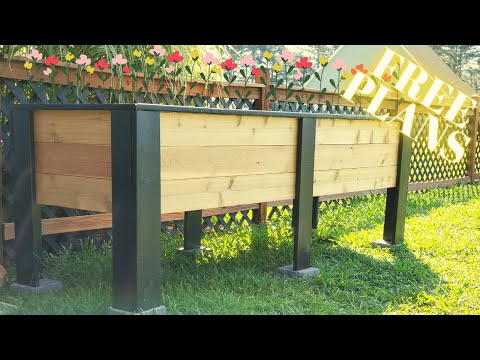
Today I build a very large and sturdy elevated raised garden bed for some of my vegetables. This was a backyard DIY planter box and I include free plans.
Total Dimensions:
Garden Box - 8-ft L x 28 1/2-in W x 32-in H
Garden Box with Railings - 100 1/4-in L x 32 1/2-in W x 33-in H
Total of 13 - 1x6x8 - Cedar Planks
6 – planks used for the length of bed / 3 on each side (cut evenly) slightly under 8 x 5 ½"
2 – planks used for the width of bed / 3 on each side (cut evenly into 30”) about 30 x 5 ½"
5 – planks used for the bottom of the bed / (cut evenly just shy of 30” - about 28 ½ x 5 ½")
Total of 5 - 1x6x8 – pressure treated planks
2 planks -cut evenly into 6 legs = 32”x 5 ½”)
1 plank - cut evenly into 3 legs = 32” x 4 ½")
1 plank - cut into 1 leg = 32” x 4 ½" and 2 – 32 ½ x 2 ¼" then 45 degree miter cut on each end (total of 10 legs and 2 short railings if using)
*Extra wood from last plank cut is used for long trim/railing (optional) and for bed brace
1 plank used for the top long trim/railing cut into 2 pieces then add extra scrap wood to create 2 railings. Total length about 100 3/8” x 2 ¼" with 45 degree miter cut on either end. (optional)
1 - 2x4x8 – pressure treated (cut in half length-wise then cut slightly to match length of bed)
Total of 2 pieces that are about 1 ¾” x 1 ½" x 8
Paint – optional
Railings – optional – no railings – remove 1 pressure treated plank from plan
Screws used – #10 x 1-1/2-in Exterior Wood Screws
--------------------------------------------------------------------------
--------------------------------------------------------------------------
#diyraisedgarden #raisedgardenbeds
--------------------------------------------------------------------------
💚Please stick around -- join my channel and community to follow along on all my projects and to watch a transformation of my yard into an oasis.
Thanks for watching :)
Follow me on Instagram @dees_yard
--------------------------------------------------------------------------
DISCLAIMER: Links included in this description might be affiliate links. If you purchase a product or service with the links that I provide I may receive a small commission. There is no additional charge to you! Thank you for supporting my channel so I can continue to provide you with free content each week!
 0:05:06
DIY Elevated Garden Bed
 0:10:08
How to Build an Elevated Garden Bed - Free Downloadable Plans Included!
 0:23:02
How To Build The Perfect Height Elevated, Raised Bed!
 0:08:58
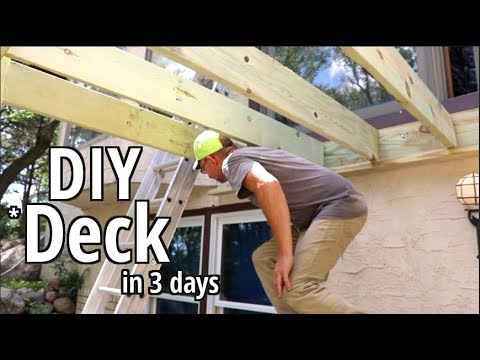
How to Build a deck- DIY Style -in 3 days Step by step Beginners guide
 0:07:01
How To Build An Elevated Raised Garden Bed - DIY Planter Box With Free Plans
 0:03:24
Elevated Wooden Planter Box (Simple DIY Project)
 0:10:32
DIY Raised Planter Box with Hidden Drainage | How to Build
 0:04:36
DIY Elevated Planter Box - with plans
 0:58:39
Chicago Wabash Elevated Train Tracks to Grant Park
 0:17:05
How to Build a Raised Deck with Wickes
 0:10:34
How to Build a Mini Elevated Raised Bed in 5 Easy Steps - No Construction Experience Needed!
 0:07:11
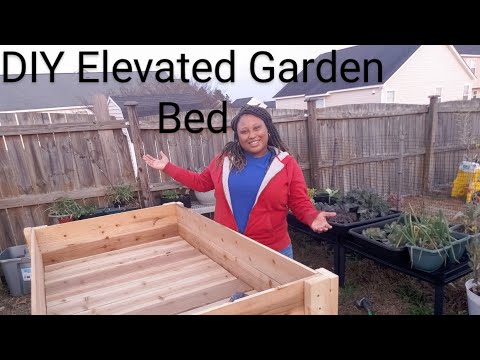
DIY Elevated Raised Garden Bed | Build Video
 0:04:29
DIY Elevated Raised Garden Bed: Step-by-Step
 0:10:43
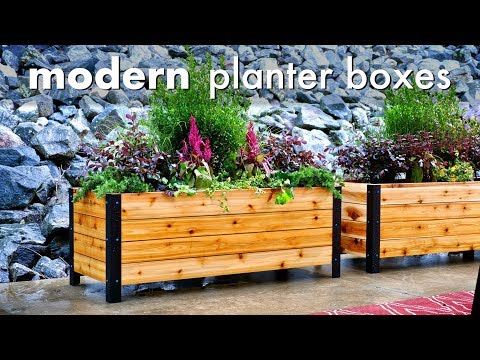
DIY Modern Raised Planter Box // How To Build - Woodworking
 0:15:51
Building Forms for Elevated Concrete Porches
 0:09:51
Building an Awesome Covered Deck - (Part 1: Footings & Framing)
 0:21:09
Pouring a 50 TON Elevated Concrete Porch Slab!
 0:15:40
How to Build Durable Raised Garden Beds (Planter Boxes)
 0:13:19
🥬DIY Elevated Garden Bed 🥕🥦
 0:01:22
How To Build An Elevated Deck With Brick Pavers in Macomb County, Michigan
 0:05:13
Construction Stages for Elevated Viaducts and Stations
 0:28:18
Building an Elevated Deck || Treehouse Build Part 2
 0:05:13
How To Build a Deck | Post Holes & Framing (2 of 5)
 0:18:50
Learn How To Build a Deck with Wood | DIY Projects
Комментарии