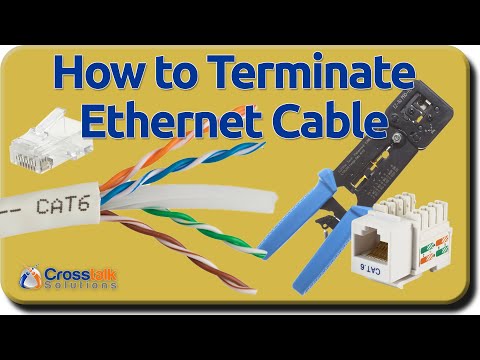
How to Terminate Ethernet Cables

preview_player
Показать описание
The tools and process that I use to terminate Ethernet cables. This is definitely not my favorite thing in the world to do, but the ability to terminate Ethernet cables is a skill that all network enthusiasts should be very comfortable with. The type of Ethernet cables isn't nearly as important - these concepts work with most types!

Individual Product links (Some are Amazon Affiliate):

Timecodes
00:00 Intro
01:12 Terminating Ethernet cables - male
04:52 Untwist tool
09:42 Terminating Ethernet cables - female
15:00 Testing Ethernet cables
-------------------

Follow me on Twitter: @crosstalksol

Connect with Chris:
Twitter: @CrosstalkSol
Рекомендации по теме
Комментарии
Автор

Guys, I know there were a few flaws in the procedure department for example.. "not enough outer cable pushed inside", blah blah blah..., so don't hurt him so hard in your criticism, he presented us with the point of how it works. He stated many times before in previous videos that he was not a professional installer, it's a simple guide that shows us how.... and I appreciate you sir for taking the time to show us

johncomeaux
Автор

Hi Chris, your preferred position of the cable jacket does not allow the male connector's built in jacket holding tab to keep the jacket from pulling away from the connector. After checking the color order, press the jacket as far into the connector as it will go so the connector's strain relief tab will be crimped on to the jacket. Otherwise you end up with connectors that pull away from the jacket and look like exposed/ damaged wiring and amateur work.

StiX
Автор

Perfect timing on this refresher for me. My house was built in 2006 and I bought it in 2013. Luckily for me every room was wired with Cat 5E but were terminated with RJ11 female receptacles for phone use. I had changed most of them to RJ45 keystones except a few rooms. I am going to finish them off tomorrow as we are planning to sell later this summer. Thanks!

thegreatgazoo
Автор

Great video. I actually looked at your recommended tools a while back and purchased these pass through ends and the same keystones as well as a new Klein tool crimper. Made my life so much better! Thank you!

JohnWizz
Автор

I've been doing this for 15 years and you just blew my mind with that untwist tool, ordering now.

NateTheBrewer
Автор

04:40 ProTip You can use the cut-off bit of the jacket to untwist the pairs. You can also use it to straighten the wires by running the jacket over the wire instead of just your fingers. This can help save your fingers if doing a bunch of terminations.

iamjohnivey
Автор

I use the piece of the outer jacket that I stripped off to use as an untwisting tool. Slip it over on of the wires in the pair and they separate nicely. Then slide the 8 wires over any screwdriver shaft to get the curls out.

mattschoular
Автор

The little string is for stripping back the insulation. Cut back the outer cover and wrap a bit of the string around a screwdriver or whatever and just pull. In industry, I used this plenty of times. But be careful, that little nylon string will cut skin just as easily.

warrenosborne
Автор

Great video! One thing I like to do when I make the male end, just to keep things tidy, is strip it a little further down for more excess wire but before I cut I twist the ends. This way it all stays together.

FlowoftheFlood
Автор

Ordered the untwist tool -- many thanks! Untwist as little as possible at the keystone end. A lot of folks will flunk keystones untwisted as shown. Some will flunk them with a pair of diagonal cutters!

artiem
Автор

Chris, that tip for Untwist was well worth the $5 beer I just sent your way. Wow! What a tool. I've used the back of my Klein snippers before and it stripped off the protective covering. I also LOVE the network testing tool. I've been using my trusted Fluke Networks tool for 20 years having really no reason to replace it but now I'm on the waiting list for the Pocketethernet!

svenllr
Автор

The outer insulation needs to be far enough in both types on connections for the outer insulation to be held into place by the finished connectors. A tab on the male and the back of the cover for the female connectors should keep the cable end from moving without the connnector. This is important because the inner wires break easily if they are moved or pulled on a lot. This detail greatly increases the reliability on the cable.

georgebush
Автор

I liked your disclaimer at the beginning, anticipating a barrage of “suggestions” - actually not too bad.

1. Set the blade of your stripper, so you spin one time only, but set it, not to cut all the way through, just score it to a good point where it will crack off.

2. You should have pushed the jacket into the rj45 jack.

2. When you do the keystones, Keep your pairs twisted to the point of the where you are going to punch down, maintaining the twist, to the point, then drag them down into the scissors of the keystone. Use the point of the keystone to split the pairs apart is better than untwisting pairs before.

recom
Автор

9:36 Nicely Done Male connector and just has the jacket of the cable under the little restrainer in the RJ45 Jack without using it there is the strain on the wires..

Loved the video

funnynoodle
Автор

Chris few comments about the video. Understanding you don't do it for living so no judgement here just commenting since I have been doing it for 30+ years. I haven't read all the comments below so sorry if any of these are repeats. 1) When ever you use the blade tool tool cut off the outer sheath, the intent here is to expose the rip cord (the little string). ALWAYS pull the cord to cut down at least 2-3" to expose more conductors below the cut line and then cut the cable off just below the original cut line. We do this because the cut tool when you spin it around the outer jacket can nick the copper conductor for one (or more) of the pairs and will eventually break, usually right after you left the site :), 2) Plenum and the center core of your cable are completely unrelated. The plastic core is to keep all the inner conductors in perfect alignment for a specific grade of cable. The outer casing can be PVC or Plenum. If the wire is run in any void (is like a ceiling whether sheetrock or tile or other) where any air-conditioning or air venting air flows through that's a plenum. Plenum rated cabling is treated to make the burning sheath less toxic. Riser or PVC rated cable can never be run in a plenum (in or out of an A/C duct, if the A/C sucks air from it, its a plenum). Keep in mind a lot of A/C ducts provide cooling air to your vents but most A/C systems use the entire void for a return (warm air flow back to A/C) and that's a plenum. 3) I always cut my cable at an angle like 30-45 degrees (only on EZ). It makes it so much easier to insert the wire into the EZ connector. When you slide the wire in, you can actually force each conductor into the right channel even if they are not perfectly straight. 4) After you insert the cable into the connector push it all the way in. The rectangle square at the back of the connect is a strain relief. Its needs to squeeze the conductors and sheath to properly secure it and prevent pulling on the conductors at the connector. 5) When cables that have the core I pull on the core slightly before cutting it and then slide the thumb and index finger down the outer sheath toward the end to make it just past the core so the core doesn't prevent you from fully seating the sheath into the connector. 6) YES, before crimping I always go through the protruding cables to verify they are in the correct order. So much easier to check before you crimp then to have to cut it off and start over! 7) To straighten your cables put your index finger over your thumb nail and slide it down the pair with some pressure. The flat thumb nail takes the kinks out of the conductors nicely. 8) For cat6 specs the twist has to go all the way to the point it is punch down on the jacks. Don't untwist it. The jacks have a point between the conductors in a pair to make it easier to press them into the correct slots without untwisting. Also, FYI, Most punch tools have 2 colors so you always know where the cutting tool is without looking. All replacement blades will always line up on the same color for 66, 110, or krone.

davidjohnson
Автор

Hey, thx for really good video. I have recently patched out my entire new home and gained a lot of experience on how to do things. First: do not buy cheap tools. Yes, You probably use them once, maybe twice, but a lot of stress will be saved during work. Klein tools are very good ones! Second: about that little gray tool comes in many varieties, but I do recommend to get one with hand regulated opening because there are so many cables and You have to test first how deep the tool shall cut the shield to not damage wires. The worst thing is to unshield cable, start preparation and realize that one or two wires have been touched by the blade and they will come off during patching. Third: cutting wires a bit after plugging in rj45 pass-through into crimping tool will make it easy to finish them correctly. Fourth: I do prefer to use Krone tool as it has these little scissors to cut the wires instead of a blade. Fifth: there are cable testers with integrated circuit breaking tool which helps to find damaged wires and to detect which cable is which if You have bunch of them tied together in one place and wondering where they're "going" into the house :)

sebastiannowak
Автор

Great Video... I would note that the connector secure tab needs to be facing down for both cable ends. Or you could crimp one end facing up and the other facing down and cross the pairs/pins 1 thru 8.

griffic
Автор

Thank you. Not many people show this. This is how I am setting up my network. I want to be able to move my rack if I need to and this help. Thanks again!

TieDyedShawn
Автор

Hi Chris, CAT6 always includes the center plastic which keeps those 4 pairs twisted and separated from each other. Plenum in the cable means material of the jacket. Plenum (or LSZH) basically means those jackets gives low smoke and slows down spread of flames. About male/female connectors, you should always strip only as short amount of jacket as possible and make sure those individual wires are not visible outside of connectors. In male connectors, you should push the cable inside as much as possible and In female connectors, you should make sure jacket goes inside connector and only untwist pairs as little as possible. Good quality female connector includes place/hook for cable tie to secure cable into the connector.

teemuanttila
Автор

That "string" is the ripcord, it's there for rip-open the cable.

jankkhvej