filmov
tv
Getting Started Creating ANIMATIONS in Fusion 360 - Beginners Start Here!

Показать описание
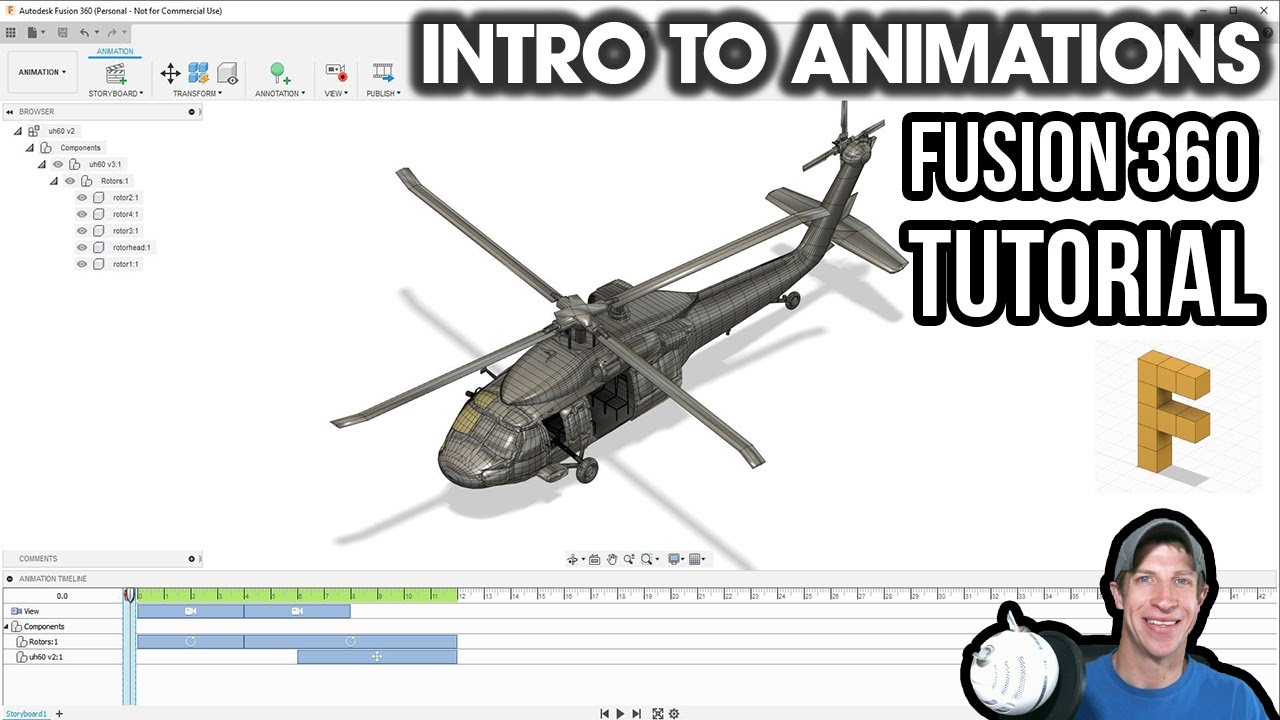
In today’s video, we’re going to start talking about the animation tools inside of Autodesk Fusion 360 and how to use them to generate moving animations!
To start off, this is an FBX model I downloaded from Turbosquid for free and imported. I will link to it in the notes below, but there was a bit of re-work involved for this application.
TURBOSQUID HELICOPTER MODEL
It’s not ideal, but it will work for this application. One thing to note is that I needed to take the rotor geometry and put it into its own component for this animation to work as the rotors need to animate independently from the rest of the model.
To start off, we’re going to want to change to the animation workspace. This workspace contains a different toolset than the design workspace, which is more focused on helping you create animations.
Intro to the Animation workspace –
- Top bar contains tools
- Left bar contains your browser
- Workspace is where you see your model
- Animation timeline is where you’re going to control your various animation elements
Now let’s create a simple animation. We’re going to start by adding a new transformation at the top of the page. It’s going to ask us to select a component to transform (or move). Let’s select the rotor head that I’ve created.
We can apply a rotation to this rotor, but you’re going to notice that it doesn’t do anything if you select ok. This is because we haven’t set a time for the animation inside of the timeline. What we want to do is start by dragging the little indicator on the timeline to a time associated with the length of the clip we want to create. In this case, for example, I’m going to set it to 4 seconds, which will create a 4 second long animation.
Now if you add your transformation, it will animate this transformation over 4 seconds and add a little clip on your timeline. You can right click on this clip and adjust the duration, edit the action itself, and more.
Add another transformation with the clip set with the end to be at 12 seconds and set our rotation to a larger number, like 4320. This would be 12 rotations over 8 seconds.
Finally, let’s add a movement. Select your whole helicopter as the transform object this time, and set a movement where your helicopter flies off the screen.
Notice you can also set your camera at different points in time by selecting those points on the timeline, then moving your camera to the location you’d like.
Finally, you can export your animation to a video file by clicking on publish.
Комментарии
 0:11:42
 0:10:42
 0:06:45
 0:04:24
 0:00:28
 0:04:13
 0:06:20
 0:11:05
 0:06:06
 0:00:17
 0:00:54
 0:00:31
 0:18:41
 0:07:14
 0:06:56
 0:00:40
 0:11:27
 0:01:01
 0:00:16
 0:07:54
 0:00:50
 0:00:15
 0:15:12
 0:19:28