filmov
tv
A Digital clock built with Python tkinter

Показать описание
This is a follow on video from the last video in the playlist that showed how to display the current time in a Python tkinter window. This video shows how to continually update the current time thus producing a digital clock.
 0:20:51
A Digital clock built with Python tkinter
 0:34:34
A Digital Clock built with Object Oriented Python and tkinter
 0:00:46
Double Sided Digital Clock Wall Clock-Multifunctions
 0:18:06
How To Create Digital Clock Using HTML CSS & JavaScript | Display Time Using JavaScript
 0:00:48
Solar Car Digital LCD Clock ||
 0:18:28
These digital clocks aren't digital at all
 0:00:59
P1 Desire: Bluetooth Connection for Large Wall Clock
 0:00:40
Lenovo Smart Clock Essential with Alexa Built In
 0:00:38
Wake Up to Niteables: The Ultimate Alarm! #shorts
 0:00:51
P2 Desire: Bluetooth Connection for Large Wall Clock
 0:03:35
Projection Alarm Clock | Digital Clock with 180° Rotatable Projector
 0:00:22
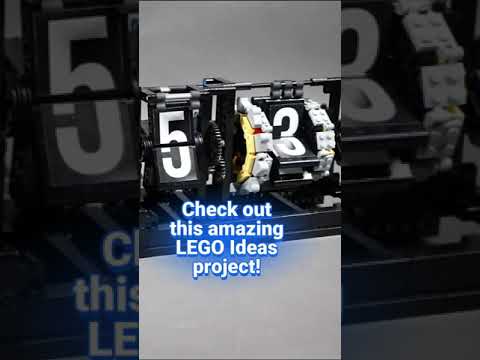
Mechanical Flip Clock is a timeless LEGO Ideas project
 0:00:33
Unboxing the Lenovo smart clock Essentiel would Your Pick this over an echo dot? #shorts
 0:04:57
INLIFE ❤️ Extra Large Digital Clock - Review ✅
 0:01:02
12/24 hour Digital clock using 7490 decade counter and BCD 7segment (file)
 0:01:37
Popular Analog or Digital Clock with EXTRA Features?
 0:00:10
Lenovo smart clock with a surprise
 0:06:53
I Built a Minimalistic Kinetic Clock Project with my 3D Printer and Arduino
 0:02:09
3D Digital LEGO Clock - Time Twister 4
 0:05:19
How to Connect Lenovo Smart Clock Essential with Phone - First Set Up of Lenovo Smart Clock
 0:00:26
LaMetric Time Smart Clock
 0:22:35
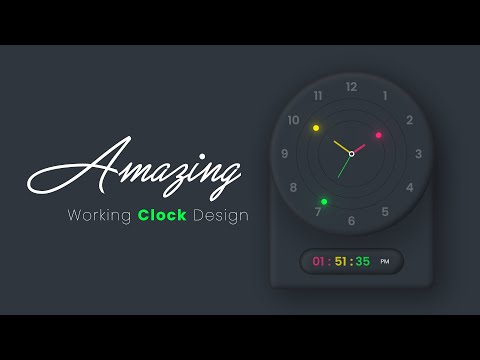
Amazing Working Analog and Digital Clock Design using Html CSS & Javascript
 0:10:54
Cheap DIY digital alarm clock, with temperature and light sensor
 0:04:48
Large White Digital Clock by XREXS | Easy Setup & Easy to See!
Комментарии