filmov
tv
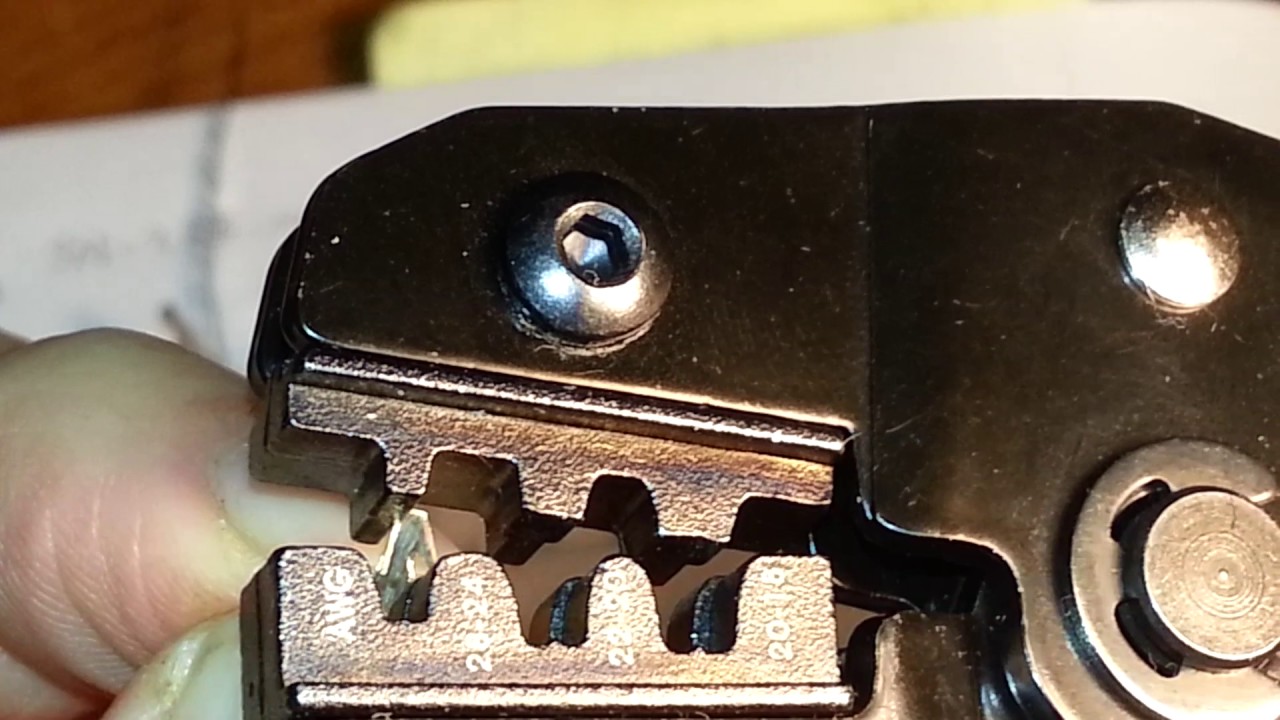
SN-28B Crimping tutorial for DuPont pins.
Показать описание
How I crimp dupont pins.
Please subscribe, if you found this video helpful.
My kickstarter:
Give a "Whiteboard robot" to that special geek:
Please subscribe, if you found this video helpful.
My kickstarter:
Give a "Whiteboard robot" to that special geek:
 0:21:12
SN-28B Crimping tutorial for DuPont pins.
 0:02:53
SN-28b CRIMPING TUTORIAL IN 2 MINUTES FOR DUPONT PINS
 0:16:41
How To Crimp A JST-XH Pin | PR-3254/SN-28B Crimping Tutorial for Dupont Pins And Connectors
 0:07:45
SN-28B Ratchet Crimper/Plier Overview & Demonstration
 0:05:01
Dupont Connector Crimping Tool Tutorial - SN-28B
 0:03:48
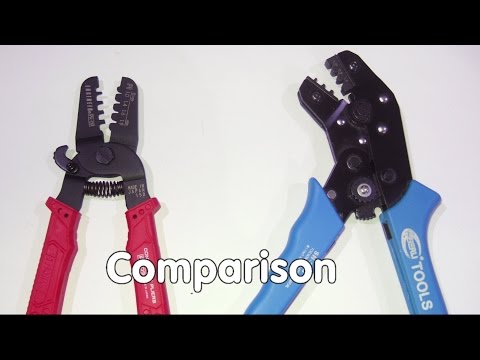
#39 SN-28B Chinese Crimper vs Engineer PA-09: Is there a difference for Dupont wires
 0:29:29
Preciva Ferrule Crimping Tool & PR-3254/SN-28B Crimping Tutorial for Dupont Pins And Connectors
 0:06:37
Using IWISS SN-28B Crimper on Dupont Connectors Redux
 0:11:40
IWISS SN-28B Crimping Tool for AWG28-18 Dupont Pins
 0:06:11
Using IWISS SN-28B Crimper
 0:03:20
CRIMPING with SN-28B type Crimper for Dupont style connectors.
 0:08:49
How To Crimp JST, Dupont, Molex With ONE Inexpensive Tool! Tips and Tricks!
 0:07:56
IWiss SN-28B Crimper Demo
 0:01:26
JST Connector Crimping
 0:04:48
Dupont Connectors - Quickly and easily make your own
 0:02:02
SN-28B vs. SN-48B Crimp-Off
 0:00:45
Dupont Crimping Tool,Knoweasy Pin Crimper and Dupont Crimper
 0:02:12
Installing Crimp Pins with Needle Nose Pliers
 0:33:32
Crimping JST-XHP, DuPont & JST-SM connectors PROPERLY & EASILY!
 0:16:03
Wiring dupont terminals with an SN-28B crimper
 0:00:55
Crimping Pliers Set SN 48BS(=SN 48B+SN 28B) Jaw Kit for 2.8 4.8 6.3 VH3.96_Tube_Insulation Terminal
 0:17:20
MG SN-28B Ratchet Crimper
 0:07:14
How to Crimp 2.54mm DuPont connectors (macro view)
 0:07:38
JST XH Series Connector Crimping.
Комментарии