filmov
tv
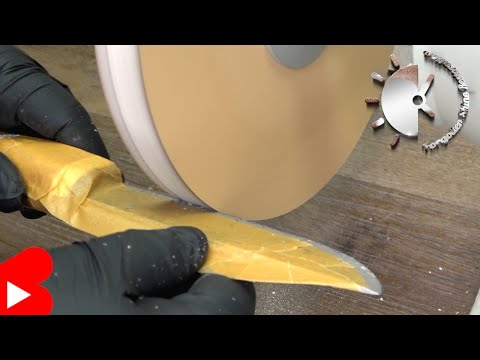
Knife Sharpening DIY MDF Wheel #shorts

Показать описание
Click here for the detailed video:
Build a knife yourself, was on my to-do list for a long time. Now it was finally time, the last "push" was that again "7 vs. Wild" in Youtube Germany comes. The format has already captivated me last year, so I decided to make a survival knife with Stonewash. For this project I had to cut knife steel, work with the belt grinder, drill, saw, file, harden with the hardening furnace, work on the lathe, sharpen the edge and much more.
This video is not only to quickly show someone how something works, but also to relax and get away from it all! Relax while watching the video and enjoy what you see and hear. I recommend you put on headphones and listen carefully at certain points (I've highlighted them), as there are often very strange sounds there.... Enjoy!
------------------------------------------------------------
▶ What did I do ?! ◀
With the angle grinder, I roughly cut out the shape from a knife steel (1.4112 - 440 B/stainless). With the belt grinder I then ground it exactly to the desired contour. After drilling the holes for the pins, I used a file to file the thumb ramp onto the back of the knife. Using a belt sander, I ground the cutting edges to the blade, but first left 0.5mm so that the blade would not curl during hardening. After hardening in the hardening oven at 1040°C, I tempered the blade three times at 200°C and 60 minutes in the oven. The blade now has a hardness of 58 HRC. I glued black G10 liners to the walnut handle, cut out the outline on the bandsaw, and gave the handle its final shape with the file. Now all I had to do was taper the edge, turn the brass pins on the lathe, and glue the two handle halves to the blade. After filing down the pins and fitting them into the handle, I sharpened the edge with an MDF washer and polishing compound. Finally, I treated the walnut handle with linseed oil varnish.
------------------------------------------------------------
▶ Good to know ◀
I used the following tools: Pencil, angle grinder, spray adhesive, clear coat, pliers, belt sander, center punch, hammer, putty knife, cordless screwdriver, drill, countersink, files, key files, calipers, marking pen, grinder, Allen wrench, screw clamps, sandpaper, curing oven, oil, forging tongs, oven, barbecue thermometer, immersion heater, HRC files, band saw, 2 component glue, sandpaper file, iron (III) chloride, KG pipes, marble chippings, lathe, cotton swabs, isopropanol, polishing stand, MDF disc, polishing paste, laser, linseed oil varnish
------------------------------------------------------------
▶ Special thanks to my channel members! ◀
-
------------------------------------------------------------
▶ Do you want to support me? ◀
Do you want to become a channel member? Then you can do it here:
You like what you saw and you want to help the channel to develop? If you want to support me, you can donate via Paypal:
------------------------------------------------------------
▶ Did you like it? ◀
Did you like the video?
Then like, subscribe and share it, please!
Thanks a lot!
 0:08:31
DIY MDF Sharpening Wheel (XL 10')
 0:00:22
Knife Sharpening DIY MDF Wheel #shorts
 0:03:36
Razor Sharp - Paper wheels knife sharpening.
 0:16:04
Can we make this knife sharpener better? Tool Time Tuesday
 0:07:56
Razor Sharp Edgemaking System - Knife Sharpening
 0:04:27
MDF Sharpening wheel DIY
 0:02:25
MDF Sharpening Wheel Regrit tutorial.
 0:13:18
DIY MDF Knife sharpening wheel.
 0:17:01
Best Knife Sharpener on the Planet!
 0:02:36
DIY MDF buffing wheel complete SHARPENIT
 0:08:17
DIY Paper Wheel Knife and Tool Sharpening System How to Sharpen knives on 8 in. Paper Wheel KIt
 0:01:01
sharpen knife with MDF
 0:01:00
Sharpen your knife fast!
 0:06:52
Quick Knife Sharpening on Paper Wheel (MDF)
 0:07:23
Making a knife sharpener from MDF, AWESOME!
 0:04:56
Making an MDF and a leather sharpening wheels
 0:06:04
MDF Knife Sharpening Wheel Razor sharp in seconds
 0:08:45
MDF honing wheel for sharpening knives
 0:04:44
DIY MDF Sharpening/Honing Wheel for the Lathe, Keep Your Edge Razor Sharp
 0:05:03
MDF Sharpening wheel. (Round 2)
 0:00:30
How to sharpen a knife with a bench grinder
 0:08:31
Knife Sharpening - Making a 8 inches MDF Honing Wheel
 0:16:33
How to Get a Razor Sharp Knife in Seconds Using MDF
 0:03:51
How to Make a Stropping Wheel for Knife Sharpening
Комментарии