filmov
tv
Lumetri Color | Effects of After Effects

Показать описание
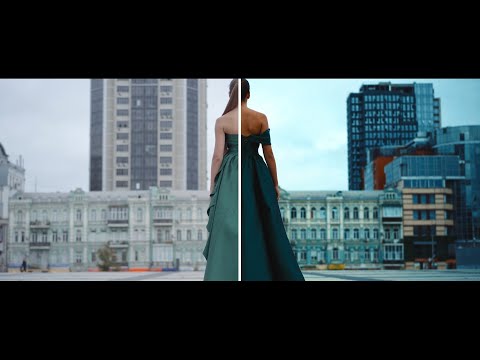
In this tutorial, I explain how to use the Lumetri Color effect in Adobe After Effects.
🎓 Learn from me other places:
🚶 Follow me online:
🏷️ Tag me on Instagram @jakeinmotion if you used something you learned from me!
Chapters:
00:00 Intro
00:07 Setup
02:42 Basic Correction
08:15 Creative
11:52 RGB Curve
13:04 Hue Saturation Curves
19:03 Color Wheels
20:25 HSL Secondary
26:40 Vignette
27:48 Wrap Up
28:43 Thanks for watching!
Lumetri Color | Effects of After Effects
How to color correct like a PRO! | Adobe Premiere Pro 2022
Color Correction Effects That Are BETTER Than Lumetri? | Premiere Pro | Intermediate Level
Color Correction with the Lumetri Color Panel | Essential Workflows with Parker Walbeck | Adobe
Lumetri Color | Video Effect-10 | All Video Effects Explained | Premiere Pro
lumetri color after effects
How to Use Lumetri Color Effect in Adobe Premiere CC (2017) to Color Correct / Color Grade
Lumetri Color Grading /after effects
How to Isolate Color in Premiere Pro – Color Pop Effect Tutorial
4 Easy Tips for Color Correction in Premiere Pro
Steal any Color Grading Look in 60 Seconds with this Auto Match Feature in Adobe Premiere Pro
59. Lumetri Color Correction | After Effects for Beginners Course
Lumetri Color Effects and Adjustment Layers
How to Color Grade Video with Lumetri Color - Premiere Pro CC
Change Color Effect: Lumetri Selective Coloring Tutorial | Premiere Pro CC
Color Grading with Lumetri in After Effects | PremiumBeat.com
Color Correction Made Easy In After Effects | After Effects Tutorial
Colour Correcting in After Effects with Lumetri Color
Color Grading & Color Correction w/ Premiere Pro | Lumetri Color Panel Tutorial | Adobe Video
COLOR GRADING 3 OSCAR NOMINEES in Premiere Pro Lumetri (Loupedeck+)
How To Bypass All Lumetri Color Panel Effects in Premiere Pro CC 2015
After Effects Tutorial: How to Use Lumetri Scopes to Color Correct Your Footage
How to use the Lumetri Color Effect in Adobe After Effects for Color Grading/Correction.
Lumetri Color’s HSL Secondary Tool #premierepro #colorgrading #lumetricolor #effects #tutorial
Комментарии
 0:29:08
 0:08:07
 0:01:46
 0:02:28
 0:01:05
 0:00:06
 0:14:58
 0:00:06
 0:01:20
 0:08:43
 0:02:42
 0:03:47
 0:10:36
 0:17:42
 0:04:33
 0:11:47
 0:05:43
 0:06:16
 0:07:36
 0:09:44
 0:05:10
 0:10:46
 0:18:54
 0:00:55