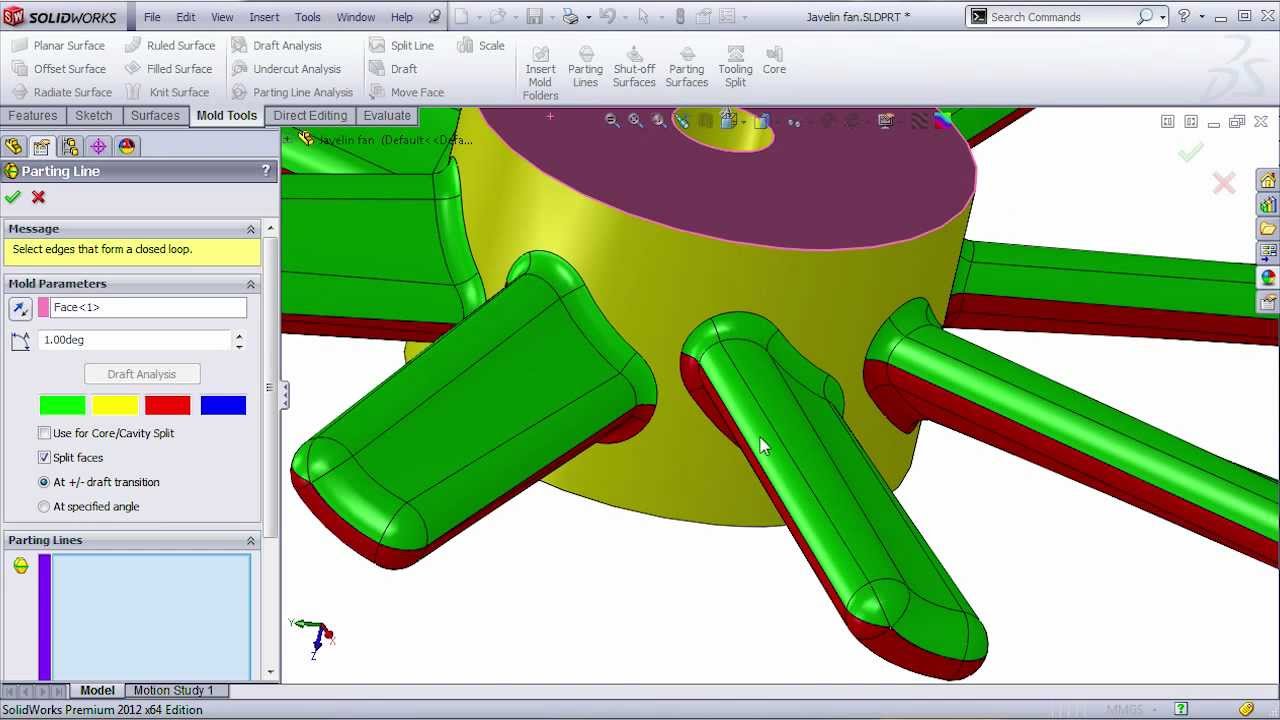
Complex Mold Split Using SolidWorks

preview_player
Показать описание
Sometimes, the standard workflow for creating a mold split is going nowhere. This video will show "unorthodox" ways to split the tooling very fast.

As a piece of advice - learn Surfacing if you want to become a Pro.
Рекомендации по теме
Комментарии
Автор

Thank you for the techniques that you shared.
This is an excellent tutorial.

jokerize
Автор

1:25 You should always try to create fully-defined sketches. So when you're requested to change a feature or the customer makes the change, importing the revised part into the file will result in fewer corrupted commands, let's hope. Nothing is guaranteed. Regarding the part file: Always use a copy the customers file & archive the customers version. Delete any links & store in a customer archive file safe from any accidental associations. It never hurts to remined everybody of this procedure to save the Designer & their employer headaches later from 'difficult' customers. As for the part: I would've asked the customer to redesign the fins for an easier better parting line. Not just for subtractive machining but to simplify the geometry to reduce build time. Just a thought. Thanks for the video.

carmiethompson
Автор

Very good example and a I like the way you explain everything.

geertwijnhoven
Автор

I could not find the copy body option. What this video doesn't show you is that when that feature was created, he selected "translate/rotate" option at the bottom of the move/copy menu to take you to a different menu that gives the option to copy shown here at 5:40. Great video overall! I was just confused about the lack of a copy option. SolidWorks needs to improve that feature.

michaelerwin
Автор

Thanks so much for sharing this useful video.

larbigueraiche
Автор

To make a smooth transition on the cylindric hub you can make the 3D-spline tangent to surrounding split line elements.

Create an split-line to split the surfaces of the "blades" and their fillets attaching to the hub but ignore the path on the hub. It will be split once you have a 3D spline.

Then make a 3D-sketch on surface where you "convert entities" of the surrounding split line elements and set them "for construction".

Then draw a 3D spline on hub surface and attach each end of the spline as "tangent" to the converted splitline elements. The 3D spline on the hub can now be used to split the hub surface.

Once the surface has been split you can run a complete split line where you can now make the path use the split of the hub surface.

When the split surface is now created using the split-line, the surface will be tangent as it crosses from hub to blade fillets and the split-plane becomes continuous and smooth.

tofo
Автор

Thanks for share. Exelent this demonstration.

mpereztab
Автор

Hello I am not sure but do you think if you made both sides of the cylinder taper the draft surface will sort out by using symmetry revolve cut ? and tracing your parting line from that middle plane that you created ?

nonenone
Автор

How is the center hole of the part represented in the mold? I don't see a part that represents it. Is it just drilled after the fact?

I appreciate the video - I have a super strange shaped object and I will see If I can apply any of your techniques.

chrisconn
Автор

Thanks Geert. This is very old video. Today I would do it slightly different.

TriMechVTTs
Автор

I have a question. How would one create a split for creating a cylindrical helical object? I want to mold just a normal helical cylinder.

akshayd
Автор

Thank you so much! i believe this is just enough for me

BUWANGUZIYUSUF
Автор

Hello do you think you can show us how to mold a coil

charbelyammine
Автор

Where is the Part II video mentioned in the video? If there is a better way could you please create and post an update?

PatRatRocks
Автор

Is it possible to upload the part file?

kandasamyrajan
Автор

Thanks~~That's good~~Have you been using in PRO/E?

jeff
Автор

Great, thank you very much, very useful

nikesoyo
Автор

Great tutorial. I was not achieving a good result with parting surface by itself.

desekrtr
Автор

hi, i want to how to make 4 cavity mold of single component, and how to add shrinkage of plastic material in component. waiting for your reply

sanjeev
Автор

what if your "spline on surface" step has to span 3 or 4 surfaces?

MotorsportsX