filmov
tv
3D Print Drain Hole TROUBLE? I Have A FIX! #shorts

Показать описание
Link To The Full Video
🚀 **Unlocking Drain Holes: A 3D Printing Breakthrough! 🛠️**
Greetings, fellow 3D printing enthusiasts! 🌐 Today, we're diving into a common challenge faced by many in the community – the frustration of not being able to create drain holes in Chitubox. Fear not! We've uncovered a game-changing solution that involves a strategic dance between Chitubox and 3D Builder. 🕺💻
🔍 **Troubleshooting the Dilemma:**
Picture this: you've meticulously designed your 3D model, only to find yourself hitting a roadblock when it comes to adding those essential drain holes. But worry not! We're about to walk you through a step-by-step guide that will empower you to conquer this obstacle.
📁 **Step 1: Import STL into Chitubox**
Begin your journey by importing your STL file into Chitubox. This is your starting point, and from here, we'll embark on a transformative process.
🌀 **Step 2: Hollow the 3D File in Chitubox**
Now, within Chitubox, hollow out your 3D model. This step is crucial as it sets the stage for what follows. Hollowing your model ensures that the foundation is ready for the magic that's about to happen.
💾 **Step 3: Save the 3D File as STL**
After hollowing your model, save it again as an STL file to your computer. This will be a pivotal moment in the journey, as you prepare to transition to 3D Builder.
🔄 **Step 4: Upload STL into 3D Builder**
Enter 3D Builder with your newly saved STL file. Let 3D Builder automatically fix the file for you. This step is like handing over the baton – trust the process, and you'll soon witness the transformation.
🔧 **Step 5: Hollow Out the 3D File in 3D Builder**
Now, within 3D Builder, take the reins again and hollow out your 3D model for the second time. This dual-hollowing technique is part of the secret sauce that unlocks the ability to add drain holes effortlessly.
💼 **Step 6: Save the New STL File**
Save the modified 3D model with a name that clearly identifies it as the new and improved version. This step ensures you can distinguish it from the original file and confidently proceed with the next phase.
📂 **Step 7: Upload New STL to Chitubox**
Return to Chitubox and upload your newly minted STL file. You'll now find yourself standing on the threshold of success, armed with a file ready to embrace the addition of drain holes.
🌊 **Step 8: Make Drain Holes with Ease**
With the modified file back in Chitubox, you'll notice the shackles have been lifted – you can now effortlessly add drain holes to your heart's content. It's a triumphant moment, marking the resolution of a common frustration in the 3D printing journey.
🚀 **Conclusion: Elevate Your 3D Printing Game!**
By strategically integrating Chitubox and 3D Builder, you've overcome a significant hurdle in the 3D printing process. This transformative technique not only adds a layer of versatility to your workflow but also empowers you to unleash your creativity without constraints.
🎓 **Knowledge is Power: Keep Exploring, Keep Creating!**
As we wrap up this insightful journey, remember that the world of 3D printing is vast and ever-evolving. Keep experimenting, keep pushing boundaries, and let your creativity soar. Share this breakthrough technique with your fellow makers, and let's continue building a community where knowledge flows freely.
Happy printing! 🚀🖨️ #3DPrinting #Chitubox #3DBuilder #DrainHoles #MakersGonnaMake
BECOME A HOBBY LINK INTERNATIONAL MEMBER:
HOBBY LINK INTERNATIONAL LINKS:
SOCIAL MEDIA:
- Twitter: @HobbyLinkInt
- Instagram: Hobby_Link_International
HLI YOUTUBE CHANNEL MEMBERS:
DONATIONS:
#scalemodeling #modelkit #hobbylinkinternational
 0:07:20
Resin Printing Tips - Drainage Holes Explained
 0:00:23
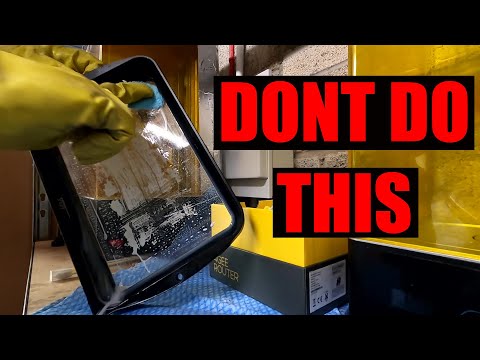
3D Print Drain Hole TROUBLE? I Have A FIX! #shorts
 0:04:39
Chitubox Masterclass Resin Printing How To Place Drain Hole
 0:00:07
Resin print explodes. This is why you always add a drain hole to your hollowed out 3-D resin print
 0:01:26
Remember drain holes when 3d printing hollow prints.
 0:02:58
Filling Resin Drainages Hole of 3D Print
 0:01:47
Hollowing, Lattice Infill, and Drain Holes
 0:17:15
How to Install MAGNETS on your 3D Prints- and plug drain holes
 0:05:15
5 Big Mistakes Beginners Make with Resin 3D Printing
 0:13:18
How to Fill Drain Holes for 3D Prints
 0:03:22
ChiTuBox add drain holes duplicate models and rotation to maximize print volume
 0:05:36
Correcting some misinformation about hollowing models and drain hole placement
 0:09:49
Easy way to Hollow your Resin 3D PRINT and save Money- Chitubox
 0:07:08
DO NOT HOLLOW A MODEL IN CHITUBOX WITHOUT WATCHING THIS!
 0:08:47
Stop Resin 3D Print Fails! Bed Adhesion Tips & Tricks
 0:00:10
Don't forget to leave drain holes in your resin models...
 0:09:20
Why You Shouldn't Hollow Resin 3D Prints
 0:13:26
Save Money & Resin by Hollowing 3D Prints | Chitubox Basic Tutorial
 0:11:35
Post processing resin prints: Remove support marks, holes, gaps, recrate texture and glueing
 0:02:37
CHITUBOX Not Creating DRAIN HOLES? Here Is A FIX!!
 0:05:47
How to cure the inside of HOLLOW prints. EASY DIY Solution
 0:14:26
Preventing Resin 3D Prints from Exploding
 0:00:16
Resin 3D print explodes #3dprinting
 0:11:20
Become a Hollowing Expert In Lychee - SAVE MONEY! #3dprinting #help
Комментарии