filmov
tv
Making a Circuit Board From Scratch

Показать описание
PLEASE READ THIS VIDEO DESCRIPTION FOR DETAILS:
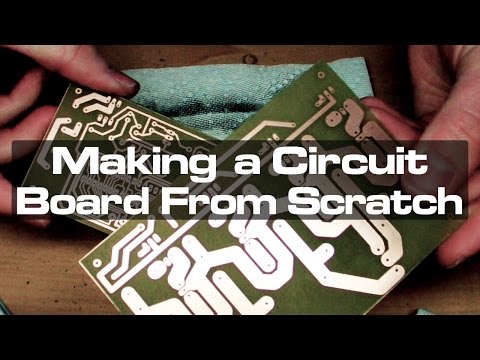
Here, I make a control unit for creating chaser animations for my various electrical projects. It's composed of two circuit boards, one that handles the logic and another to control the high-voltage loads. The full circuit is programmed with numerous animation patterns, the speed and brightness of which can be adjusted with a control panel.
Note: This video is not intended to be a tutorial. To learn the ins and outs of making PCBs at home, Google "PCB toner transfer method." However, I have included some notes below. If you have a question, I'm happy to answer it in the comments if it hasn't already been answered here.
PATREON EXCLUSIVES
FOLLOW ME
TOOLS & MATERIALS FEATURED IN THIS VIDEO
(MORE DETAILS BELOW)
▶ HP Glossy Premium Presentation Paper (CG988A): (Apparently, this is no longer produced. If you find a good alternative, please let everyone know in the comments.)
OTHER NOTES
▶ I design my circuit boards in Autodesk Eagle and print the final layup from Adobe Illustrator.
▶ The sanding is to remove surface oxidation on the copper-clad board. As you might be able to tell, this particular stock had been sitting for quite a while and had become pretty cloudy.
▶ I use an HP LaserJet HP1102w in this video, but most laser printers will work. (The toner in Brother printers is generally reported not to give good results, however.) Will your specific printer work? I don't know, since I don't have one to test.
▶ I wear cotton gloves once I begin cleaning the copper-clad board (a) to avoid contaminating it with oils before applying the toner mask, and (b) because the boards get pretty hot coming out of the laminator.
▶ I use Goof Off Professional Strength Remover to clean the boards and to remove the toner, but regular acetone works, too.
▶ The etching solution is 2 parts hydrogen peroxide (available at any drug store) and 1 part muriatic acid (available at nearly any hardware store).
▶ The toner mask sometimes looks white because, with the HP paper I use, a thin layer of paper sticks to the toner. It appears lighter or darker depending on lighting and moisture.
▶ The "silk screen" on the top is added simply by using the same toner-transfer process.
▶ The red thing with all the holes in it is a homemade fume extractor.
▶ I program the microcontroller using an Arduino Duemilanove (see above for newer model) through the USBTiny ISP Programmer (see above for newer model). Note: I cannot provide support for these items.
▶ The spray I coat the circuit boards with is Techspray's Fine-L-Kote HT, a conformal coating that prevents oxidation. It can be soldered through if necessary.
 0:08:01
How to Make a Circuit Board (Beginner's Guide)
 0:10:11
Making a Circuit Board From Scratch
 0:10:40
PCB Creation for Beginners - Start to finish tutorial in 10 minutes
 0:00:21
Homemade PCB circuit board using ComMarkerB4 laser engraving machine #laserengraving r#pcb
 0:10:44
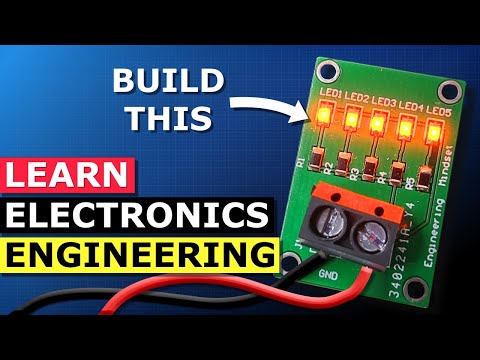
Design and Build a PCB - SMD LED Learn electronics engineering
 0:40:27
Make A Circuit Board, At Home!
 0:17:10
I'm Developing a New Circuit Board Manufacturing Technology
 0:05:35
DIY PCB Fabrication (Dry Film Inkjet Method)
 0:13:15
I designed and 3d printed this retro mouse #3dprinting #3dprinted #bambulab
 0:03:25
Using Perfboard | Soldering Basics | Soldering for Beginners
 0:06:08
What is a PCB?
 0:00:46
How Circuit Boards Are Made
 0:05:51
How to make a printed circuit board (DIY PCB fabrication)
 0:02:45
How To Make a Simple Electric Circuit | Working Model School Science Project
 0:00:17
When The Quiet Kid Does Your Homework 💀 #electronics #arduino #engineering
 0:00:11
Free PCB Design Software
 0:05:56
How I Make Circuit Boards
 0:05:27
How Do PCBs Work?
 0:00:08
Remember To Use Flux When Soldering Header Pin onto a Prototype Board!
 0:00:20
The book every electronics nerd should own #shorts
 0:10:57
PCB Board Components - 101
 0:00:15
This is how we trace and find common points in a PCB circuit board - wait for the beep!
 0:00:25
3D Printing the World's LIGHTEST Mouse! Thanks @PCBWay for making the circuit boards :)
 0:00:19
school project || electronic projects for beginners
Комментарии