filmov
tv
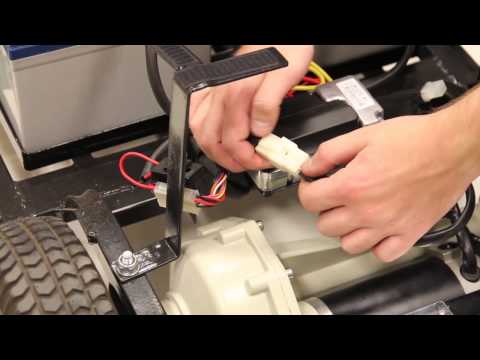
👨🔧Go Go Mobility Scooter Repair Guide Part 1 The Tear Down

Показать описание
Are you stuck with a Go Go Mobility Scooter that is broken down? If so, this video will show you how to completely tear-down a Go Go Scooter and then you can watch the rest of the videos in this series to replace parts. In this video, you'll learn how to remove each replaceable part, and then in the future videos, you'll learn how to troubleshoot each part as we rebuild the scooter, one part at a time. This mobility scooter troubleshooting guide is great for anyone that owns a Pride Go Go Scooter because most of them are built in a very similar way. After watching this video, you will have a strong foundation of knowledge regarding how to take apart a GoGo Mobility Scooter.
In this video, we're using a Go Go Ultra X 3-Wheel which is model SC40X. This model was recently replaced by the new Ultra X which is model S39. They are both very similar and if you watch this video, you can easily work on the new model as well. We will make more videos like this one, covering the breakdown of full-size, mid-size, and heavy-duty mobility scooters.
You should not attempt to work on your mobility scooter if you are not a technician. You will void your warranty if you do not use OEM parts and a technician to do repairs in most cases. Please only use this video for educational purposes, we do not condone working on your own mobility scooter. This video is for technicians to use.
We offer this product and all other powered mobility products with free shipping and we don't charge sales tax (restrictions apply). (888) 263-5601
To learn more about the 2021 Go Go Ultra X Scooter, please visit our website with the link below:
To view our complete selection of Go Go scooters, visit our website with the link below:
You may also request a FREE CATALOG via USPS by filling out the form on our website which is linked below:
If you're on the market for a mobility product, please consider our company (888) 263-5601. We have been in business since 2014 and we the best customer service in the industry. Feel free to check out our reviews and customer testimonials which we proudly display on our website and they can also be seen across various platforms like Google and Facebook.
Thank you for watching this video, don't forget to subscribe or to leave a comment if you have any questions about our products. You can also call us toll-free to speak with a sales expert any time at
Video Chapters:
Introduction - (0:00)
Removing the seat- (1:46)
Removing the battery pack - (1:57)
How to adjust and lock the tiller - (2:29)
How to disassemble the front/rear part of the scooter- (4:22)
Battery connecter - (4:39)
How to remove the seat post - (6:22)
How to remove the screws on the bottom part of the frame - (7:03)
Exposing the wire harness/power connecters - (8:38)
How to detach the main power connectors - (9:12)
How to detach the front fender shroud - (9:42)
How to detach the steering lock - (12:07)
How to remove the front wheel - (12:38)
Detaching the rest of the wire harnesses of the power connector - (13:45)
How to remove the screws of the main controller - (14:32)
Exposing the components of the main controller - (15:40)
Removing the main battery connector - (15:54)
How to remove the wire harnesses/connectors of the main controller - (17:18)
How to re-attach the wire harnesses/connectors of the main controller - (18:47)
How to disassemble the steering assembly - (19:31)
Exposing/detaching the components/harnesses of the dash - (20:53)
How to detach the throttle module- (21:39)
Disassembling the components in the dash - (23:05)
How to remove the frame/shroud of the motor assembly - (28:09)
How to remove the tires of the motor assembly - (29:21)
How to remove the rear power connector - (30:01)
How to detach the motor from the frame - (31:51)
Disassembled parts of the scooter - (33:29)
Ending - (33:56)
 0:34:19
👨🔧Go Go Mobility Scooter Repair Guide Part 1 The Tear Down
 0:09:17
Pride GOGO Traveller Mobility Scooter Don’t move but beeping and the battery indicator flashing 🔊🔊...
 0:12:05
GoGo Elite Mobility Scooter - Problems to expect, and how to fix them
 0:02:33
Pride GOGO Elite Traveller Plus Mobility Scooter. Don’t move only beeps 🔊🔊🔊 I show the trick😉...
 0:03:03
Pride GOGO Elite Traveller Plus Mobility Scooter disassembly and assembly
 0:14:02
Will it Work?? Pride Mobility Go-Go Elite Traveller Service, Repair and clean up.
 0:15:52
What the Hal! Two Pride Mobility Go Go Scooters in For Repair and Diagnostics
 0:16:59
Pride Mobility i-Go Scooter Repair Hacks & Tips
 0:06:15
👨🔧Go Go Ignition Repair/Replacement Tutorial Video
 0:05:08
⚡ Pride Mobility Scooter Not Working? Analyzing Beep Codes and Troubleshooting
 0:39:06
How to repair a Pride Mobility Go Go Transaxle Motor and Brake – the Inner workings explained
 0:00:55
Scooter Repair Replacing Motor - BIOS Living
 0:02:50
Mobility Scooter How To: Pride Go Go Elite Traveller | Next Day Access
 0:11:11
Pride GOGO Elite Traveller Plus Mobility Scooter Battery change
 0:16:15
Let's Take a DEEP DIVE Into MOBILITY SCOOTERS - Best Practices, Charging, Faults & Battery ...
 0:11:17
BROKEN SCOOTER – The Pride Mobility Go Go Sport John Deere Special Edition Mobility Scooter
 0:06:36
TOTAL LOSS OF POWER - Mobility Scooter Fault Finding - Always the SIMPLE stuff!
 0:01:50
Pride Mobility Go Chair - How to Fix Connector Block Issues
 0:07:33
How to Replace the Go-Go Elite Traveller Battery Pack
 0:14:28
👨🔧How to Fix a Mobility Scooter
 0:04:46
How To Fix Your Scooter That Won't Turn On Or Charge
 0:05:17
👨🏻🔧DIY: Replacing the front and rear wheels on a Pride Mobility Victory Sport scooter
 0:01:15
Mobility Scooter Repair and Maintenance, Corby
 0:09:28
Mobility scooter fault finding
Комментарии