filmov
tv
Swann NVR NVW-490 Security System Hardware Quick Start – How to Connect Parts, Cables

Показать описание
Product Pages:
Script:
Let’s walk through the Hardware Quick Start Guide.
To start using your recorder, you’ll need:
• A high definition TV capable of displaying 720p or 1080pp video
• A router with a broadband internet connection
• An Android or iOS mobile device to download the “Always Safe App”.
This video will help you get your new security system up and running as soon as possible.
To ensure there was no damage in shipping, we recommend you connect everything and verify functionality before performing a permanent installation.
Begin by connecting both of the long antennas to the rear of the recorder, by turning the antennas base in a clockwise motion.
Now, connect the shorter antennas to the rear of the cameras.
Leave the antennas in a vertical position for best reception.
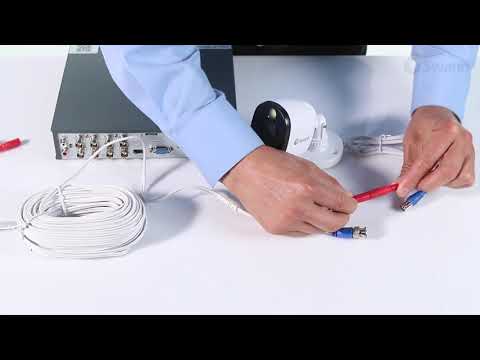
Next, connect an extension cable’s output to the cameras power input.
Then connect a power adapter to the extension cable’s input.
Now, plug the camera into an outlet.
Then, repeat this step for all the cameras
Next, connect your NVR to the internet by connecting one end of an Ethernet cable to the NVR and the other end to an available port on your router. Do not proceed further until the Ethernet is connected.
Next, connect the mouse by plugging it into the bottom USB port on the back of the NVR.
*Bluetooth & wireless mice & trackpad devices are not supported.
To connect the NVR to an HDTV, plug one end of an HDMI cable into the HDMI port on the back of the NVR, and the other end of the cable into an HDMI port on your display.
Then, navigate to the appropriate HDMI input.
Now, connect the power adapter to the NVR’s power port.
Then, connect it to an outlet.
You should now see the setup wizard on your display. Watch the next segment, “Wizard Quick Start Guide” to configure your NVR.
Script:
Let’s walk through the Hardware Quick Start Guide.
To start using your recorder, you’ll need:
• A high definition TV capable of displaying 720p or 1080pp video
• A router with a broadband internet connection
• An Android or iOS mobile device to download the “Always Safe App”.
This video will help you get your new security system up and running as soon as possible.
To ensure there was no damage in shipping, we recommend you connect everything and verify functionality before performing a permanent installation.
Begin by connecting both of the long antennas to the rear of the recorder, by turning the antennas base in a clockwise motion.
Now, connect the shorter antennas to the rear of the cameras.
Leave the antennas in a vertical position for best reception.
Next, connect an extension cable’s output to the cameras power input.
Then connect a power adapter to the extension cable’s input.
Now, plug the camera into an outlet.
Then, repeat this step for all the cameras
Next, connect your NVR to the internet by connecting one end of an Ethernet cable to the NVR and the other end to an available port on your router. Do not proceed further until the Ethernet is connected.
Next, connect the mouse by plugging it into the bottom USB port on the back of the NVR.
*Bluetooth & wireless mice & trackpad devices are not supported.
To connect the NVR to an HDTV, plug one end of an HDMI cable into the HDMI port on the back of the NVR, and the other end of the cable into an HDMI port on your display.
Then, navigate to the appropriate HDMI input.
Now, connect the power adapter to the NVR’s power port.
Then, connect it to an outlet.
You should now see the setup wizard on your display. Watch the next segment, “Wizard Quick Start Guide” to configure your NVR.
 0:05:42
 0:06:21
 0:01:43
 0:03:15
 0:01:17
 0:14:06
 0:02:35
 0:01:58
 0:02:26
 0:02:31
 0:02:15
 0:02:53
 0:01:10
 0:00:30
 0:08:22
 0:01:49
 0:01:58
 0:01:36
 0:01:27
 0:02:04
 0:03:34
 0:01:30
 0:00:31
 0:02:48