filmov
tv
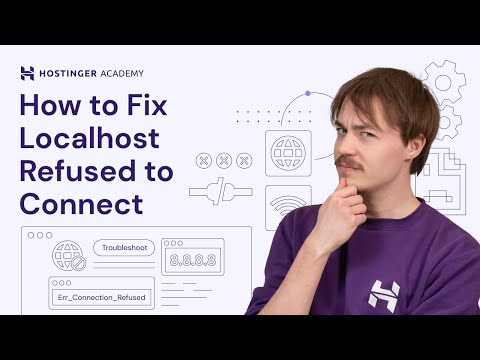
How to Fix Localhost Refused to Connect

Показать описание
💥Use the discount code HA10 to get 10% OFF!
“Localhost refused to connect” is one of the network connection errors that might occur when you can't access your localhost. This error has several causes – from a firewall-blocked server to wrongly-configured browser settings. In this video, you’ll learn four ways to solve the “localhost refused to connect” error.
____________________________________________
📚 Get Our eBooks!
____________________________________________
📌 Handy Links
____________________________________________
⭐ Follow Us ⭐
____________________________________________
🕒 Timestamps
00:00 - Intro
00:34 - Temporarily Disable Your Firewall
01:32 - Flush Your DNS
01:59 - Connect With the Specified Port
03:40 - Go Through Browser Settings
04:18 - Outro
____________________________________________
📌 How to Fix Localhost Refused to Connect?
In this video, we’ll go through four methods to solve the localhost refused to connect error.
👉 Temporarily Disable Your Firewall
While it’s an important security system, sometimes a firewall may run inaccurately block safe web pages or incoming connections.
It’s best to temporarily disable the firewall when developing a website in your localhost, so it won’t flag the project as malicious and block it. Make sure to immediately re-enable it once the website goes live.
👉 Flush Your DNS
DNS cache that contains too many records might fail to function. Flush the DNS to erase the records and solve the localhost refused to connect error.
👉 Connect With the Specified Port
Port 80 is the default port number for the Apache web server, but sometimes it is used by another application on your computer. This makes you unable to run the server on the same port simultaneously.
Check whether port 80 is free using XAMPP, then connect with the correct port number using the listen command.
👉 Go Through the Browser Settings
Every web browser has a different setup and characteristics. Some browsers will automatically redirect you to a site’s HTTPS version, even when you enter an HTTP web address. But if that site has an invalid SSL certificate or doesn’t have any, “localhost refused to connect” will appear on the screen.
If you use Chrome, you can delete localhost’s domain security policies. This will enable connections to sites without an SSL certificate, like the one you’re currently developing.
There you go! Now you know how to fix the “localhost refused to connect” error.
____________________________________________
▶ If you have questions, don’t hesitate and join our Facebook group for more help:
____________________________________________
Thank you for watching! Let us know in the comments below if you have any questions. Good luck on your online journey. 🚀
#localhostrefusedtoconnect #HostingerAcademy
 0:04:57
How to Fix Localhost Refused to Connect
 0:01:22
How to Fix Localhost Refused to Connect VSCode Error for Html - Chrome Visual Studio Code
 0:02:40
Quickly Fix 'Localhost Refused To Connect' in Chrome
 0:01:16
How to FIX Error Localhost Refused to Connect from Visual Studio Code (2023)
 0:06:44
✅(6)2024 FIX - Localhost Refused To Connect in Google Chrome Windows 10/11/8/7
 0:03:24
Localhost refused to Connect || How to Fix This Site Can’t Be Reached in chrome
 0:06:06
How to fix the error 'localhost refused to connect'
 0:03:23
localhost refused to connect | VS code error for HTML
 0:01:40
How to FIX Error Localhost Refused to Connect from Visual Studio Code
 0:00:35
How to Activate Localhost (127.0.0.1) in your PC
 0:05:56
How to Fix Localhost Refused to Connect Error | Hostinger India
 0:02:36
Fix XAMPP Localhost Refused to Connect Error | XAMPP Error [SOLVED]
 0:03:37
How to fix localhost and phpmyadmin not opened with xampp
 0:00:25
localhost refused to connect error fixed! HTML CSS not run in VS code solve just in 2 seconds.
 0:01:59
(2024 Fix) - Localhost Refused To Connect | This Site Cannot be Reached on Windows
 0:02:10
Localhost refused to Connect | This Site Can't be reached | Wamp Server
 0:00:02
Localhost refused to connect issue 🤬
 0:01:05
VS Flutter Localhost:8080 Error Problems
 0:03:00
Fix localhost refused to connect | This site can’t be reached - Solved
 0:06:13
How to Fix ERR_CONNECTION_REFUSED
 0:01:20
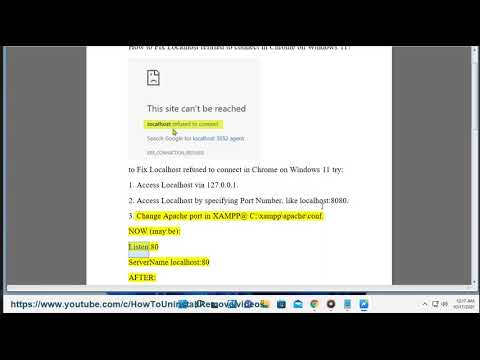
Fix Localhost refused to connect in Chrome on Windows 11
 0:04:35
fix This site can't be reached 127.0.0.1 refused to connect oracle database 11g 127.0.0.1:8080
 0:01:28
Ho to fix localhost refused to connect || this site can't be reached,
 0:02:11
2024 - Quickly Fix 'Localhost Refused To Connect' in Chrome
Комментарии