filmov
tv
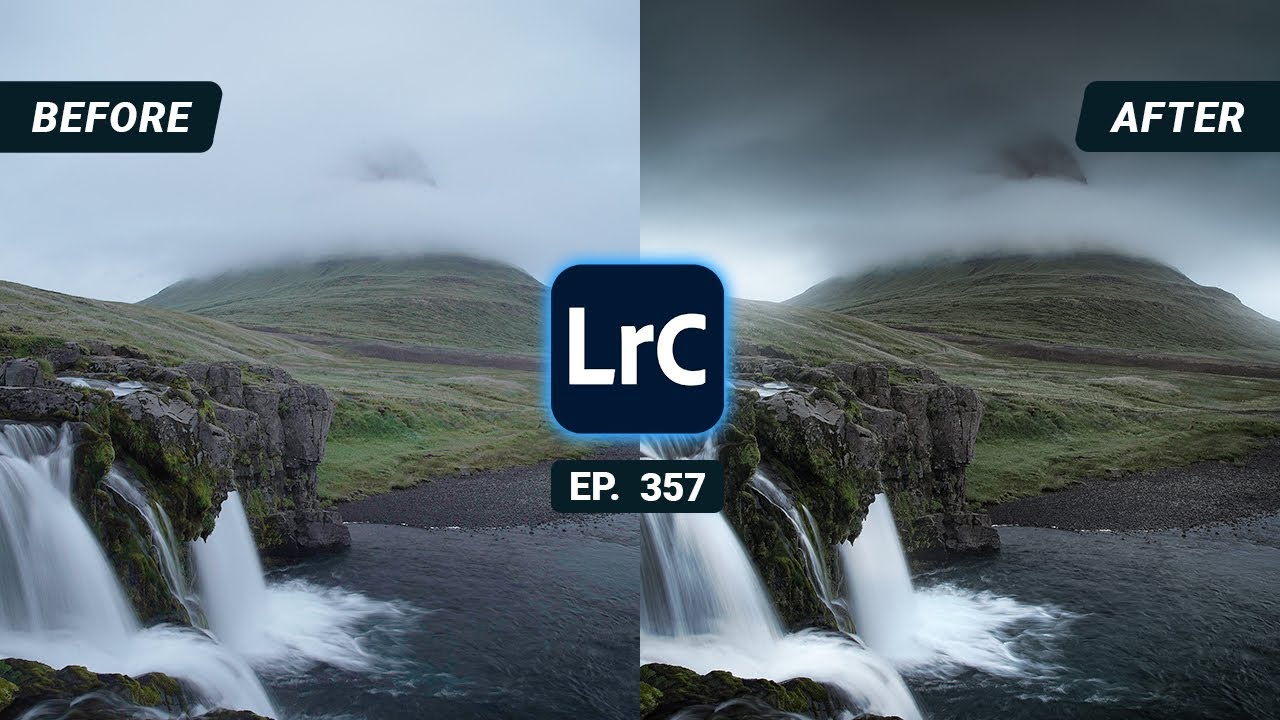
Dark, Moody Post Processing with Adobe Lightroom | QE #357
Показать описание
In this video I’m editing a dark, moody landscape photo using #Adobe #Lightroom for the post processing
▬▬▬▬▬▬▬▬▬▬▬▬▬▬▬▬▬
Thank you for watching my video!
▬▬▬▬▬▬▬▬▬▬▬▬▬▬▬▬▬
0:00 Intro
I wanted this photo to look much darker and grim, so my intention was to darken most of the clouds, while still having a nicely exposed foreground, plus I wanted to add some glowing lights just above the landscape in the distance. Sadly, due to some camera error this is only a jpeg, not a raw fie, so I was rather limited with the post processing which I have mostly done in Lightroom.
0:32 1. Basic Adjustments
First off, I slightly adjusted the white balance to reduce the color cast. Then, I increased the shadows and the whites carefully to get a well exposed base image. I further dropped the contrast and added a bit of dehaze to make the mountain peak more visible. Finally, I dropped the vibrance.
2:00 2. Local Adjustments
To make the upper clouds darker I used a simply graduated filter and dropped the exposure. Also, in using this filter, I dropped the texture to make the clouds look smoother, added clarity to get more structure and dropped the saturation.
For the glowing areas I used radial filters. Inside of them, I increased the blacks, decreased the dehaze and added some whites without overexposing.
Another radial filter was used over the waterfall itself. Here I added whites and texture.
6:00 3. Color Grading
Not much going on here. In the hue tab I increased the yellow hue to get richer green tones. In the saturation tab, I dropped the green saturation and boosted the blue one.
7:05 4. Photoshop
Finally, I used Photoshop to get rid of a few objects with the spot healing brush, enhance the glow just a little more and do some minor dodging in the foreground.
▬▬▬▬▬▬▬▬▬▬▬▬▬▬▬▬▬
Thank you for watching my video!
▬▬▬▬▬▬▬▬▬▬▬▬▬▬▬▬▬
0:00 Intro
I wanted this photo to look much darker and grim, so my intention was to darken most of the clouds, while still having a nicely exposed foreground, plus I wanted to add some glowing lights just above the landscape in the distance. Sadly, due to some camera error this is only a jpeg, not a raw fie, so I was rather limited with the post processing which I have mostly done in Lightroom.
0:32 1. Basic Adjustments
First off, I slightly adjusted the white balance to reduce the color cast. Then, I increased the shadows and the whites carefully to get a well exposed base image. I further dropped the contrast and added a bit of dehaze to make the mountain peak more visible. Finally, I dropped the vibrance.
2:00 2. Local Adjustments
To make the upper clouds darker I used a simply graduated filter and dropped the exposure. Also, in using this filter, I dropped the texture to make the clouds look smoother, added clarity to get more structure and dropped the saturation.
For the glowing areas I used radial filters. Inside of them, I increased the blacks, decreased the dehaze and added some whites without overexposing.
Another radial filter was used over the waterfall itself. Here I added whites and texture.
6:00 3. Color Grading
Not much going on here. In the hue tab I increased the yellow hue to get richer green tones. In the saturation tab, I dropped the green saturation and boosted the blue one.
7:05 4. Photoshop
Finally, I used Photoshop to get rid of a few objects with the spot healing brush, enhance the glow just a little more and do some minor dodging in the foreground.
 0:09:49
Dark, Moody Post Processing with Adobe Lightroom | QE #357
 0:06:53
Dark & Moody Post Processing in Lightroom & Photoshop | QE #137
 0:12:24
How to Edit DARK MOODY TONES in Lightroom (Full Tutorial)
 0:11:33
Post Processing Tutorial - Moody Atmosphere in Landscape Photos
 0:19:50
Creating a dark moody woodland feel in Adobe Lightroom
 0:17:04
How to Edit DARK MOODY TONES in Lightroom
 0:11:12
Editing Dark Moody Tones in Adobe Lightroom | QE #353
 0:07:40
How to edit dark and moody photographs
 0:10:15
How To Edit Dark Moody Photos In Lightroom
 0:06:01
How to Take Moody Photos
 0:12:22
Fotografia MOODY DARK in Lightroom! 😱 Lo Devi Vedere ASSOLUTAMENTE!
 0:13:34
Lightroom Photo Editing // Moody Night Street Photography
 0:13:47
Make Photos Look Dark & Moody In Lightroom + FREE Preset!
 0:05:17
Lightroom Tutorial: Creating Dark Moody Images
 0:00:12
DARK MOODY PRESET LIGHTROOM #lightroom #lightroomediting #lightroompresets
 0:05:04
Post processing in Lightroom mobile || Winter blue moody tones || full editing tutorial
 0:11:45
Dark And Moody Studio Portraits | Take and Make Great Photography with Gavin Hoey
 0:14:12
How to Edit MOODY BROWN Effect | Lightroom Classic Tutorial
 0:05:09
Creating a moody image in Adobe Lightroom | QE #125
 0:34:57
Darktable Episode 82: dark moody orange
 0:03:55
Black Tone Preset - Photoshop Tutorial | Black Moody Color Grading in Photoshop
 0:06:21
Tutorial Annoucement - Moody Photos
 0:06:57
Create a Moody Landscape Image with fake Sunrays | QE #147
 0:12:44
Moody Landscape Tones in Photoshop: A Step-by-Step Tutorial
Комментарии