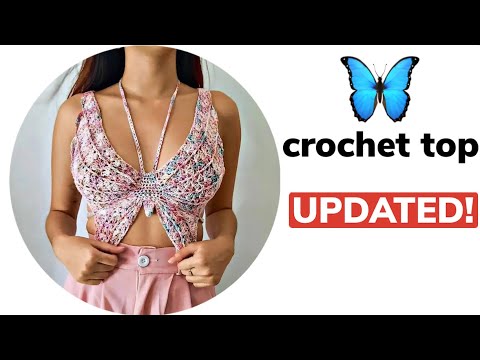
crochet butterfly lace top tutorial

preview_player
Показать описание
pinterest inspired butterfly crochet lace top :)

chapters:
0:00-0:54 intro
0:54-1:34 some info before we start
1:34-8:11 how to crochet the cup
8:11-9:36 a little trick i used (optional)
9:36-13:37 edging for the side of the cup
13:37-15:49 shell border for the top of the cup
15:49-17:03 finishing off the cup
17:03-20:50 attaching the 2 cups
20:50-23:56 lace pattern (row 1)
23:56-25:56 lace pattern (row 2)
25:56-28:25 lace pattern (row 3)
28:25-29:56 lace pattern (row 4)
29:56-30:54 lace pattern (row 1 repeat)
30:54-31:31 lace pattern summary
31:31-34:12 front tie/weaving it through
34:12-35:26 outro :)
Рекомендации по теме
Комментарии
Автор

For the big booby gals: I never though this top would work for me but I made the cups bigger and just kept lacing the tie in the middle up the front for more support (33:56). I also made the shoulder straps longer and crossed them in the back and looped them through the outer edges of the cups and it worked so well and feels so secure!!

jordanzabel
Автор

this is a great tutorial, thank you!!! for anyone else struggling with the cup shell borders facing the same way: crochet one side as normal, and then for the shell part of the other cup, you insert your hook from back to front . hope this helps!!

evamariereg
Автор

Suuuuper clear. It's difficult to find this level of clarity in other people's videos. Thank you for making it so easy for people learning.

JupiJupes
Автор

Attention big boobed ladies! I have a 38DDD chest, so I ended up starting with 11 chains, but I _used a magic circle_ to start. If you chain 11 as a start, the hole is too big and I questioned my nipples’ exposure.

With the magic circle first row instead of 11 chains, it allowed me to tighten the hole to a minimum. Then, continue as normal with the rest of her pattern. I frogged about a dozen bra cups as I went through the process of elimination for what works.

When you start the cup with 11 and a magic circle, I tightened after I finished row 2’s 11 double crochets. It might look like a half circle when you start building up your rows, but it will grow to look more like a full coverage version of her cup. When trying it on, it still has that tapered looking neckline, so fret not and trust the process.

Hope this helps! Remember that adapting patterns to your body’s proportions is okay and to not be too much of a stickler when starting new projects. (I say this because during this past week of frogging, I had to tell myself to stop being such a stickler and to experiment. 😂 That’s how I came to try the magic circle.)

thedarknessofnana
Автор

Hi, great tutorial you're extremely talented! It would help visual learners like myself if we could see the work after every row or so properly in order to compare with our own to check if done correctly, oftentimes I think I've done it right by just watching and listening to your guidance however when you show what it looks like it looks different to mine, took me three times to figure my mistake out before I realised what you were doing. I also think instead of skipping progress, to just make the video long and those who are finding it easier can just pause until they're ready for the next step or skip it!

siennacampbella
Автор

Your pattern is fantastic!!! I finished this in two days total and I loved the outcome!!! Very nice explanations and you made this so easy and fun. Thank you!

cherryblast
Автор

this is definitely not a beginner friendly tutorial to those frustrated in the comments! HOWEVER this tutorial was so helpful! made this top in blue for the Eras tour (1989) and it turned out good! can't wait to wear it this weekend! been crocheting for a long time now and this is not my first clothing item so for me this was really easy to follow even with my personal sizing adjustments.

katie-kbqd
Автор

took me about 5ish weeks to finish because i accidentally chose a much thinner yarn than you BUT it ended up coming out so pretty and light and lacy!! almost gave up but im glad i stuck with it. now i have a gorgeous lightweight summer top made by ME! thank you for this awesome tutorial <3333

thebrownyogi
Автор

hi nikita!! this is the 2nd top i’ve made with your tutorials and i love it Soso much!! came out gorgeous. thank you so much for your generousity in this being free and for your efforts in giving us written patterns ❤

cheri
Автор

took me a few tries to understand the pattern more but i’ve got it down and so far have finished the first cup! for those stuck, what helped me the most was reminding myself that the ch 2 spaces also counted as a stitch!! now onto the next cup🫡

dingdongdinguss
Автор

Thank you sm for this pattern!! I love your tutorials and I appreciate any artist who is willing to share and show their patterns, I can’t stand seeing all of the negative comments cause I’ve only been crocheting for 3 months and I was able to understand this tutorial perfectly! Keep up the amazing work!

Kxxliee
Автор

I struggled for three days, but i finally got it! The top turned out so cute, thank you <3

TP-uxii
Автор

at first i was a bit frustrated because i consider my self plus size so trying to figure out sizing was interesting but i do loveeee this tutorial. i get what everyone is saying about this tutorial being confusing or unclear but i just think that this isn’t beginner friendly although it is on the easier side. since ive made tops and have been crocheting for a while and have experience i felt a bit more motivated to figure it out. moral of my story is if yall really wanna make it, you’ll make it. also the written pattern SO CUTE and helpful❤️

nadineavila-butterfield
Автор

Next project idea: granny squares maxi skirt, in just one colour

nanaesio.nyarkoh
Автор

I just finished making this top and I absolutely loved it! I can’t believe how pretty the end result is, I will definitely be making more of these in different colors 🥰😆💖💖💖

Lavender_Rose_Crochet
Автор

it's not that hard to follow, but if you're a beginner i do not recommend it

ssoulstice-hw
Автор

This is the second shirt I ever crocheted and the first one to turn out great! Even though it might seem tricky, once you get the hang of it, even if the sizing is different than yours, I found your instructions pretty intuitive to follow. Thank you soooo much!!! I love it!

isaFederle
Автор

thank you so much for this, i saw this top on Pinterest and i tried to make it multiple times and i failed, this helped so much!

sakaya.
Автор

To make the second cup face the right way:
I switched which side the increase was on
Had to cut off my yarn at the end of my last row (since it wasn't on the increase side) and then just slip stitched back to the increase side where you then make the edges and the strap.
For the shell edging, I worked backward. So I cut my yarn after making the strap, put 2 sc into each row along the bottom, put 5dc in the starting loop then did the shells all the way up until I met back with my strap.

hel
Автор

omg i love this top sm! i crocheted it for my holiday along with the mesh sweater (which i turned into a beach dress) and it is my favourite one that i have made. you are my all time favourite crochet youtuber!!! I LOVE YOU ❤️

royalebethany
welcome to shbcf.ru