filmov
tv
Master Webmin Installation on Ubuntu 18.04 | Ultimate Step-by-Step Guide for Beginners

Показать описание
Unlock the Full Potential of Webmin Your Ultimate Step-by-Step Guide to Installation on Ubuntu 18.04!
Are you eager to enhance your server management skills? Look no further! In this comprehensive video tutorial, we'll guide you through the ins and outs of installing Webmin, a powerful web-based interface for system administration on Ubuntu 18.04. Designed specifically for beginners, this step-by-step guide will simplify complex processes, turning them into easily digestible steps that anyone can follow.
## What You Will Learn
- Setting Up Ubuntu Server for Webmin Ensure your server is ready to host Webmin.
- Step-by-Step Installation Procedures Follow along as we install Webmin from scratch.
- Configuring Apache, MySQL, and PHP Get your server running smoothly with these essential packages.
- Enabling SSL for Secure Connections Learn how to secure your Webmin interface to protect sensitive information.
- Troubleshooting Common Installation Issues Don't fret if things go wrong; we've got you covered with solutions!
# Why Choose Webmin?
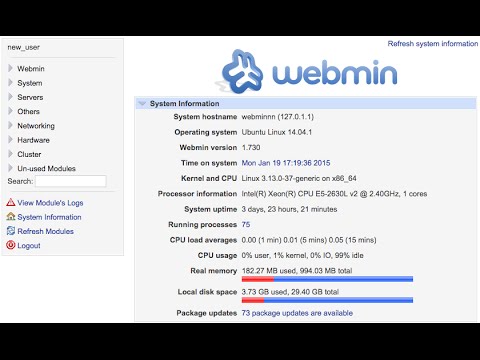
Webmin is an intuitive tool designed for effortless management of Unix-based systems via your web browser. With Webmin, you can configure various system settings with ease
- User Accounts Management Create and manage user accounts effortlessly.
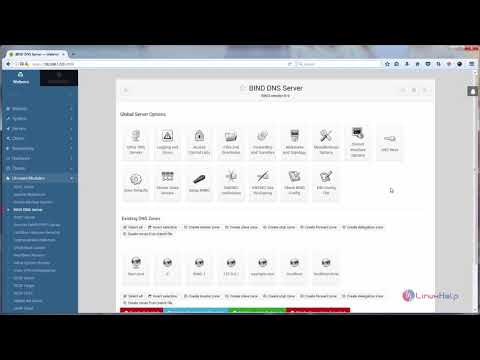
- DNS Settings Configuration Easily set up and modify your DNS records.
- Apache HTTP Server Administration Fine-tune your Apache server configurations.
- File Sharing Options Share files across your network with a few clicks.
- And Much More! Explore additional modules that enhance your system capabilities.
# Installing Ubuntu Server for Webmin A Simple Guide
1. Install Required Packages
Begin by running the following commands in your terminal. This ensures all necessary software is installed
```bash
sudo apt-get update
sudo apt-get install apache2
sudo apt-get install mysql-server
sudo mysql_secure_installation
sudo apt-get install php libapache2-mod-php
```
2. Add the Webmin Repository
Next, we will add the Webmin repository. Update your sources list
```bash
```
Add this line into the file
```bash
```
3. Download and Add Webmin's GPG Key
Ensure you can verify the packages installed
```bash
sudo apt update
```
4. Install Webmin
Finally, install Webmin by executing
```bash
sudo apt install webmin
```
After installation, log into Webmin using your server's IP address
```bash
https//your_server_ip10000
```
5. Enable SSL for Apache
For enhanced security, follow these steps to enable SSL
```bash
sudo service apache2 restart
```
# Additional Support
# Supporting This Channel
If you find this video helpful and would like to support the creation of more content like this, please consider making a donation through
- GCash 09174521009
# Conclusion
Don't let server management intimidate you; with Webmin, you can take control of your Unix systems easily. Make sure to subscribe to our channel for more in-depth tutorials. Like this video, share it with friends who are eager to learn, and engage with us in the comments below; your feedback drives our content!
Empower your server management skills today with this complete guide to Webmin!
Are you eager to enhance your server management skills? Look no further! In this comprehensive video tutorial, we'll guide you through the ins and outs of installing Webmin, a powerful web-based interface for system administration on Ubuntu 18.04. Designed specifically for beginners, this step-by-step guide will simplify complex processes, turning them into easily digestible steps that anyone can follow.
## What You Will Learn
- Setting Up Ubuntu Server for Webmin Ensure your server is ready to host Webmin.
- Step-by-Step Installation Procedures Follow along as we install Webmin from scratch.
- Configuring Apache, MySQL, and PHP Get your server running smoothly with these essential packages.
- Enabling SSL for Secure Connections Learn how to secure your Webmin interface to protect sensitive information.
- Troubleshooting Common Installation Issues Don't fret if things go wrong; we've got you covered with solutions!
# Why Choose Webmin?
Webmin is an intuitive tool designed for effortless management of Unix-based systems via your web browser. With Webmin, you can configure various system settings with ease
- User Accounts Management Create and manage user accounts effortlessly.
- DNS Settings Configuration Easily set up and modify your DNS records.
- Apache HTTP Server Administration Fine-tune your Apache server configurations.
- File Sharing Options Share files across your network with a few clicks.
- And Much More! Explore additional modules that enhance your system capabilities.
# Installing Ubuntu Server for Webmin A Simple Guide
1. Install Required Packages
Begin by running the following commands in your terminal. This ensures all necessary software is installed
```bash
sudo apt-get update
sudo apt-get install apache2
sudo apt-get install mysql-server
sudo mysql_secure_installation
sudo apt-get install php libapache2-mod-php
```
2. Add the Webmin Repository
Next, we will add the Webmin repository. Update your sources list
```bash
```
Add this line into the file
```bash
```
3. Download and Add Webmin's GPG Key
Ensure you can verify the packages installed
```bash
sudo apt update
```
4. Install Webmin
Finally, install Webmin by executing
```bash
sudo apt install webmin
```
After installation, log into Webmin using your server's IP address
```bash
https//your_server_ip10000
```
5. Enable SSL for Apache
For enhanced security, follow these steps to enable SSL
```bash
sudo service apache2 restart
```
# Additional Support
# Supporting This Channel
If you find this video helpful and would like to support the creation of more content like this, please consider making a donation through
- GCash 09174521009
# Conclusion
Don't let server management intimidate you; with Webmin, you can take control of your Unix systems easily. Make sure to subscribe to our channel for more in-depth tutorials. Like this video, share it with friends who are eager to learn, and engage with us in the comments below; your feedback drives our content!
Empower your server management skills today with this complete guide to Webmin!
 0:14:03
Master Webmin Installation on Ubuntu 18.04 | Ultimate Step-by-Step Guide for Beginners
 0:13:38
Easy Webmin Setup on Ubuntu 22.04: Step-by-Step Guide!
 0:03:15
Installing Webmin On UBUNTU Server 24.04 LTS
 0:09:20
Install Webmin and Virtualmin on Ubuntu 18.04
 0:08:46
WEBMIN Installation auf Ubuntu 16.04 Server
 0:08:55
Ubuntu Webmin Configuration
 0:04:29
How to Work on Webmin with Ubuntu 18.04 2020 Rakiblinux
 0:06:08
How to Install Webmin on Ubuntu 18.04
 0:03:55
install Webmin in Ubuntu 18.04
 0:10:58
How to set up and install webmin on ubuntu/linux.
 0:03:34
Ubuntu Webmin installieren
 0:06:05
How to install and configure Bind DNS on Webmin
 0:02:53
How To install Cockpit , Ajenti, And Webmin On Ubuntu 20.04 LTS
 0:11:11
Complete Mail Server Setup and Testing with Webmin on Ubuntu | Step-by-Step Guide
 1:13:25
Install Ubuntu Server them DNS Server Configure and Webmin install for GUI Manage for DNS Server.
 0:08:05
How To Install Webmin with SSL on Ubuntu 16.04 LTS and Ubuntu 16.10 [2016-2017]
 0:06:42
Installation de Webmin sur Ubuntu
 0:10:37
installare e configurare webmin su ubuntu server
 0:06:40
How to install webmin on Ubuntu
 0:13:55
How to setup DNS at home with Bind and Webmin on Ubuntu 20.04
 0:05:37
How to Install Webmin in Ubuntu
 0:24:25
Webmin #1: Administrowanie serwerem Linux za pomocą przeglądarki internetowej
 0:06:29
Webmin Setting 3 DNS Server
 0:03:33
How To Install Webmin On Ubuntu 18.04
Комментарии