filmov
tv
Multi-Function-Push button using Arduino

Показать описание
Hi everyone,
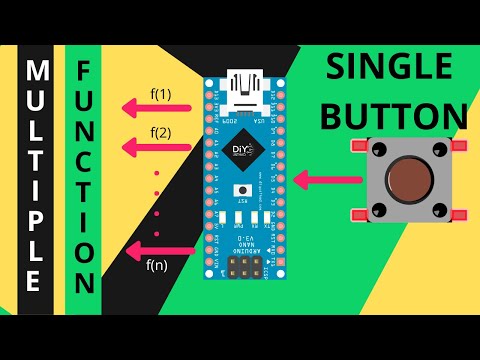
In this video, I'm going to show how to make a multi-function push button with Arduino and use it in your project professionally.
Using this method will save a lot of pins in Arduino and make your project more easy to use.
So as I said there four example showing in this video, Each one has a good point in some case and I hope to understand what I have done.
----------------------------------------------------------------------------------------------
First Example: Turn one LED by two Push Button one to Turn it ON and the other to Turn it OFF. Start at 00:07
Here's the Arduino code and the diagram :
----------------------------------------------------------------------------------------------
Second Example: Turn the LED by one Push Button to Turn it ON and OFF.
Start at 00:29
Here's the Arduino code and the diagram :
----------------------------------------------------------------------------------------------
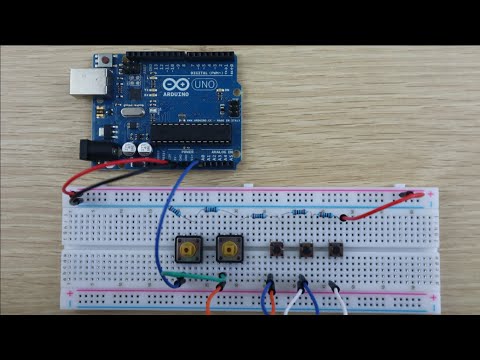
Third Example: Counter with Seven Segment four Digits uses two Push Button one to increase the number and the other to decrease it, To reset the counter just click the tow Button at the same time. Start at 00:53
Here the Arduino code and the diagram :
----------------------------------------------------------------------------------------------
Fourth Example: Control Three LEDs using just one push button by multi-function method. One click to Turn the LED1 ON and OFF, Double click to Turn the LED2 ON and OFF, long click to Turn the LED3 ON and OFF, Push it one second to turn ON and again to turn it OFF. The second Button to adjust the LED brightness. Last one to turn all the LEDs OFF and reset the processes.
Start at 01:54
Here the Arduino code and the diagram :
----------------------------------------------------------------------------------------------
Here's how I made the LCD driver using just 1 wire the another two you still can use it because of SPI protocol.
----------------------------------------------------------------------------------------------
Music: Fredji - Happy Life (Vlog No Copyright Music)
----------------------------------------------------------------------------------------------
If you like this video don't forget to Like and Share.
Don't be a stranger, hit the Subscribe button, It will be awesome having you here.
Comment if you have any questions.
Thanks for watching.
In this video, I'm going to show how to make a multi-function push button with Arduino and use it in your project professionally.
Using this method will save a lot of pins in Arduino and make your project more easy to use.
So as I said there four example showing in this video, Each one has a good point in some case and I hope to understand what I have done.
----------------------------------------------------------------------------------------------
First Example: Turn one LED by two Push Button one to Turn it ON and the other to Turn it OFF. Start at 00:07
Here's the Arduino code and the diagram :
----------------------------------------------------------------------------------------------
Second Example: Turn the LED by one Push Button to Turn it ON and OFF.
Start at 00:29
Here's the Arduino code and the diagram :
----------------------------------------------------------------------------------------------
Third Example: Counter with Seven Segment four Digits uses two Push Button one to increase the number and the other to decrease it, To reset the counter just click the tow Button at the same time. Start at 00:53
Here the Arduino code and the diagram :
----------------------------------------------------------------------------------------------
Fourth Example: Control Three LEDs using just one push button by multi-function method. One click to Turn the LED1 ON and OFF, Double click to Turn the LED2 ON and OFF, long click to Turn the LED3 ON and OFF, Push it one second to turn ON and again to turn it OFF. The second Button to adjust the LED brightness. Last one to turn all the LEDs OFF and reset the processes.
Start at 01:54
Here the Arduino code and the diagram :
----------------------------------------------------------------------------------------------
Here's how I made the LCD driver using just 1 wire the another two you still can use it because of SPI protocol.
----------------------------------------------------------------------------------------------
Music: Fredji - Happy Life (Vlog No Copyright Music)
----------------------------------------------------------------------------------------------
If you like this video don't forget to Like and Share.
Don't be a stranger, hit the Subscribe button, It will be awesome having you here.
Comment if you have any questions.
Thanks for watching.
 0:04:13
Multi-Function-Push button using Arduino
 0:00:21
Control several led by one push button
 0:00:17
Arduino UNO - two different functions with one button
 0:00:12
Read Multiple Analog Inputs on One Analog Input Pin in Arduino Using ADC
 0:09:45
How to Program a Push Button with an Arduino
 0:00:45
Single Switch Multiple Function - Arduino -Demo
 0:10:30
How To Connect Multiple Pushbuttons To One Arduino Input
 0:00:27
How to interface multiple push buttons to one Arduino Interrupt pin
 0:10:33
How to connect Arduino in the car, push button multi-function / como ligar arduino no carro.
 0:10:23
How to do multiple tasks in Arduino | Beginners | millis() function
 0:07:48
Single Switch Multiple Function - Arduino - Full Programming Video Part 1
 0:35:25
How to use up to 10 push button switch with 1 Arduino input pin ANPB-V1
 0:00:59
Arduino on off switch | Multiple LED control using multi pushbutton | Arduino multi led on off
 0:17:26
How connect multiple switches to one pin, Arduino?
 0:20:57
How to Use a Button with an Arduino (Lesson #5)
 0:03:55
Multiple output control button single click double click long press |arduino hindi
 0:00:22
IO22D08 / IO22C04 Arduino Pro Mini delay relay demo
 0:01:34
Arduino Push Button 3 functions Click, Double click, Long press
 0:02:44
Push Button On Off Switch Circuit - New Electronics Project (2021)
 0:03:37
The Simplest Way to Wire a Button to Arduino (with Internal Pull-Up) | Arduino Button Tutorial
 0:05:25
Push Button for multi function (Turn on 3 different led using one push button)
 0:08:51
How to control 5 LED with one button using arduino uno-3 styles!! LED project!!
 0:04:38
Push Button and LED control with the Arduino
 0:44:33
Control 10 output pins or relay using 10 push button switch with 1 Arduino input pin ANPB-V2
Комментарии