filmov
tv
Basic operation of a Chevalier FSG-3A1224 surface grinder.

Показать описание
#1 prep the magnetic chuck and place your part on the table.
#2 release the Emergency stop button.
#3 ensure the speed control handle is pointing to the hand, then turn on the switch for the magnetic chuck. Be sure the magnetic power is turned up.
#4 press the cycle start button to start the hydraulic pump. Then press the grinder wheel and coolant buttons. And press the cycle start button to turn them on.
#5 adjust the stop position knobs just beyond the location of your part on the table by rotating the knobs counter clockwise to loosen, then sliding them to the desired postion, then snug them by rotating the knobs clockwise.
#6 dress thee wheel if desired, by rotating the numbered dial 2 marks clockwise, then turn the table power feed handle to point to the diamond, and pull downward on the dresser lever until the dresser is in a fully forward position, then release the lever and wait until it fully returns. Repeat until wheel is fully dressed.
#7 use the manual handles to position the grinder wheel over the workpiece, then slowly move the table movement lever to move the table back and forth and slowly lower the head until the grinder wheel gently touches the workpiece.
#8 zero the digital readout if equipped, then loosed the locking knob on the downfeed handle, and rotate the numbered ring until it reaches zero, then each small line represents a .0005" Rotate the ring clockwise the amount you want to grind off. Example: .002" would be four lines to the left of zero. When set, rotate the locking knob clockwise until snug to lock the number dial in place.
#9 set the little dial below the downfeed to .0001" or .0002" this is the incremental downfeed amount. Then set the number on the operator panel to the amount per pass to multiply the little downfeed by. Example, if you set it to 02 and have the little dial set at .0001" it will downfeed two increments of .0001" or .0002" total per pass. If the little dial is set to .0002" the it would move two increments of .0002" per pass, or .0004" total each pass. Note, you must adjust downfeed amount before starting to grind, or it will disregard any adjustments during operation.
#10 select auto on the z panel and surface auto or plunge auto on the downfeed panel. Make sure the table movement lever is pointing to the hand. Then, press the cycle start button. Next slowly open the table valve lever until the table is moving the desired speed, and adjust the crossfeed increment dial as desired. When the dial reaches zero the table will spark out and then park to the right or left according to the dial setting, and the head will raise, according to the y retract amount.
#11 if more is needed to be ground off, move the table speed control lever to point at the hand symbol, then press the cycle start button, then manually lower the head and repeat steps seven through ten. If finished, move the table speed control lever to the hand symbol and turn the magetic chuck switch all the way to the right and wait for the light to stop flashing to demagnetize and remove workpiece from the magnetic chuck.
#12 to shut down machine, clean and dry the magnetic chuck to prevent rust, and wait for the grinder wheel to dry for several minutes, then, turn the z axis switch to manual and the y axis switch to jog, then press the spindle and coolant buttons to turn them off, and press the emergency stop button.
 0:05:14
Basic operation of a Chevalier FSG-3A1224 surface grinder.
 0:00:19
Knowing what code is used here can be called a master #CNC lathe #turn-milling #CNC programming
 0:00:18
Chevalier FCL 1840D conversational
 0:06:53
16' X 32' CHEVALIER 3-AXIS AUTOMATIC FEEDS SURFACE GRINDER WITH PENDANT MOUNTED CONTROL
 0:07:37
16' X 40' CHEVALIER PRECISION SURFACE GRINDER
 0:00:15
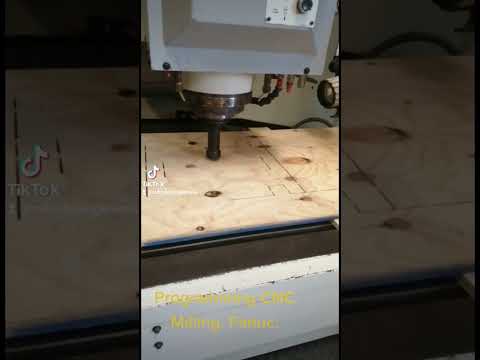
working Milling CHEVALIER Fanuc CNC. #ingenieria #manufacturing #design #milling #engineering
 0:00:50
Sold!! Chevalier FSG-1640AD (1000mm x 400mm) Surface Grinder
 0:01:43
【CHEVALIER】Column-type, Multi-function CNC Surface Grinder│SMART-20+24IV Series
 0:07:13
Surface Grinders Chevalier Manual
 0:00:43
Life Doodles | Operation on sausage with worms 😂 #lifedoodles #shorts #animation #cartoon
 0:00:14
5 BLUE LOCK SKILLS⚽️🟦#football #soccer #shorts
 0:09:58
16' X 40' CHEVALIER PRECISION SURFACE GRINDER
 0:05:06
8' X 18' CHEVALIER PRECISION SURFACE GRINDER
 0:12:34
Is investment procedure useful? - Dr Florent Chevalier, MLCTO 2022
 0:07:23
16' X 28' CHEVALIER PRECISION SURFACE GRINDER
 0:01:09
Chevalier QP1620 pressing operation
 0:00:17
Best Race V3 Ability in Blox Fruits! 😱💀 #bloxfruits
 0:01:55
【CHEVALIER】SMART-H/B12/16IV Series│Multi-function CNC Surface Grinder
 0:03:05
Chevalier Model CGP-816 CNC Cylindrical Grinder @ Mullin Machinery of NJ
 0:00:14
THE FLAG...💀🔥 #shorts #shortvideo #russia #ussr
 0:00:22
I rolled KARASU THE CROW in the NEW Blue Lock Rivals Update... #roblox #bluelock #bluelockrivals
 0:00:17
Goalkeepers Training + Him ☠️
 0:02:56
Chevalier FNL-220LSY Multi-Axis Turning-Milling Machine
 0:00:17
BLUE LOCK SKILL TUTORIAL!!⚽️Rin Itoshi#football #soccer #shorts
Комментарии