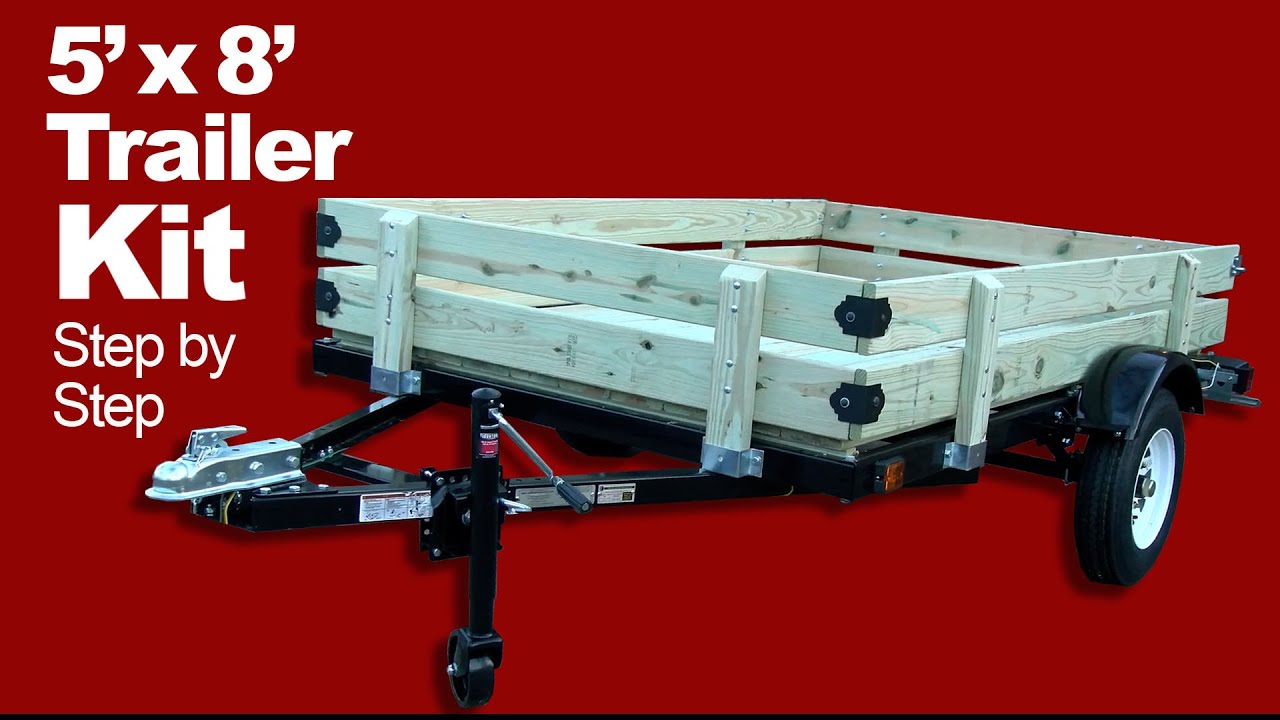
Building a Ironton 5' x 8' Utility Trailer Kit from Northern Tool.

preview_player
Показать описание
In this video we assemble the Ironton 5' x 8' Utility Trailer from Northern Tool.
The first half is the full assembly process. The second half follows with the installation of decking and sides at 11:51.
Below is a list of links to the trailer, materials and tools used in this video.
Trailer jack:
Tail gate latches:
Tie down rings:
Corner braces:
14ea. 1" x 6" x 8' decking:
2ea. 1" x 6" x 10' decking:
5ea. 2" x 4" x 8" pressure teated:
2.5" deck screws:
32 1/4" carnage bults:
32 1/4" nuts:
32 1/4" flat washers:

This video and description contain affiliate links, which means if you click on one of the product links, I’ll receive a small commission. This helps support the channel and allows me to continue to make videos like this with absolutely no additional cost to you! Thank you for your support!
Рекомендации по теме
Комментарии
Автор

I have watched this video of yours at least a half dozen times. Great video!
Bought one and used your video as a reference. Cost me $549 with a $100 gift card as a reward. Used the gift card and got the loading ramp on sale for $79.99 and still had $$ leftover. 5x8 really is a great size!

gamerdan
Автор

I bought this. I don't even know if it came with all those parts. I'll have to check.

TychoKingdom
Автор

Nice video thanks for posting, that trailer looks very similar to the Harbour Freight Super Duty 5x8 that I've seen on YT, however, judging from the look of those fenders it would appear to have somewhat better specs. A friendly word of advice, those blue snap together electrical connectors ( known as Scotchloks here in the UK) are most definitely NOT waterproof, after a while they will begin to fail when exposed to rain, road dirt, winter roadsalt etc and are not suitable for an outdoor automotive application. I learned this the hard way. Regards from Wales UK.

jontisdall
Автор

Great video!!...trailer looks awesome...hope it has served you will these past 2yrs!...1 quick question....did you bolt the 2x4 cross pieces to the frame cross pieces...or did you leave them floating?

PinksAdventures
Автор

I would have put the carriage bolts in with the heads in the trailer and the nut on the outside. Not as pretty to look at but it’ll give you a flush surface on the inside to slide stuff up against. So you’re less likely to damage it.
Also having the sides tighter together with less of a gap. This way if you need to haul sand or a loose material, you won’t lose as much.
Nice build overall.

lordrichard
Автор

Great video! Best close up look at this trailer. Thinking of doing a teardrop trailer on it. How does it do at higher highway speeds? Thanks!

lisawiese
Автор

You did good work for a guy who doesn't even own a pickup truck, LOL (I don't either)

GunNut
Автор

that size is perfect for me, is that frame safe to use for teardrop camping trailer?

arnelmariano
Автор

Is it safe to pull these on the freeway?

noahriding
Автор

Where did you buy those corner brackets? I like the 2 holes per bracket!

timothyjohns
Автор

Scratching that new powder coat by assembling the trailer on the driveway made me cringe...But hey, everyone to each their own.

KevinNguyen-znvv
Автор

Great job, my only comment would be. The wiring should be soldered and covered with weather/water tight heat shrink tubing. The provided connectors are not weather tight, and are really meant for temporary internal use. In no way your fault, they should have put better connections in the kit, or explained in the directions...

hobowh
Автор

I enjoyed this video and your build. For my use, I would have made the following modifications. 1) reverse the carriage bolts so the rounded heads are on the inside. Then cap the outside of the bolts with Acorn round head nuts. That eliminates the studs of the bolts sticking out inside the cargo area and snagging the cargo or your shins and hands. Sharp edges are a no no. 2) I would have run a white ground wire to all the lights. I have experienced too many issues with bad grounds on trailers. For me, well worth the extra cost and effort. 3) grommets on all wire penetrations through the metal holes in the frame. Chaffing wire insulation is definitely a thing. Been there, done that, don’t want to go there again.

I like your use of deck boards instead of plywood. It just looks better and I just like it more than plywood.

americanrambler
Автор

Nice. Very nice. Incredible job! This video definitely boosted their trailer sales. Northern Tool should mail you a check for the cost of your trailer.

seymourscagnetti
Автор

Thank you for the great advice on building the trailer. I would put tie down hooks on the top rails to and then both upper and lower in front and space the the tie down hooks. Love the way it turned out.😀🤘

johnscharnhorst
Автор

Thanks for this great video! This is really well done. I'm on the lookout for a small, cheap trailer!

I especially like how you built the deck. 2x boards are a huge improvement over plywood.

kevinohara
Автор

The tailgate latches you installed have a tendency to wiggle loose when you're going down the road, leading to a lost tailgate. I'd recommend replacing them with something that securely locks, or adding a swivel catch that will secure the handle. When it's time to rewire the lights, get some good heavy duty jacketed wire and use heat shrink connectors. The wire that comes with those cheap light kits is usually almost as bad as the scotchlocks that they provide. Make your splices in protected locations if you can and protect any of the exposed wire with split loom or tape to keep the sun off of it. Make sure you have a good ground coming from the tow vehicle to the trailer. If the jack breaks, replace it with one with a foot instead of a wheel.

Mike_Neukam
Автор

This is a good and informative video. Thank you for posting. I would like to mention about the trailer axels. After putting the hubs on the spindles, install the washer and then the castle nut (as you called it a slot not). You then tighten the castle nut all the way down to preload the bearings. Then back the castle nut off to where the tire will freely spin. Install the carter pin, cap and call it done. With the wire connectors, I couldn't hear weather you said the are or are not weather proof. They are not. I would have use butt connectors with a 3:1 heat shrink which has adhesive on the inside. This will help make it more water proof/resistance. All in all, it works for you and you did a good job showcasing the trailer build.

countrymagic
Автор

Replace the van with a Chrysler product van. It'll be dead in no time. Haha
And before people start to criticize my statement, I've owned several Chrysler vehicles.
I have a ram 1500 currently, but I also have 2023 Outback touring XT. I was thinking about getting a 4-ft trailer for it for certain purposes. I've looked at the harbor freight one, but I thought it was just painted. I wouldn't mind getting a powder coated utility trailer instead of painted.

mrdpwr
Автор

This was great!! I haven't been able to find a trailer I like that is affordable, but this I can do. You are a good instructor. Thanks!

marshacowan